 |
|||
|
|
|||
|
|
|||
| ||||||||||
|
|
 (2) Replace the thermostat if defective.
(1) Coat new gasket with sealing compound,
c. Installation.
place on pump body. Place pump in position and attach
to cylinder block. Alternator adjusting brace is secured
(1) Coat the gasket surface of the housing
by upper left capscrew. At this time do not tighten
with sealer.
alternator adjusting brace capscrew; but, torque three
(2) Install the thermostat in its proper
remaining capscrews to 18 to 21 ft-lbs. Tighten brace
position.
capscrew after making belt adjustment (para 4-31).
(3) Place the gasket on the housing and
(2) Install coolant bypass tube between pump
install the outlet pipe securely with capscrews.
and outlet manifold. Make certain connection nuts are
(4) Close drain cock and fill cooling system
tight to prevent leakage.
as specified in table 2-1.
(3) Install pump inlet hose on pump.
(4) Place drive pulley in position over pulley
4-30. Water Pump
hub. Position fan belt over pulley. Install cooling fan by
a. Removal and Disassembly.
positioning pulley and fan on hub.
Then install
(1) Raise the driver's seat and remove the
capscrews and lockwashers and tighten to 11 to 13 ft-
side panels.
lbs.
(2) Drain the radiator.
(5) Make certain fan belt is correctly
(3) Remove the radiator (para 4-28).
positioned on fan, alternator and crankshaft pulleys.
(4) Loosen the hose clamp and remove the
Adjust fan belt tension (para 4-31).
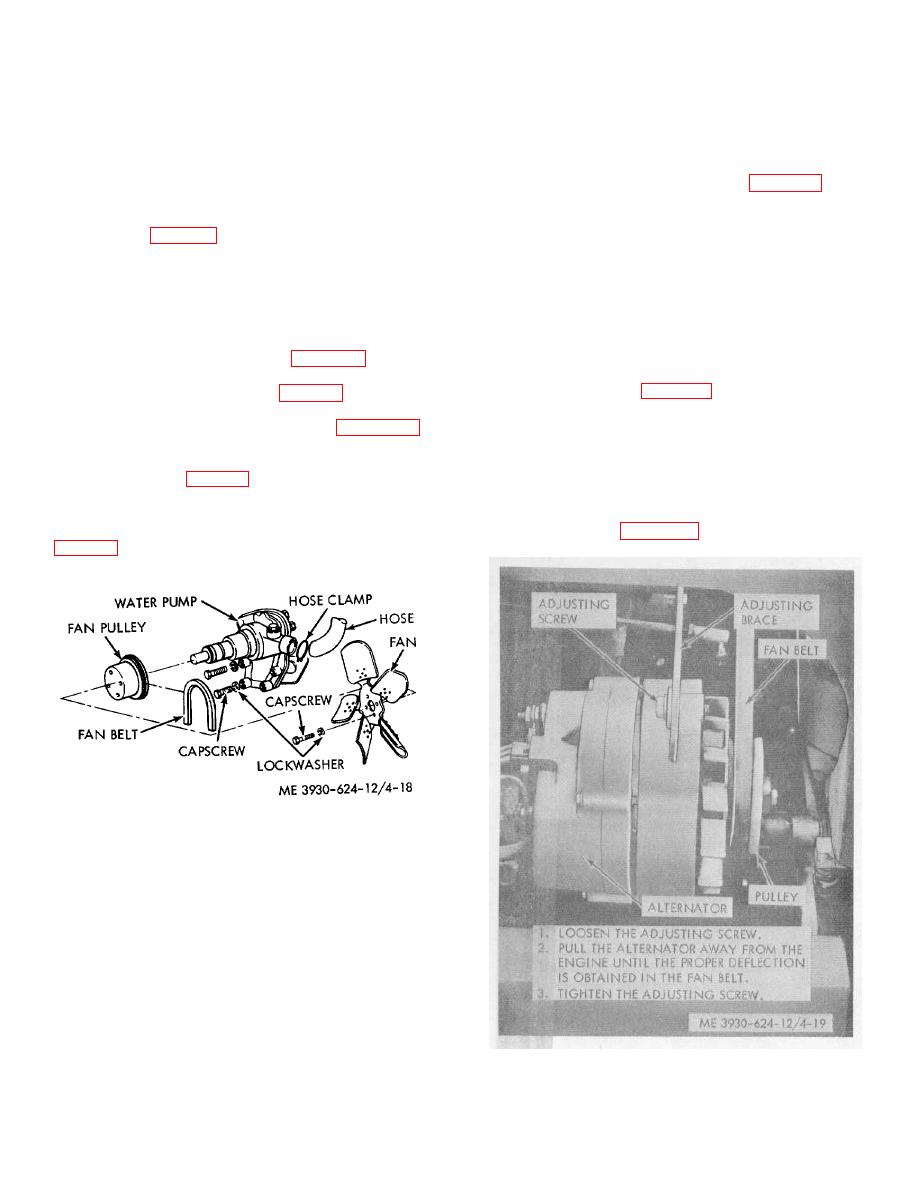
coolant inlet hose from the pump (fig. 4-18).
(6) Install radiator by a direct reversal of
(5) Loosen the nut at each end of the coolant
removal procedure.
bypass tube and remove the tube, refer to figure 4- 17.
(6) Loosen the alternator adjusting screws
4-31. Fan Belt
and move the alternator towards the cylinder block,
a. Adjustment. The fan belt must be tightened so
freeing the fan belt (fig. 4-19).
that it can be deflected /" at a point midway between
(7) Loosen and remove the four capscrews
the water pump and the alternator. If necessary, adjust
and lockwashers securing the fan and pulley to the
the belt as shown in figure 4-19.
water pump hub. Remove the fan blade and pulley
Figure 4-18. Water pump and fan blade.
(8) Remove the four capscrews and lock-
washers securing the water pump to the cylinder block.
Remove the pump.
b. Cleaning and Inspection.
(1) Discard gasket. Clean the pump with a
cleaning solvent; dry thoroughly.
(2) Inspect the water pump for cracks, signs
of leaking, and other damage. Turn the pump shaft. It
must rotate freely, without catching or binding. Replace
if damaged.
(3) Inspect the fan blade for cracks,
distortion, loose fan elements, and other damage;
Figure 4-19. Fan belt adjustment.
replace if damaged.
c. Installation.
4-24
|
|
Privacy Statement - Press Release - Copyright Information. - Contact Us |