 |
|||
|
|
|||
|
|
|||
| ||||||||||
|
|
 (e) Remove the outlet pipe from the
the center of counterweight. After top of radiator has
cleared inside top of counterweight, it can be easily
thermostat housing and remove the thermostat
lifted out.
Reinstall the outlet pipe.
c. Installation.
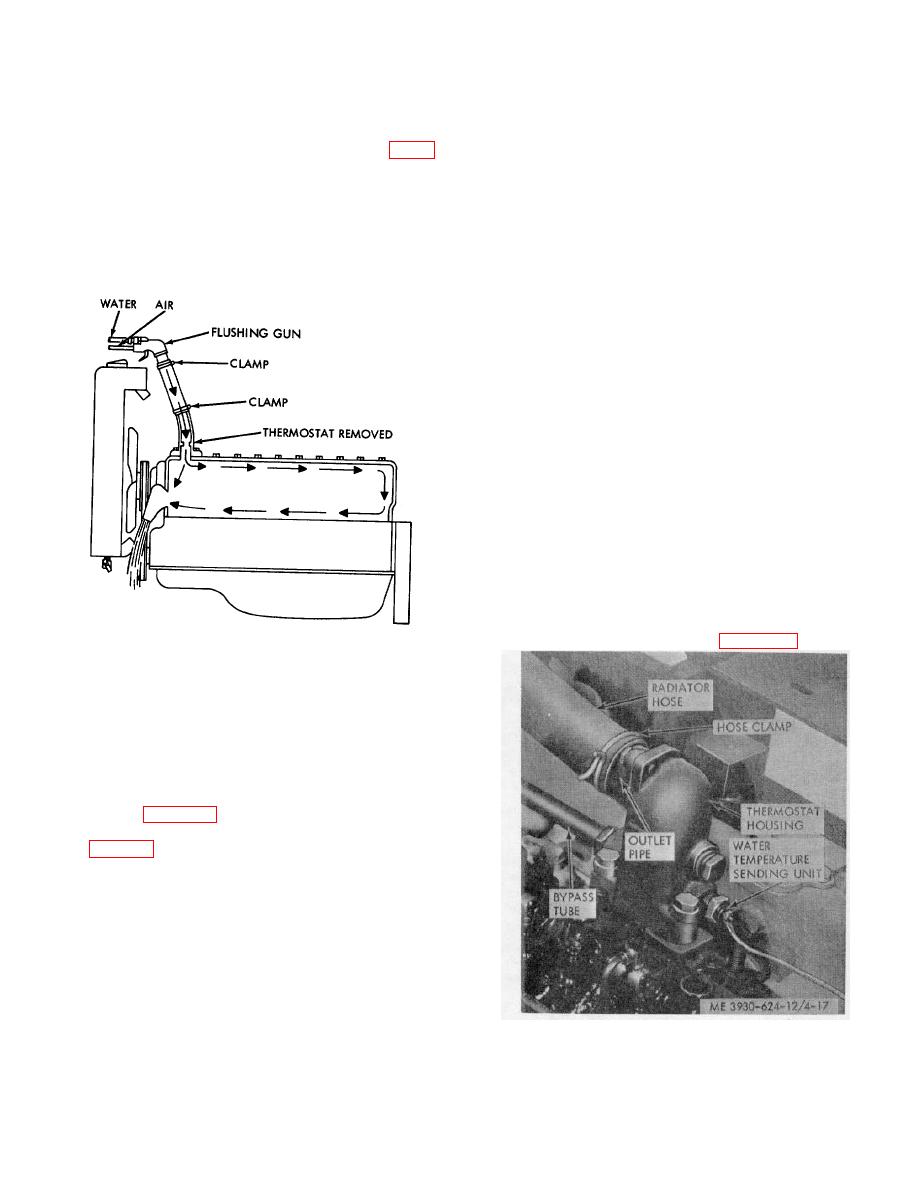
(f) Connect the flushing gun to the
(1) Install radiator by a direct reversal of
upper hose on the thermostat housing as shown in figure
removal procedure.
4-16. Completely fill the engine water jacket with water.
Hold a hand over the water pump outlet to be sure the
water jacket is completely full. Shut off the water
Note. If spacers were present
supply. Blow the water out of the water jacket with air.
between radiator mounting flange
Repeat this procedure until the flushing stream runs
and frame, be sure to replace in
clean. Disconnect the flushing gun.
original locations.
If none were
present. but there is space between
radiator mounting flange and frame,
use spacers as necessary to prevent
strain on radiator when mounting
bolts are tightened.
(2) After radiator is installed, measure
distance between leading edge of fan blades and
radiator core. This dimension should be approximately
7/8'". Also, make certain cooling fan is centered in
radiator shroud.
(3) Close radiator drain cock, fill system and
check for leaks.
(4) Install rear grille and side panels.
4-29. Thermostat
a. Removal.
(1) Raise the driver's seat and remove the
side panels.
(2) Drain the radiator.
(3) Remove two capscrews securing the
outlet pipe from the thermostat housing. Remove
thermostat from housing. Refer to figure 4-17.
ME 3930-624.12/4-16
Figure 4-16. Reverse flushing of engine block.
b. Removal.
(1) Raise driver's seat and remove side
panels.
(2) Remove the radiator grille by removing
nuts and lockwashers from studs which attach grille to
truck frame. (para 4-67.)
(3) Drain the radiator by opening the drain
cock (fig. 4-15).
(4) Loosen hose clamps which secure coolant
inlet and outlet hoses to the radiator. Disconnect
transmission oil cooler lines from the fittings in
bottom of the tank of the radiator.
(5) Remove the four capscrews and lock-
washers which attach radiator to truck frame from the
inside of engine compartment.
CAUTION: Do not lose any spacers
that may be present between radiator
and frame mounting .
Figure 4-17. Thermostat location.
(6) Slide bottom of radiator out first through
b. Inspection.
(1) Inspect the thermostat and thermostat
housing for cracks, distortion, scale, dirt deposits, or
other physical damage.
4-23
|
|
Privacy Statement - Press Release - Copyright Information. - Contact Us |