 |
|||
|
|
|||
|
Page Title:
Figure 28. Removing forward-and-reverse clutch pack. |
|
||
| ||||||||||
|
|
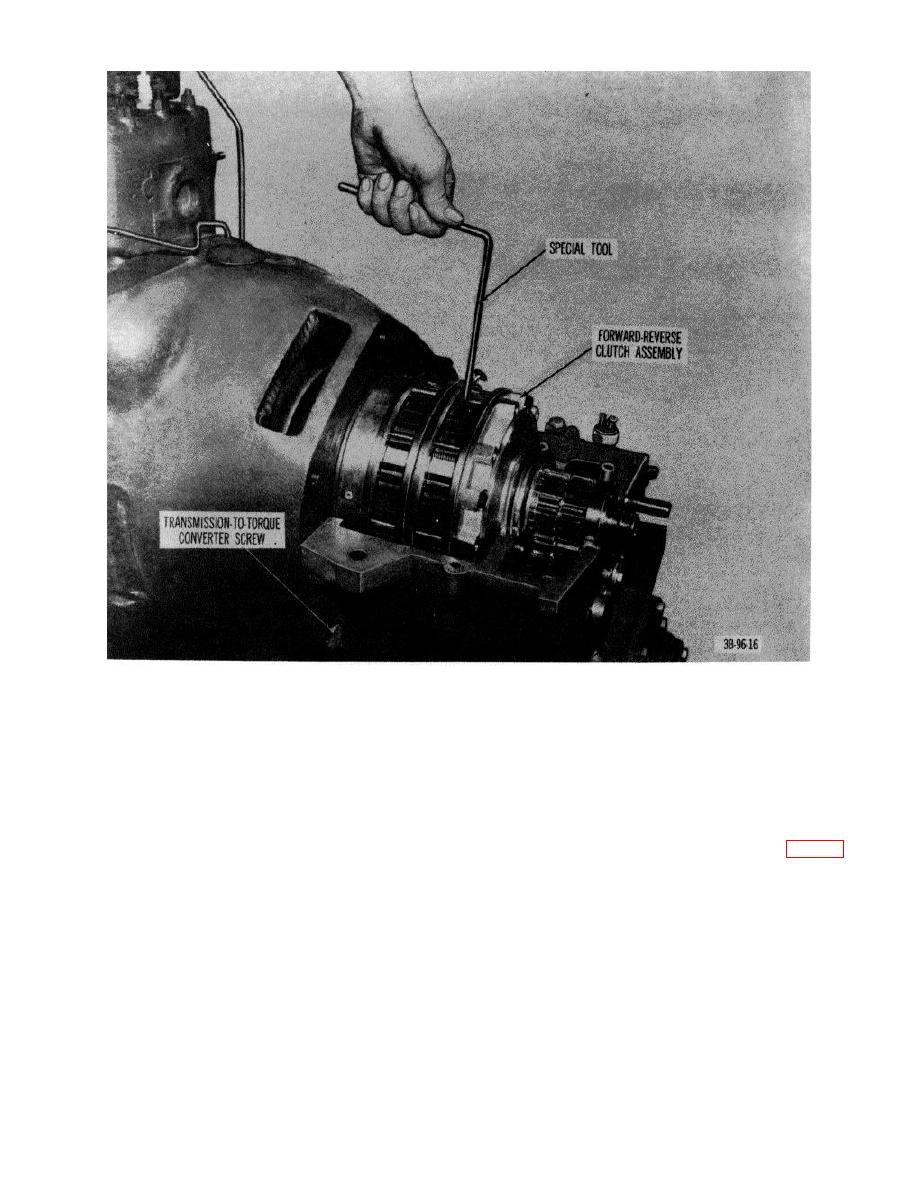 Figure 28. Removing forward-and-reverse clutch pack.
(24) Remove inner and outer packing (23 and 24)
(4) Check the clutch rings for wear caused by
from housing assembly (22).
separator plate lugs.
(25) Remove piston (4) from end housing (1) by
(5) Check the bearings for wear or roughness.
turning end housing over and gently tapping the
d. Assembly.
edges so the piston will fall out.
Caution: Make sure that the work area is
c. Inspection. Inspect the clutch assembly as follows
clean. Lubricate all parts with OE-10 oil and
and replace damaged parts with new items:
assemble as follows:
(1) Check the gears for nicks, burs, or excessive
(1) Install new packing (23 and 24, fig. 40) in
wear.
housing assembly (22).
(2) Check the thrust washers for scoring or
(2) Install new packing (2 and 3) into end housing
excessive tang wear.
(1).
(3) Check the separator plates and friction disks for
(3) Install clutch piston (4) into housing end.
warpage or cracks.
AGO 7010A
42
|
|
Privacy Statement - Press Release - Copyright Information. - Contact Us |
