 |
|||
|
|
|||
|
|
|||
| ||||||||||
|
|
 e . Install rocker arm assembly and make
b. Loosen and remove all bolts (except
certain that push rods engage with rock-
captive bolt shown by arrow in figure 5-30)
er arms. T o r q u e b o l t s t o s p e c i f i c a t i o n s
which secure water pump to cylinder block.
shown in Table 5.
c. Captive bolt may be loosened for water
f. Perform a valve clearance adjustment
pump removal, b u t c a n n o t b e r e m o v e d f r o m
as outlined in Section IV.
pump unless pulley is removed.
g. Install rocker arm cover, using a
d. Carefully tap on the pump body (not
new gasket and torque rocker arm cover
pulley) until gasket seal is broked and
retainers to specifications. Do not over
pump can be removed.
tighten.
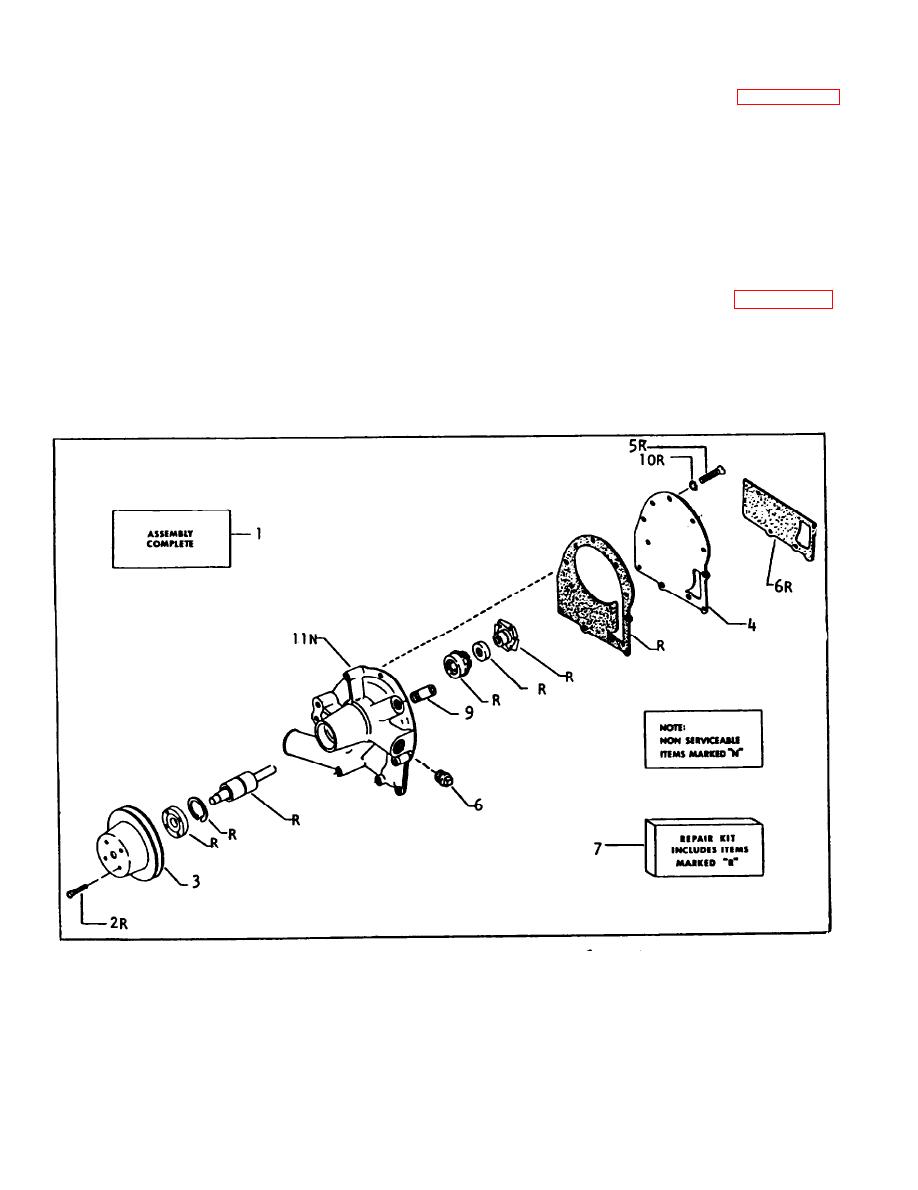
5 - 3 7 . DISASSEMBLY. (Refer to figure 5-32)
5-36. WATER PUMP REMOVAL
a. With the fan blade
and pulley removed,
a. Proir to removing water pump, drain
use a bar type puller
to remove the pulley
colling system completely, remove colling
hub. Discard the hub.
It is dangerous to
fan from water pump pulley and disengage
re-use a hub that has
been removed since it
V-belts from water pump pulley.
won't fit properly.
1 . Pump assembly
6.
Gasket
7.
Repair kit
2 . Capscrew
8.
3 . Pulley
Plug
4 . Cover
9.
Fitting
5 . Screw
10.
Washer
11.
Body
Figure 5-32 Water Pump Assembly
5-26
|
|
Privacy Statement - Press Release - Copyright Information. - Contact Us |