 |
|||
|
|
|||
|
Page Title:
Section VII. PISTON AND CONNECTING RODS |
|
||
| ||||||||||
|
|
 TM 10-3930-621-34
f. Install fuel pump, valve covers, and
g. Install oil pan (para 3-40), oil pump (para 3-41) and
distributor (TM 10-3930-621-12).
timing gear cover (para 3-39b).
Section VII. PISTON AND CONNECTING RODS
3-26. Removal and Disassembly
3-25. Description
a. Remove engine (para 2-5) and cylinder head from
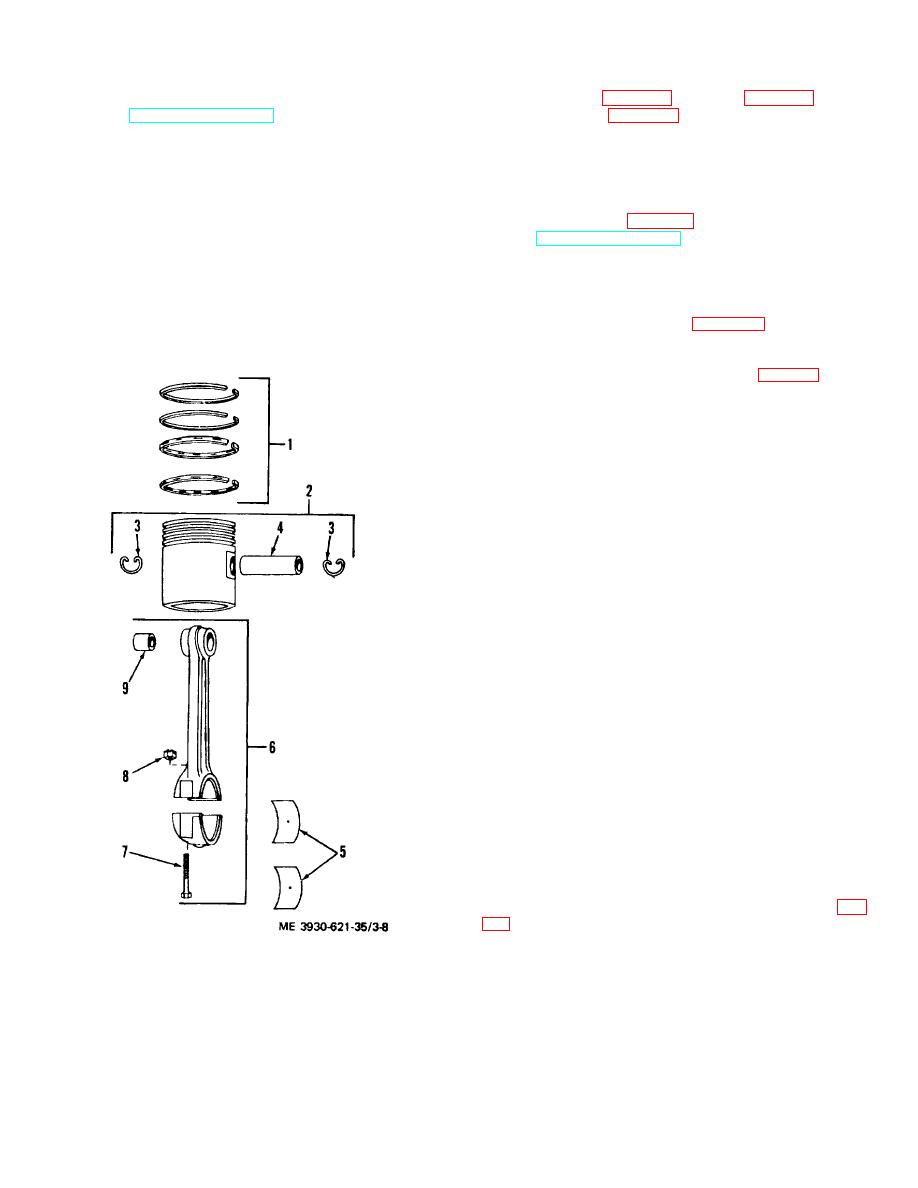
The engine has four aluminum pistons. Each piston has
engine (TM 10-3930-621-12).
three scraper rings and one oil ring. The piston is
b. Using a suitable reamer, remove ridge from top of
attached to a connecting rod by a piston pin. The forged
cylinder walls before removing pistons. Failure to remove
connecting rods are precision ground at the large end to
ridge will result in damage to piston ring lands.
receive precision type thin wall sleeve bearings (5, fig. 3-
c. Remove reamer cuttings.
8). Another sleeve bearing (9) is diamond bored and
d. Drain and remove oil pan (para 3-40).
burnished, in place, in the upper end of the connecting
e. Turn crankshaft until one of the pistons is at the top
rod. Pistons and rings are available in 0.010. 0.020, and
of its stroke.
0.040 inch
f. Remove nuts and bolts (7 and 8, fig. 3-8), then
remove bearing caps and bearings (5).
Caution: Be certain to mark caps and connecting
rods (6) for accurate rematching during assembly.
Mismatching can cause serious damage.
g. Remove piston (2) and connecting rod (6) through
top of engine block. Be certain not to damage rings or
grooves.
h. Remove ring set (1) from piston.
i. Remove piston pin retainers (3), piston pin (4), and
piston from connecting rod. 3-27. Cleaning
a. Soak pistons in a cleaning compound, solvent (Spec.
P-S-661). Dry thoroughly with compressed air.
b. Clean all carbon from piston top and ring grooves.
c. Use a drill of appropriate size to clean carbon from
the oil return holes in the grooves.
3-28. Inspection
a. Inspect pistons for score marks, ring land fractures,
cracks, or other damage.
b.
Measure each piston with a micrometer to
determine size.
c. Inspect pins, rods, and rings for cracks, scores,
distortion and other damage.
3-29. Piston Fitting
a. Description. Proper fitting of pistons requires at
least four different precision checks. These are ring gap,
ring side clearance, pin clearance in piston, and piston
skirt to cylinder clearance,
b. Checking Ring Gap. Place each ring individually in
bore of cylinder, invert piston and use it to push the ring
to within two inches of the top of the cylinder.
c. Measuring Gap. Measure gap with feeler gage (fig.
top and second rings. The third and
2.
Piston assembly
7. Bolt
3.
Retaining rings
8. Nut
4.
Piston pin
9. Pin bearing sleeve
5.
Bearing
Figure 3-8. Piston and connecting rod, exploded view.
3-12
|
|
Privacy Statement - Press Release - Copyright Information. - Contact Us |
