 |
|||
|
|
|||
|
|
|||
| ||||||||||
|
|
 TM 10-3930-673-20-2
NOTE
Do not turn adjusting nuts on top of
autoleveler switch.
Autoleveler cable is part of autoleveler
switch and is not repairable. If
autoleveler cable is damaged, entire
TR00004
autoleveler switch must be replaced.
Note orientation of fork autoleveler
switch for installation.
(2)
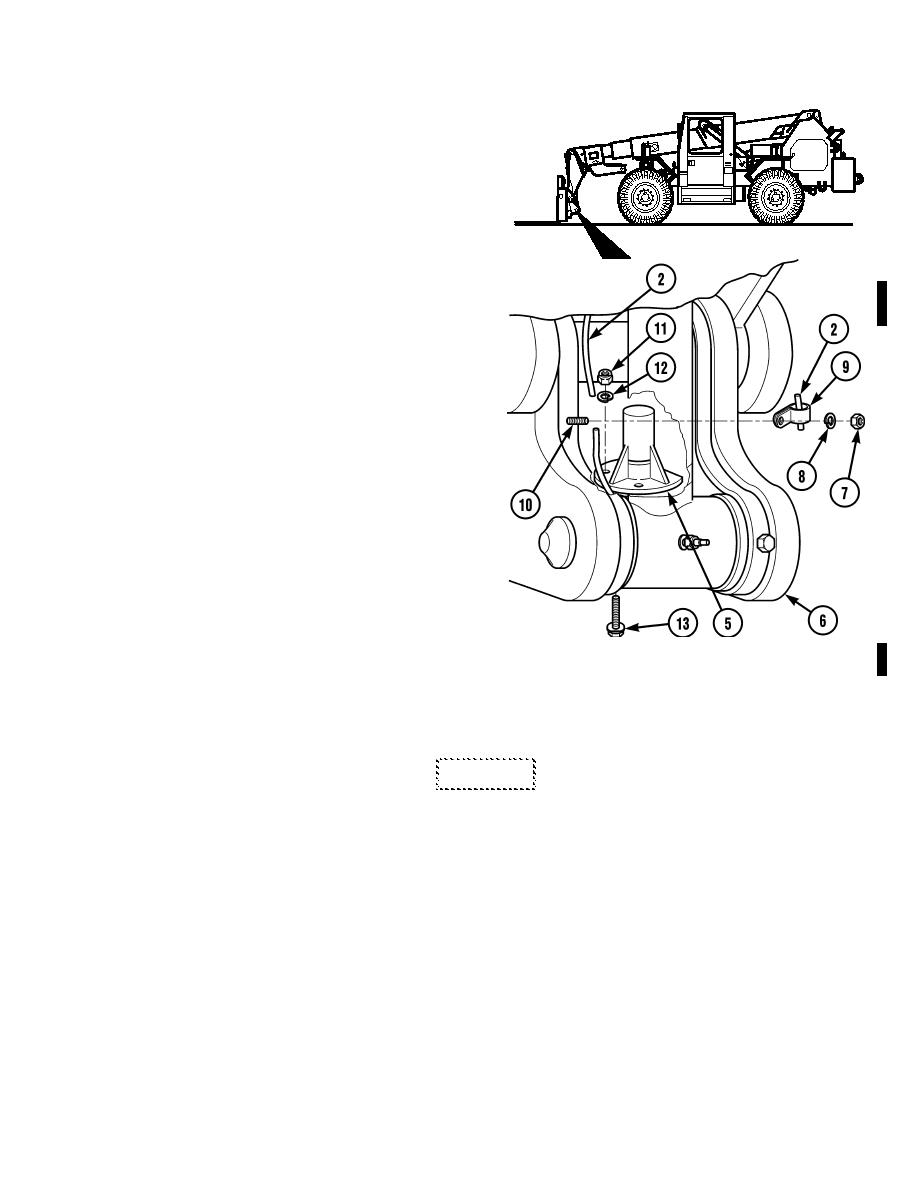
Remove fork autoleveler switch (5) and fork
autoleveler switch cable (2) from attachment
(6).
(a)
Remove nut (7), lockwasher (8) and
clamp (9) from stud (10). Discard
lockwashers.
(b)
Remove cable (2) from clamp (9).
(c)
Remove cable (2) through guard in
attachment (6).
(d)
Start engine (TM 10-3930-673-10).
Position attachment (6) in down position
so that tilt cylinder is fully extended. Stop
engine.
(e)
Remove four locknuts (11),
lockwashers (12), fork autoleveler switch
(5) and screws (13) from attachment (6). Discard locknuts and lockwashers.
b. Installation.
CAUTION
Failure to route autoleveler cable as described may result in damage to vehicle or load due to
malfunctioning of autoleveler system.
(1)
Install fork autoleveler switch (5) and fork autoleveler switch cable (2) on attachment (6).
(a)
Apply thread sealing compound to threads of four screws (13).
(b)
Install fork autoleveler switch (5) on attachment (6) with four screws (13), lockwashers (12), and locknuts
(11).
(c)
Position autoleveler cable (2) through guard in attachment (6).
(d)
Position autoleveler cable (2) through clamp (9).
(e)
Install clamp (9) on stud (10) with lockwasher (8) and nut (7).
|
|
Privacy Statement - Press Release - Copyright Information. - Contact Us |