 |
|||
|
|
|||
|
|
|||
| ||||||||||
|
|
 TM 10-3930-660-24-2
TRANSMISSION ASSEMBLY REPAIR - CONTINUED
0289 00
ASSEMBLY - CONTINUED
29.
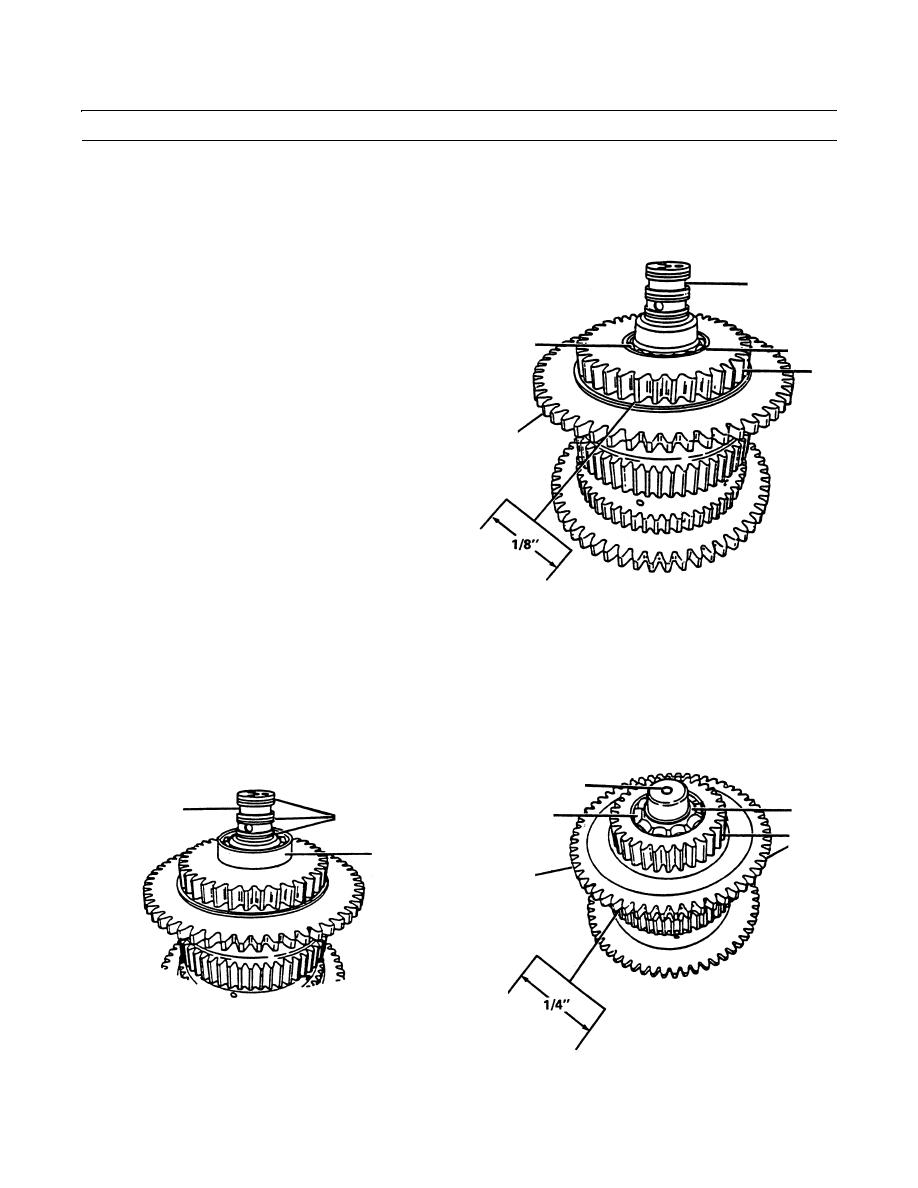
Install appropriate pair of alignment bars between weld gear (29) and piston (45) as required to hold weld gear (29) off
piston (45). Use either narrow or wide side of bars to ensure that weld gear (29) is held off piston (45) 1/8 in. (0.3 mm),
and at the same time engages all clutch plates (34).
30.
If removed, install snap ring (31) in weld gear (29).
26
31.
Install weld gear (29) on shaft assembly (26).
32.
Use a bearing driver to press bearing (30) onto shaft
assembly (26) and into weld gear (29). Remove align-
30,31
ment bars to seat bearing (30) and weld gear (29).
28
29
33.
Install snap ring (28). Ensure that snap ring (28) is
fully in groove of shaft assembly (26).
45
409-1183
34.
Use a bearing driver to press bearing (27) onto shaft assembly (26).
35.
Apply grease to three seal rings (25) and install.
36.
Turn shaft assembly (26) over and repeat steps 23 thru 30.
37.
Install weld gear (38) on shaft assembly (26). Turn weld gear (38) so it meshes with clutch plates (34) and separator
plates (35). Push weld gear (38) until it bottoms out. Weld gear (38) splines must be in full position with internal teeth of
all clutch plates (34).
26
37
26
39
25
38
27
45
409-1154
409-1185
0289 00-17
|
|
Privacy Statement - Press Release - Copyright Information. - Contact Us |
