 |
|||
|
|
|||
|
|
|||
| ||||||||||
|
|
 TM 10-3930-660-24-2
TURBOCHARGER ASSEMBLY REPAIR (152 HP) - CONTINUED
0281 00
ASSEMBLY - CONTINUED
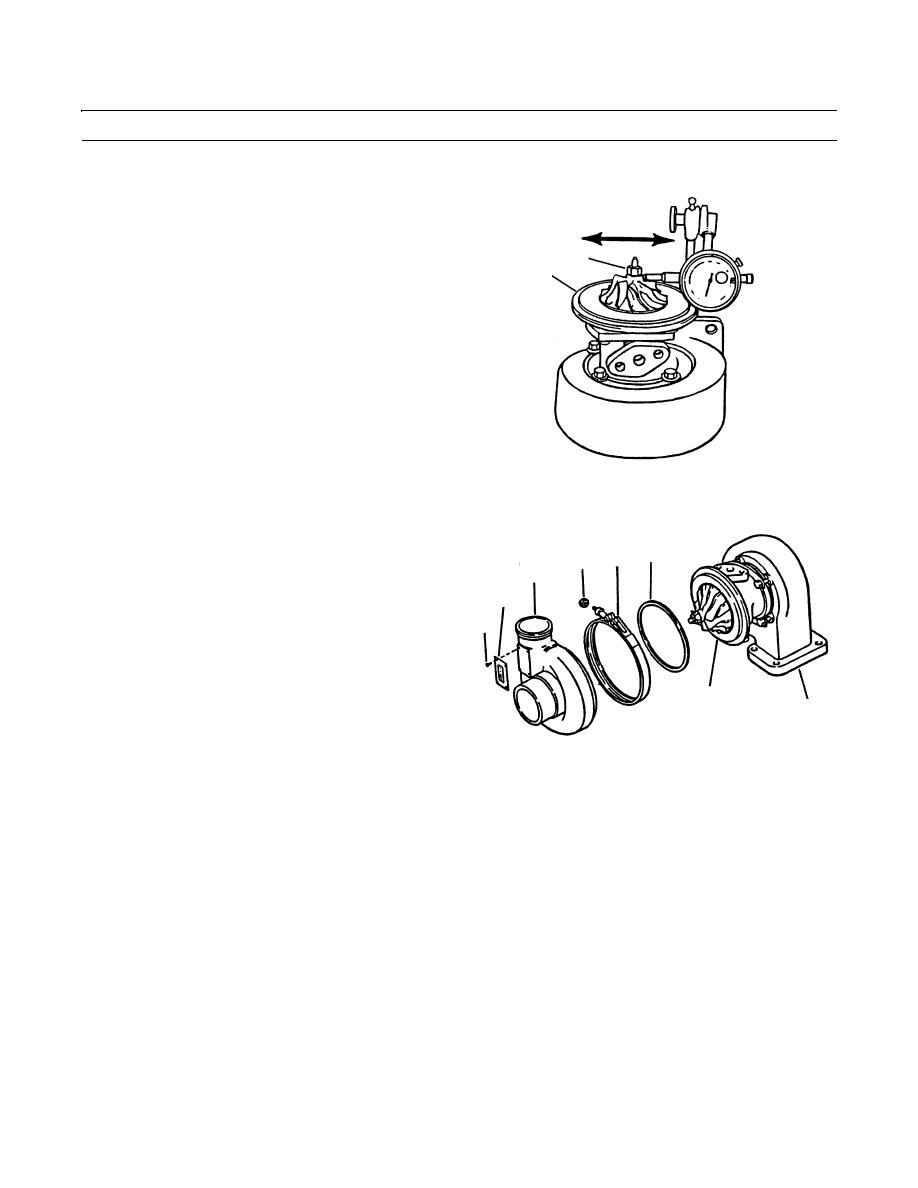
35.
Set dial indicator to zero.
36.
Move end of impeller (13) left and right and read
radial clearance on dial indicator. If radial clearance is
9
less than 0.012 in. (0.304 mm) or greater than 0.018
13
in. (0.457 mm), disassemble turbocharger and check
for problem. Replace defective parts and assemble.
409-1083
37.
If removal was necessary, install dataplate (8) and secure with four drivescrews (7).
38.
Install ring seal (6) onto turbocharger diffuser (13).
6
39.
Apply loctite 59241 to V-band clamp (5) bolt threads.
5
4
1
40.
Install compressor housing (1) and V-band clamp onto
diffuser (13). Torque nut (4) to 120 lb-in. (14 Nm).
8
41.
Tap clamp (5) in four places, 90 degrees apart to seat
7
clamp.
13
A
409-1084
42.
Re-torque nut (4) to 120 lb-in. (14 Nm).
43.
Install turbocharger (WP 0026 00).
44.
Operate vehicle and check for proper operation (TM 10-3930-660-10).
END OF WORK PACKAGE
0281 00-7/(-8 Blank)
|
|
Privacy Statement - Press Release - Copyright Information. - Contact Us |
