 |
|||
|
|
|||
|
|
|||
| ||||||||||
|
|
 TM 10-3930-660-24-1
REAR TURN SIGNAL LIGHTS REPLACEMENT - CONTINUED
0098 00
REMOVAL - CONTINUED
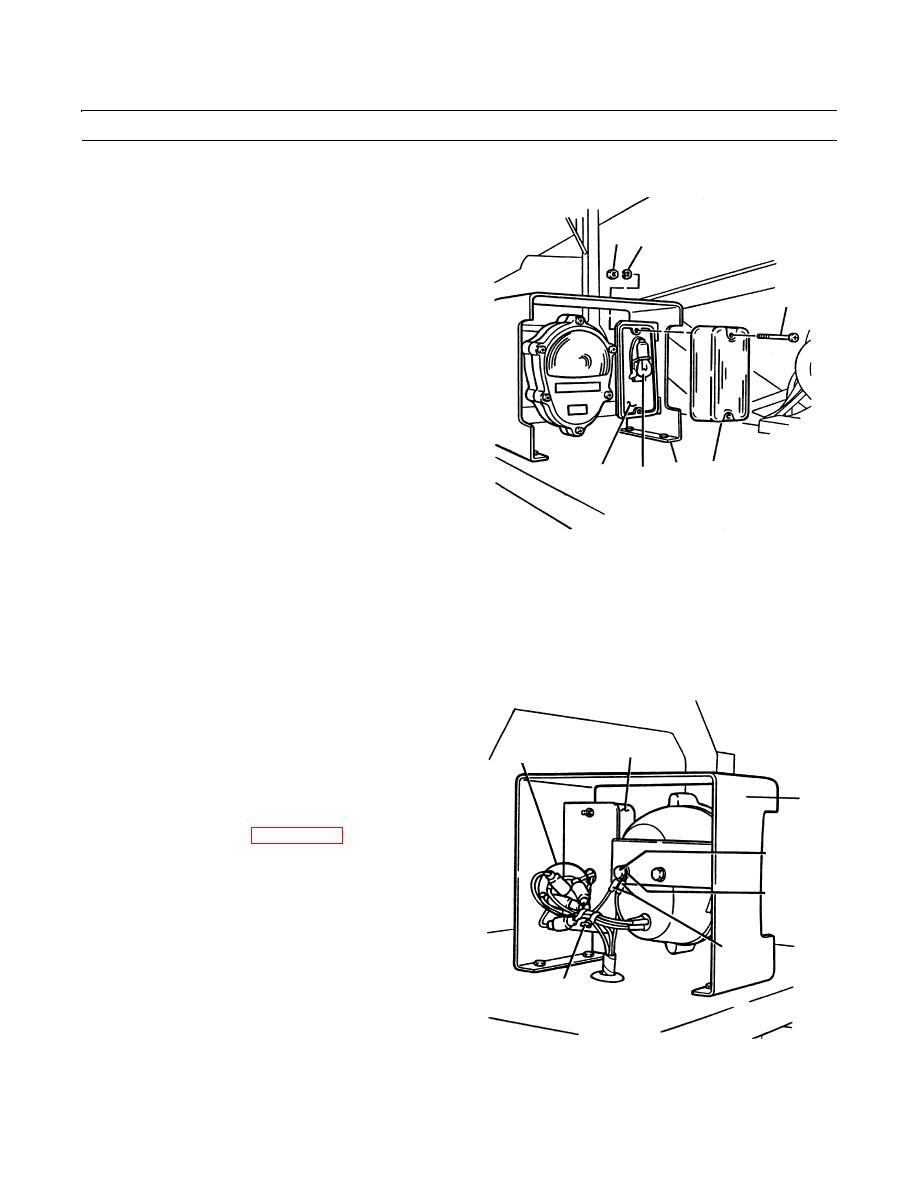
4.
Remove two nuts (10) and two lockwashers (11). Dis-
card lockwashers.
10
11
5.
Remove two screws (12) from lens (13) and pull lens
from socket plate assembly (14).
6.
Pull socket plate assembly (14) from light bracket
12
(15).
INSTALLATION
1.
Position socket plate assembly (14) on light bracket
(15).
2.
Position lens (13) on socket plate assembly (14).
3.
Secure lens (13) and socket plate assembly (14) to
light bracket (15) with two screws (12), two new lock-
washers (11) and two nuts (10).
13
15
14
16
409-363
NOTE
One wire lead connected in step 4 below is part of the rear turn signal light assembly. The other wire lead is
part of the vehicle wiring harness.
Apply loctite to capscrew as installed.
4.
Install new starwasher (7), two wire leads (8 and 9)
and second new starwasher (7). Secure with capscrew
(6).
5
2,3,4
5.
Connect electrical lead (4) from vehicle wiring har-
ness to rear turn signal light assembly (5) by connect-
ing male plug (3) to female plug (2).
15
6.
Install new tie down strap (1).
7.
Connect battery cables (WP 0107 00).
6
7
8,9
1
409-364
0098 00-2
|
|
Privacy Statement - Press Release - Copyright Information. - Contact Us |
