 |
|||
|
|
|||
|
Page Title:
BEARING REPLACEMENT AND LUBRICATION |
|
||
| ||||||||||
|
|
 Slip rings which are rough or out of round
to re-lubricate and reuse the bearing.
should be trued in a lathe to .002 inch maximum
To remove the bearing from the slip ring
indicator reading. Remove only enough material
end frame, press out with a tube or col-
to make the rings smooth and round. Finish with
lar that just fits inside the end frame
400-grain or finer polishing cloth and blow away
Press from the outside of the
housing.
a l l dust.
housing towards the inside.
BEARING REPLACEMENT AND LUBRICATION:
d. To install a new bearing, place a fiat
plate over the bearing and press in from
a. The bearing in the drive end frame can be
the outside toward the inside of the
removed by detaching the retainer plate
frame until the bearing is flush with
screws and then pressing the bearing from
the outside of the end frame. Support
the end frame. If the bearing is in satis-
the inside of the frame with a hollow
factory condition and is to be reused, it
cylinder to prevent breakage of the end
should be filled one-quarter full with
frame. Use extreme care to avoid mis-
s p e c i a l grease (Part number 1800574)
alignment or otherwise placing undue
stress on the bearing.
CAUTION
e.
If the seal is separate from the bearing,
it is recommended that a new seal be in-
DO NOT OVERFILL, AS THIS MAY CAUSE THE
stalled whenever the bearing is replaced
Press the seal in with the lip of the
BEARING TO OVERHEAT.
USE ONLY THE REC-
seal toward the rotor when assembled;
t h a t is, away from the bearing. Lightly
COMMENDED LUBRICANT (PER 01M00 LUBRICA-
c o a t the seal lip with oil to facilitate
assembly of the shaft into the bearing.
TION SPECIFICATIONS AND RECOMMENDATIONS).
5-67. REASSEMBLY:
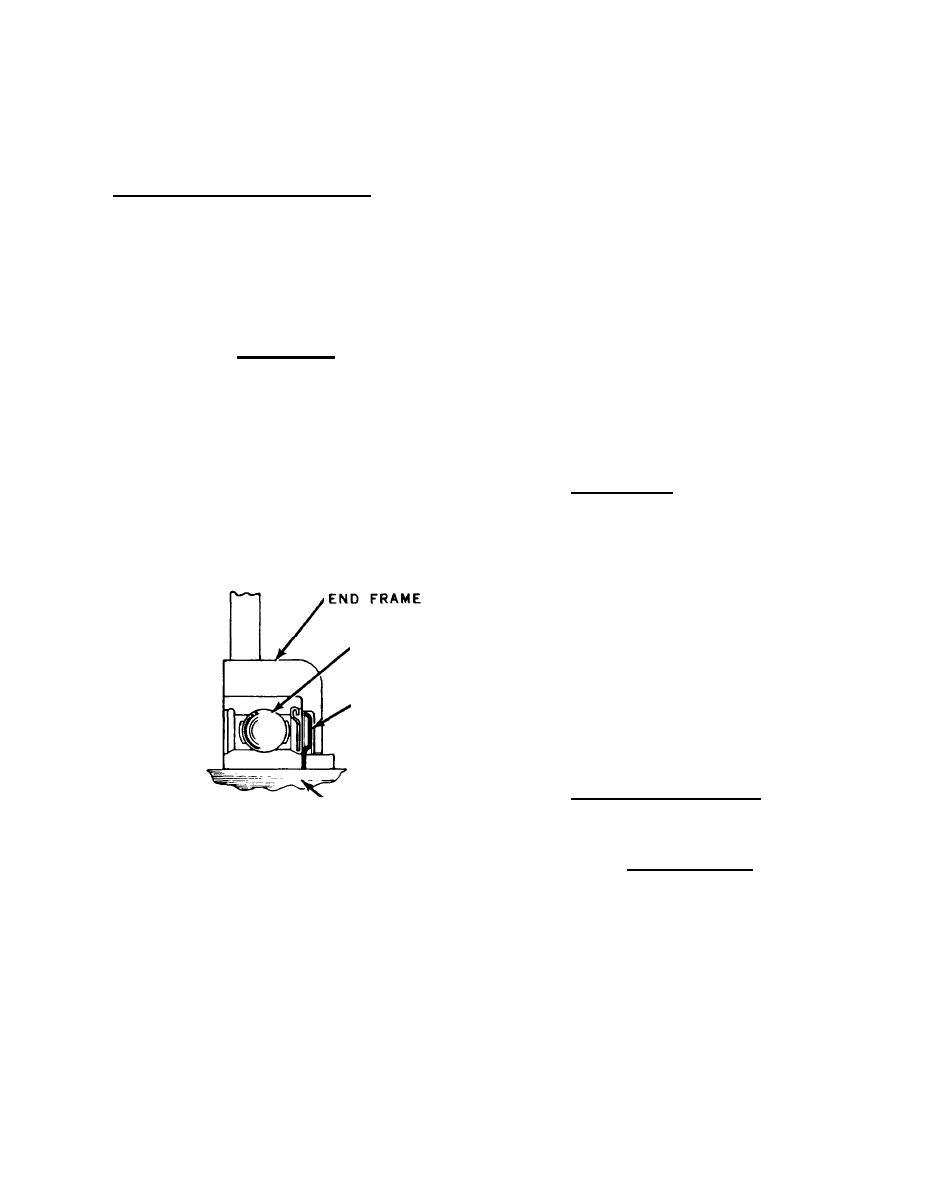
b. To install a new bearing, press in with
Reassembly is the reverse of disassembly.
a tube or collar that just fits over the
Remember when assembling the pulley to secure
outer race, with the bearing and slinger
assembled into the end frame (as shown in
the rotor in a vise only tight enough to permit
tightening the shaft nut to 40-60 pound feet
plate 12343).
It is recommended that a
If excessive pressure is applied ag-
a i n s t the rotor, the assembly may become dis-
t o r t e d . To install the slip ring and frame as-
sembly to the rotor and drive end frame assembly,
remove the tape over the bearing and shaft, and
BEARING
make sure the shaft is perfectly clean after re-
moving the tape. Insert a rod through the hole
to hold up the brushes. Carefully
install the
shaft into the slip ring end frame assembly to
`SLINGER
avoid damage to the seal. After tightening the
t h r u - b o l t s , remove the brush retaining rod to
allow the brushes to fail down onto the slip
rings.
5-68. GENERATOR BENCH CHECK
\
ARMATURE
To check the generator in a test stand, proceed
SHAFT
a s follows:
Plate 12343. Drive End Bearing Assembly with
Slinger (some models use flat
IMPORTANT
washer instead of slinger)
GROUND POLARITY OF ENERGIZER AND GENE-
new retainer plate be installed if the
felt seal in the retainer plate is hard-
RATOR MUST BE THE SAME. USE A FULLY
ened or excessively worn. Fill the cavity
between the retainer plate and bearing with
CHARGED ENERGIZER OR BATTERY.
special lubricant called for in Step I.
c. The bearing in the slip ring end frame
should be replaced if its grease supply
is exhausted. No attempt should be made
5-50G
|
|
Privacy Statement - Press Release - Copyright Information. - Contact Us |