 |
|||
|
|
|||
|
Page Title:
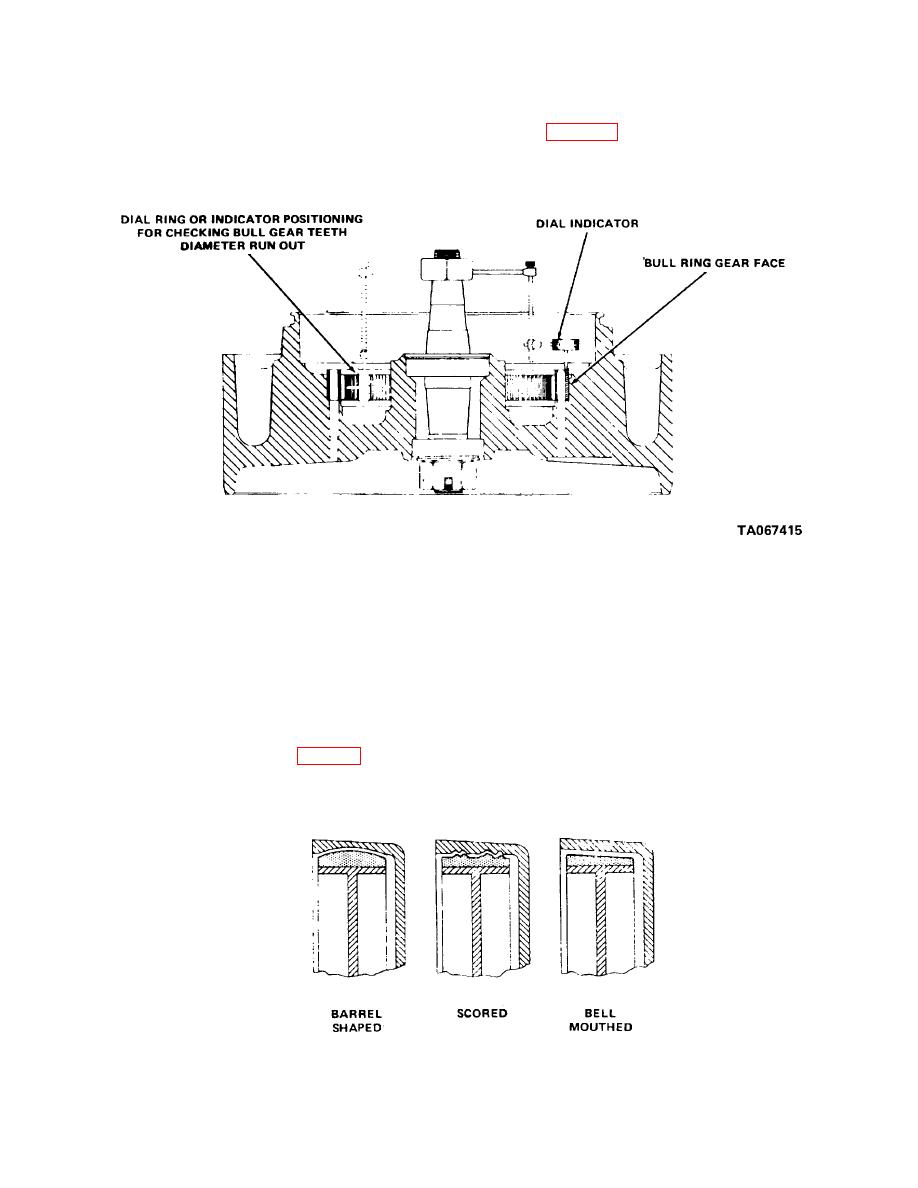
Figure 7-2. Checking bull gear face and teeth runout. |
|
||
| ||||||||||
|
|
 TM 10-3930-630-34
and damage.
damage is observed.
c. Check drive or bull gear for cracks, chips or other
(1) Check runout of bull gear teeth diameter as
shown in figure 7-2.
damage.
d. Check teeth of bull gear for wear, broken teeth
Figure 7-2. Checking bull gear face and teeth runout.
(0.254 mm) deep. Resurface drums that are heat
(2) Runout of bull gear face must not exceed
checked.
0.010 inch (0.254 mm).
(3) If drums do require resurfacing, resurface both
(3) Runout of inside diameter of bull gear face
drums. Finish grind or hone drums to remove tool
must not exceed 0.005 inch (0.127 mm).
marks, to prevent excessive lining wear and to avoid
e. Check inside diameter of brake shoes surface in
runout when brakes are applied.
drive wheel.
(4) Do not remove more than 0.050 inch (1.27
(1) Check inside diameter at points 45 degrees
mm) from a drum. Replace drum requiring deeper
apart. Resurface drum if measurements differ more
resurfacing. Maximum inside diameter after resurfacing
than 0.010 inch (0.254 mm).
will not exceed 11.053 inches (280.74 mm).
(2) Inspect lining wear pattern (fig. 7-3). Resurface
or reface bell-mouthed or barrel shaped drums. Scored
drums must be resurfaced if scoring is over 0.010 inch
TA067416
Figure 7-3. Improper lining wear pattern.
7-2
|
|
Privacy Statement - Press Release - Copyright Information. - Contact Us |