 |
|||
|
|
|||
|
Page Title:
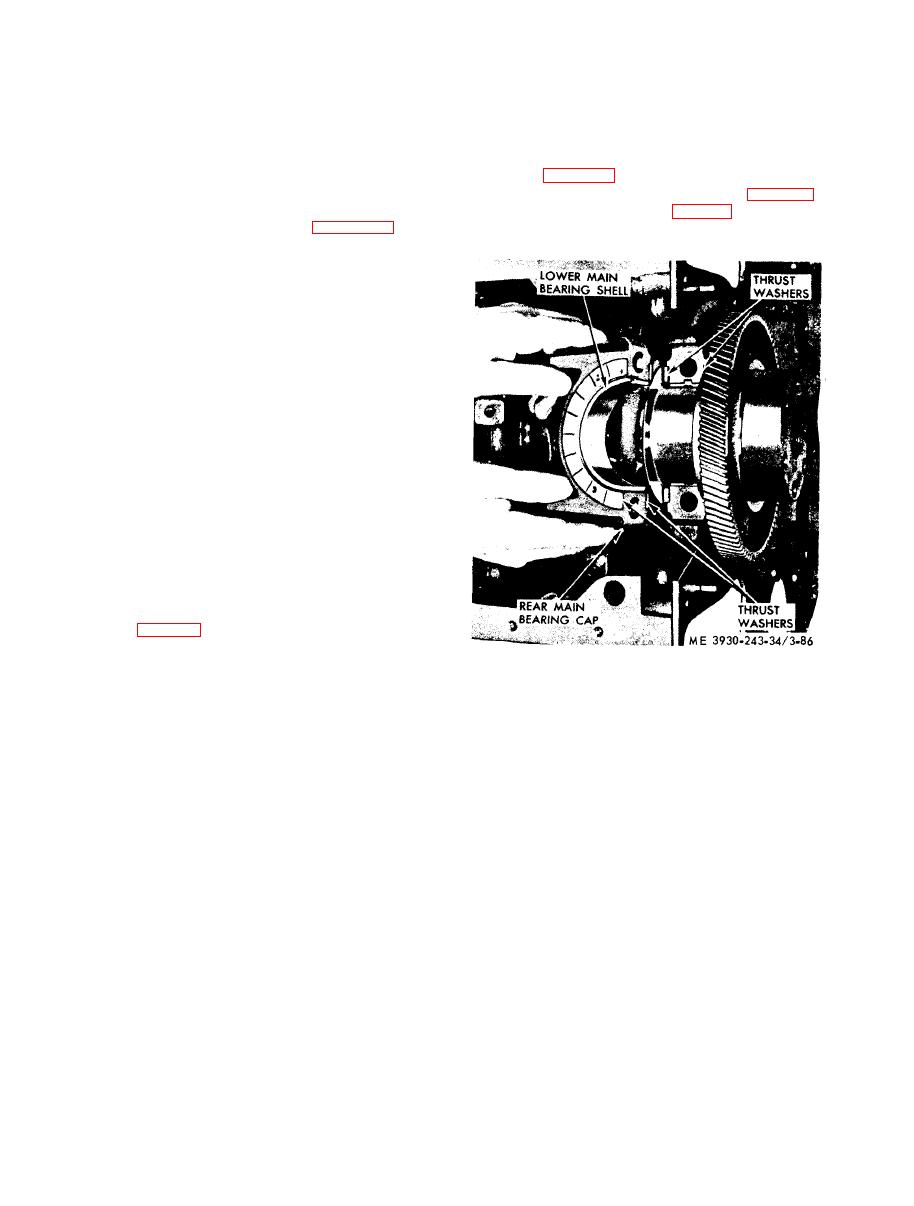
Figure 3-86. Rear main bearing thrust washer and mounting. |
|
||
| ||||||||||
|
|
 so that when shell is in place the tang will fit into
NOTE
If end play has increased to the point where clearance
the groove in the shell support.
is in excess of 0.004 to 0.011 inch, new washers
(2) Assemble crankshaft thrust washer before
should be installed.
installing rear main bearing cap. Clean both halves
of thrust washer carefully, removing any burs from
(5) Install lubricating oil pump inlet pipe
the seats-the slightest particle of dirt may decrease
assembly (para 3-25).
clearance between washers and crankshaft beyond
(6) Install oil pan with new gasket (para 3-24).
limits. Slide upper halves of thrust washers into
(7) Install the engine (para 2-9).
place in their grooves, as shown in figure 3-86; then
assemble lower halves over dowel pins in bearing
cap.
NOTE
Main bearing caps are bored in position and marked
1, 2, 3, 4, and 5. They must be replaced in their orig-
inal positions with marked side of caps facing the
same side of cylinder block that carries the engine
serial number.
(3) With the lower main bearing shells in-
stalled in bearing caps, install caps in their original
position and draw bolts up snug. Then tap caps
lightly with a soft hammer to seat them properly,
a n d d r a w b e a r i n g c a p b o l t s uniformly tight,
starting with center cap and working alternately
towards both ends of block, to 120-130 foot-pounds
NOTE
If the bearings have been installed properly. the
crankshaft will turn freely with all main bearing caps
bolted tight.
(4) Check crankshaft end play at thrust
washers (fig. 3-87). This clearance should be from
0.004 to 0.011 inch. Insufficient clearance will
usually denote misalignment of the rear main
bearing. In such case, loosen and retighten the rear
main bearing cap. I f lack of clearance is still
present, dirt on a bur on inner face of one or more
of the thrust washers may be the cause, or washer
may be bent.
|
|
Privacy Statement - Press Release - Copyright Information. - Contact Us |