 |
|||
|
|
|||
|
Page Title:
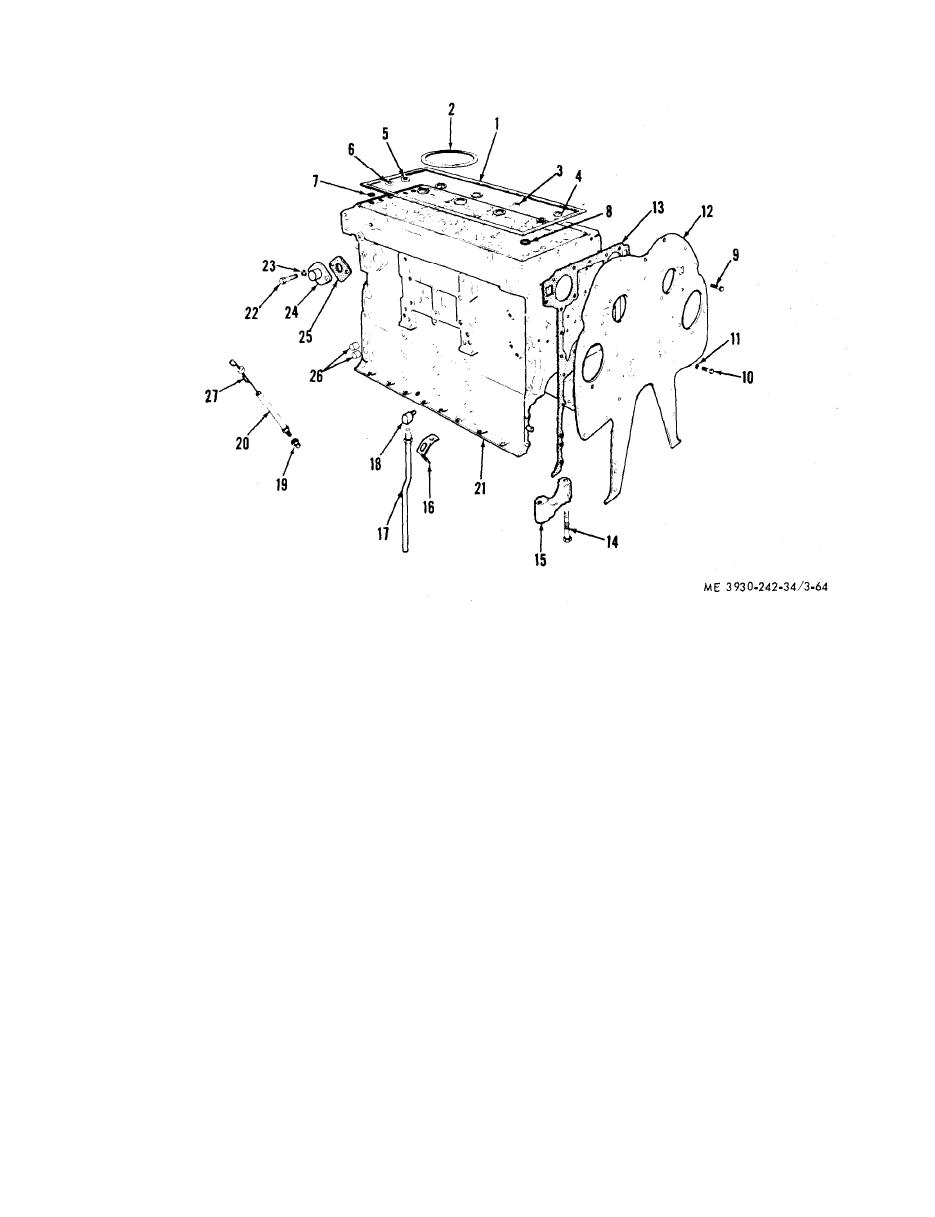
Figure 3-64. Cylinder block, disassembly and reassembly. |
|
||
| ||||||||||
|
|
 TM 10-3930-242-34
10
Screw
1
Gasket
19
Nut
11
Washer
2
Ring
20
Guide
12
Plate
3
Ring
21
Block
13
Gasket
4
Ring
22
Screw
14
Capscrew
5
Ring
23
Lockwasher
15
Cap
6
Ring
24
Cover
16
Clip
7
Ring
25
Gasket
17
Tube assembly
8
Ring
26
Plug
18
Elbow
9
Screw
27
Dipstick
and suitable rubber gaskets held in place by
f o o t - p o u n d s torque. Caps are numbered to cor-
bolts.
r e s p o n d with their respective positions in the
(e) Immerse the cylinder block for 20 mi-
b l o c k . The number of the front and rear main
nutes in a tank of water heated to 180-200 F.
b e a r i n g caps is stamped on the face of the oil
(f) Using a suitable fitting at one of the
pan mounting flange of the cylinder block, adja-
w a t e r inlet or outlet openings, apply 15 pounds
c e n t to their permanent location in the engine,
a s established at the time of manufacture. The
per square inch air pressure to water jacket and
observe water in the tank for bubbles indicating
number 1 cylinder and main bearing cap are
cracks or leaks.
a l w a y s located at the end opposite the flywheel
(g) Following the pressure test, blow out
e n d of the cylinder block, regardless of engine
p a s s a g e s with dry compressed air.
r o t a t i o n . The standard bearing bore diameter is
( 3 ) Inspect cylinder block. A f t e r c l e a n i n g
3.251-3.353 inches.
a n d pressure testing the cylinder block should
(b) Check the cylinder liner counterborek
be inspected as follows:
for squareness, proper depth, and diameter.
(a) Check the main bearing bores. Check
C o u n t e r b o r e s should be from 4.825-4.835 inches
b o r e inside diameter with main bearing caps
in diameter. Counterbored surfaces must be
secured in place with bolts tightened to 120-130
smooth and square with the cylinder bore
|
|
Privacy Statement - Press Release - Copyright Information. - Contact Us |