 |
|||
|
|
|||
|
Page Title:
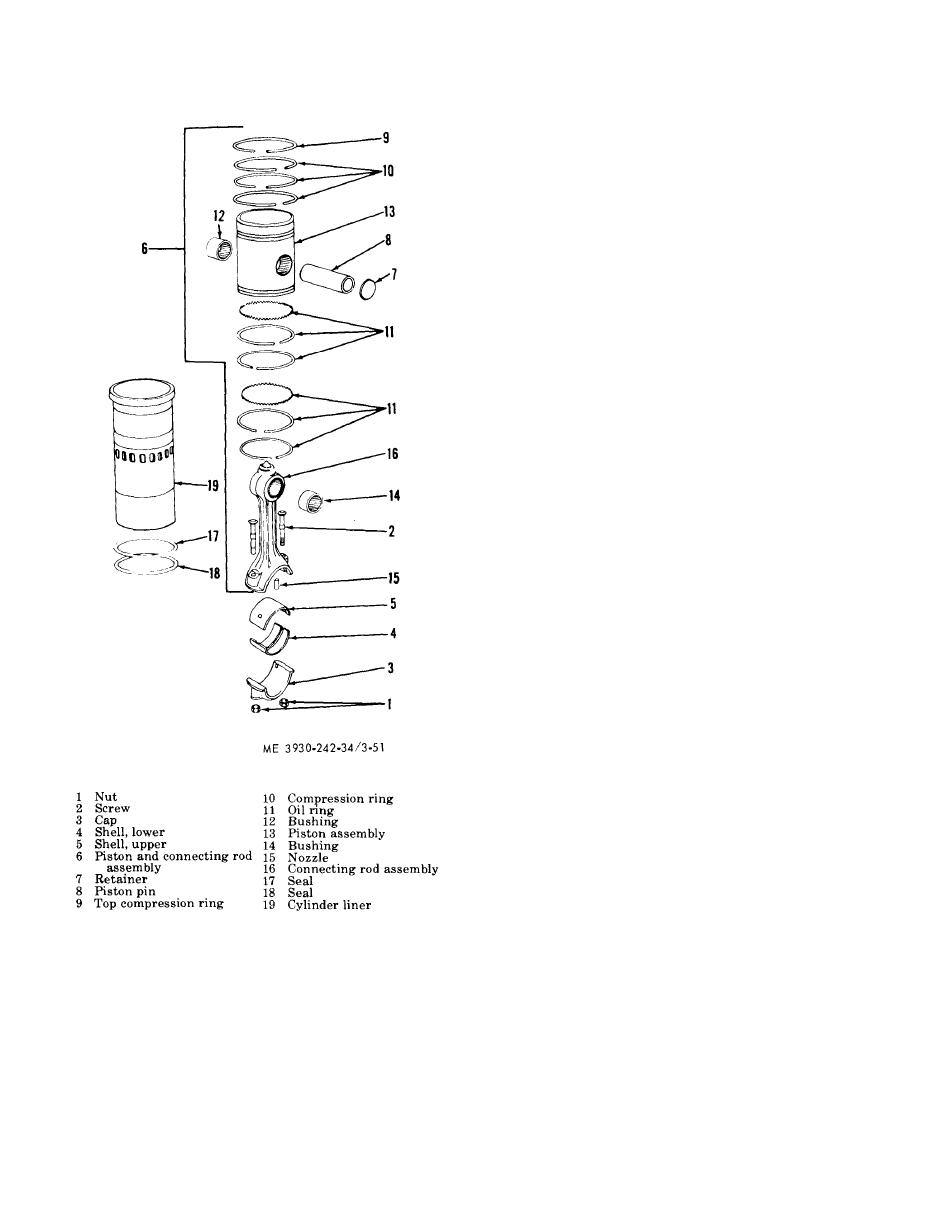
Piston, rings, connecting rod, and cylinder liner, disassembly and reassembly, |
|
||
| ||||||||||
|
|
 TM 10-3930-242-34
nance will reduce to a minimum the amount of
a b r a s i v e dust and foreign material introduced
i n t o the cylinder and will, in turn, reduce the
rate of wear.
(c) The protective coating on the skirt of
the piston is from 0.0007- to 0.0015-inch thick.
T h e presence of this coating of tin will, there-
fore, indicate very little wear. A careful exami-
nation of the piston should be made for scoring,
burning, worn or damaged ring grooves and
c r a c k s inside the piston across the struts. A
badly scored piston should not be reused,
whereas a piston only slightly scored may be
c l e a n e d up and reused.
(d) Examine the inside of the piston
c l o s e l y for cracks across the struts and discard
p i s t o n if such cracks are present.
(e) Inspect the top of the piston crown for
burned spots or other indications of overheating
s u c h as carbon formation on the underside of
the piston.
(f) Inspect the piston rings for free fit in
t h e grooves and side clearance.
(g) I n s p e c t a n d m e a s u r e t h e i n s i d e
diameter of the piston pin bushings in each pis-
t o n , and, if worn excessively, replace the bush-
ings or piston assemblies. Also inspect and
measure the piston pin. The standard inside
diameter of bushings in a piston is 1.3775-1.3780
inches and the standard outside diameter of the
piston pin is 1.3746-1.3750 inch. Thus, the stan-
dard clearance between the piston pin and bush-
ing, in a piston is 0.00250.0034 inch with a max-
imum allowable wear limit of 0.010 inch.
(h) The piston taper must not exceed
0.0005 inch from 7/16 inch below the bottom com-
p r e s s i o n ring to the lower end of piston skirt.
T h e diameter of a new standard piston below
t h e compression ring grooves to bottom of pis-
ton skirt is 3.8693-3.8715 inch.
(i) C h e c k t h e p i s t o n - t o - l i n e r c l e a r a n c e
while the piston is held upside down in the liner.
T h e liner should be in place in the cylinder
b l o c k . This clearance should always be checked
when installing either new or used positions and
liners. The clearance of a piston in a liner may
b e checked with liner in the cylinder block, by
i n s e r t i n g a -inch-wide feeler ribbon about 15
i n c h e s long between the piston and liner, then
liner, disassembly and reassembly,
w i t h d r a w feeler ribbon, measuring the force re-
quired with a spring scale. This force should not
Excessively worn or scored pistons, rings and
e x c e e d six pounds. When this force is approxi-
c y l i n d e r liners indicate abnormal maintenance
m a t e l y 6 pounds, the actual clearance between
or operating conditions that should be corrected
t h e piston and the liner is 0.001 inch greater
as quickly as possible. Proper types of lubricat-
than the thickness of the feeler ribbon used.
ing oil filters and air cleaners and their mainte-
F e e l e r ribbon used for checking this clearance
|
|
Privacy Statement - Press Release - Copyright Information. - Contact Us |