 |
|||
|
|
|||
|
Page Title:
Section IV. OIL PAN, OIL PUMP SCREEN, INLET PIPE, CONNECTING RODS AND PISTONS |
|
||
| ||||||||||
|
|
 TM 10-3930-242-34
Section IV. OIL PAN, OIL PUMP SCREEN, INLET PIPE,
CONNECTING RODS AND PISTONS
3 - 2 3 . General
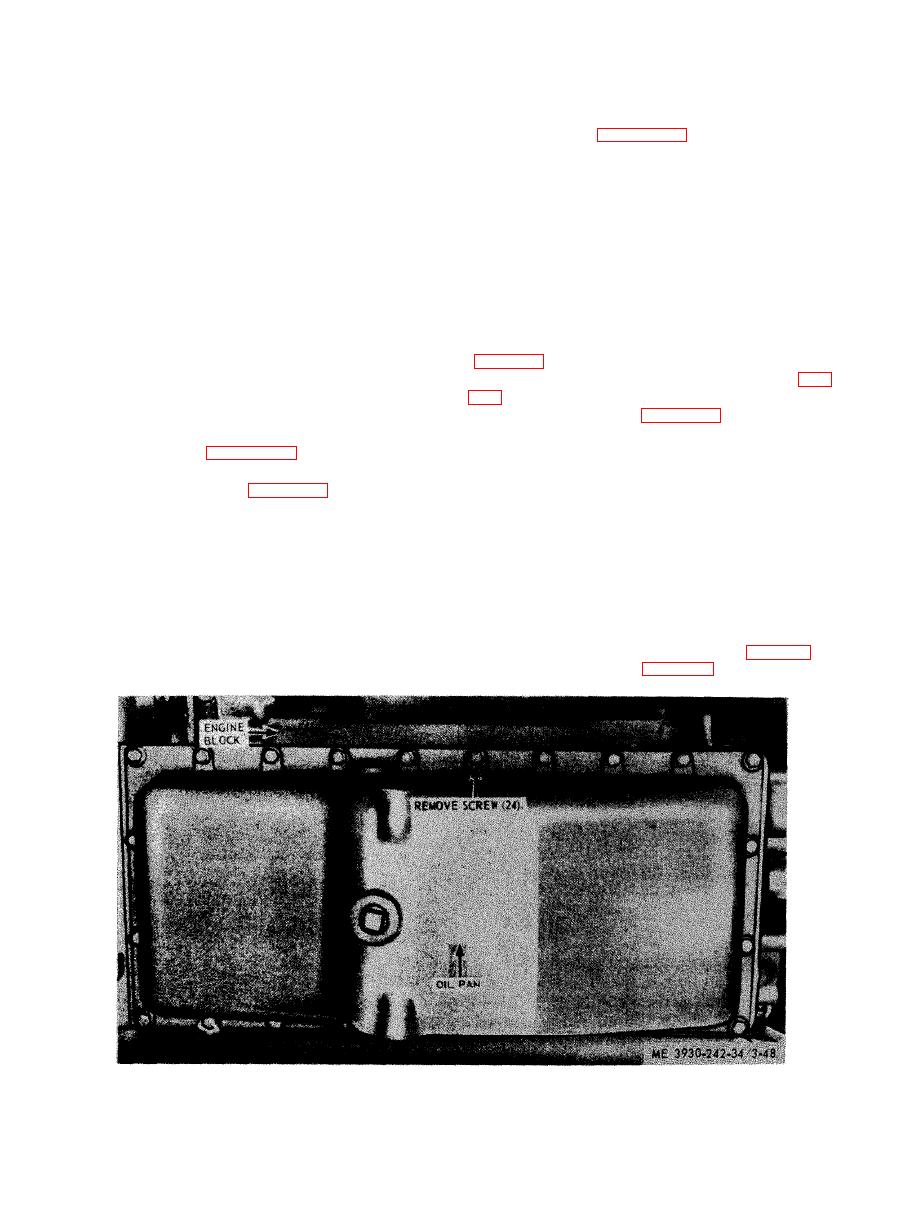
(2) Refer to figure 3-48 and reinstall the oil
pan.
The oil pan houses the lower engine compo-
( 3 ) Refer to the lubrication order and ser-
n e n t s and also contains lubricating oil for the
v i c e engine lubrication system.
e n g i n e . The oil pump screen is secured to the
main bearing cap with two bolts and lock-
w a s h e r s . The inlet pipe is secured to the oil
a. General. As the oil pump rotors revolve, a
pump. The pistons are secured to the connecting
vacuum is formed on the inlet side of the pump
r o d s with wrist pins and connecting rods and
a n d oil is drawn from the crankcase, through
bearings mounted around the crankshaft.
the oil pump screen and inlet pipe, into the rotor
3 - 2 4 . Oil Pan
c o m p a r t m e n t of the pump.
b. Removal.
a. General. The oil pan is secured to the bot-
(1) Drain engine oil and remove oil pan
t o m side of the engine block by 24 bolts and
washers, A drain plug is located in bottom of oil
( 2 ) Remove oil screen and inlet pipe (fig.
pan for draining engine oil, at oil change inter-
vals or for oil pan removal.
b. Removal.
a s s e m b l e oil pump screen and inlet pipe.
(1) Remove plug and drain the engine oil.
(2) Refer to figure 3-48 and remove the oil
d. Cleaning and Inspection.
pan.
(1) Clean all metal parts thoroughly, using
s o l v e n t P-D-080, or equal.
a s s e m b l e the oil pan.
( 2 ) Inspect the inlet pipe for evidence of
d. Cleaning and Inspection.
clogging.
(1) Clean oil pan and attaching hardware,
(3) Inspect the inlet pipe for deep dents and
t h o r o u g h l y using solvent P-D-080, or equal.
cracks.
(2) Remove all gasket material from the
(4) Inspect mounting hardware and the
g a s k e t area.
s c r e e n assembly for damage.
(3) Inspect the oil pan for cracks, excessive
( 5 ) Replace all defective parts.
d e n t s , or other damage.
e. Installation.
e. Installation.
(1) Install inlet pipe and screen (fig. 3-50).
(1) Affix a new gasket to oil pan.
(2) Install oil pan (para 3-24).
|
|
Privacy Statement - Press Release - Copyright Information. - Contact Us |