 |
|||
|
|
|||
|
Page Title:
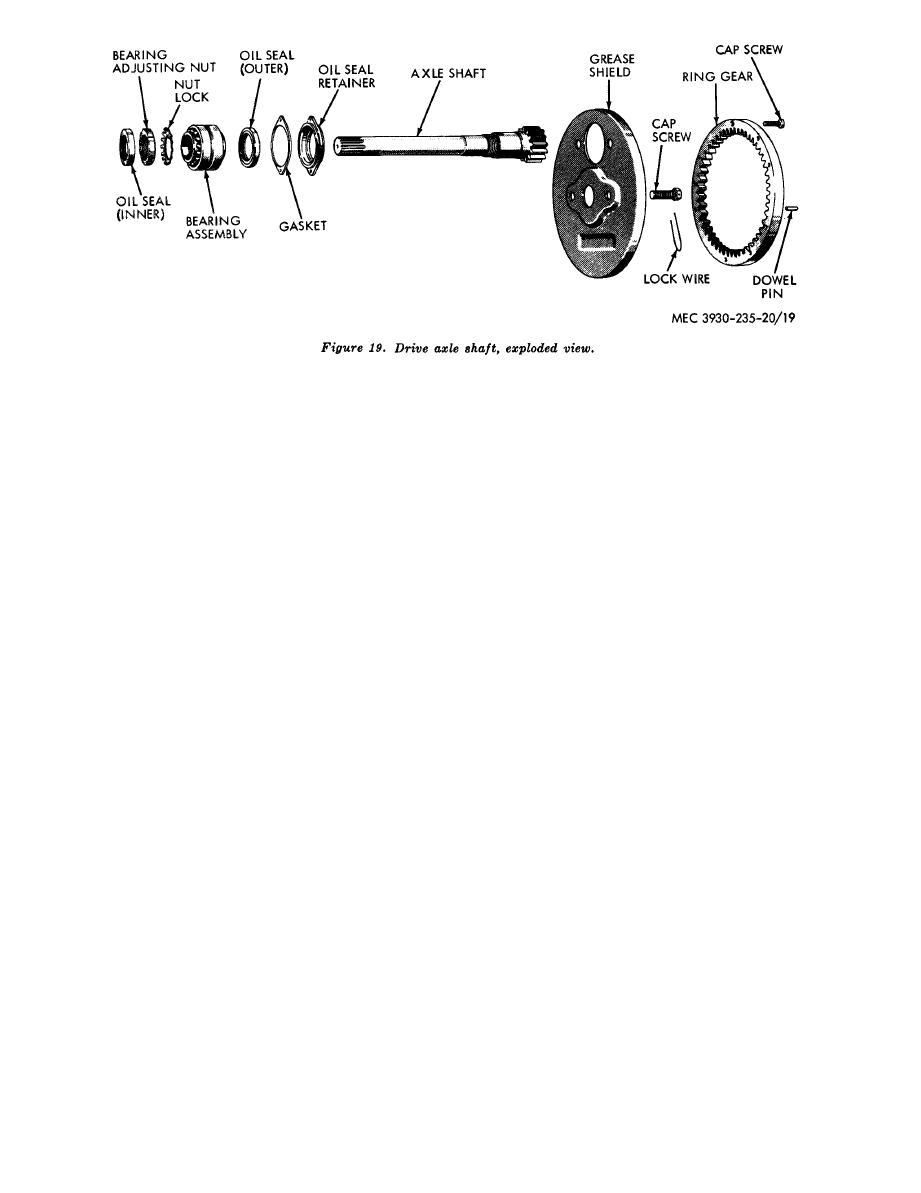
Figure 19. Drive axle shaft, exploded view |
|
||
| ||||||||||
|
|
 (4) If necessary, remove inner oil seal
scratches or scars using a fine emery paper,
then polish with emery cloth. If axle shaft
from axle housing using a suitable
surface will not clean up to a fairly smooth
puller.
finish, replace axle shaft.
(5) Repeat above procedures for other
side of truck if necessary.
e. Reassembly.
b. Disassembly.
(1) Reverse procedure in b above.
(1) Straighten ears of nut lock, then un-
(2) Tighten bearing adjusting nut until
screw and remove bearing adjusting
axle shaft binds when turned, then
nut and lock.
back off nut one-sixth turn, or until
(2) Remove bearing assembly, and oil seal
axle shaft turns without binding.
retainer assembly.
f. Installation. Reverse procedures in a
(3) If necessary, remove oil seal from re-
above, except that if gaskets were damaged or
tainer.
lost, it will be necessary to measure the gap
c. Inspection.
between the bearing retainer and the axle hous-
(1) Inspect bearing cones and cup for
ing. Refer to g below for adjustment of axle
scoring, nicks, or flat spots. If there
shaft.
is evidence of bearing cone or cup
g. Adjustment of Axle Shaft. To determine
wear, the bearing assembly must be
the amount of gaskets required to fill the gap
replaced as a complete assembly.
between the bearing retainer and the axle hous-
(2) Inspect axle shaft for chipped or
ing, install the axle shaft assembly in the axle
broken teeth or splines, and oil seal
housing without gaskets. Measure the clearance
ring surfaces for scratched or scarred
between bearing retainer and axle housing with
conditions.
a flat feeler gage. Select gasket thicknesses
d. Repair. If axle shaft oil seal bearing sur-
totaling 0.001 to 0.005 inch less than the meas-
faces are scratched or scarred, remove
ured gap dimension.
AGO 6217A
|
|
Privacy Statement - Press Release - Copyright Information. - Contact Us |