 |
|||
|
|
|||
|
|
|||
| ||||||||||
|
|
 TM10-3930-242-12
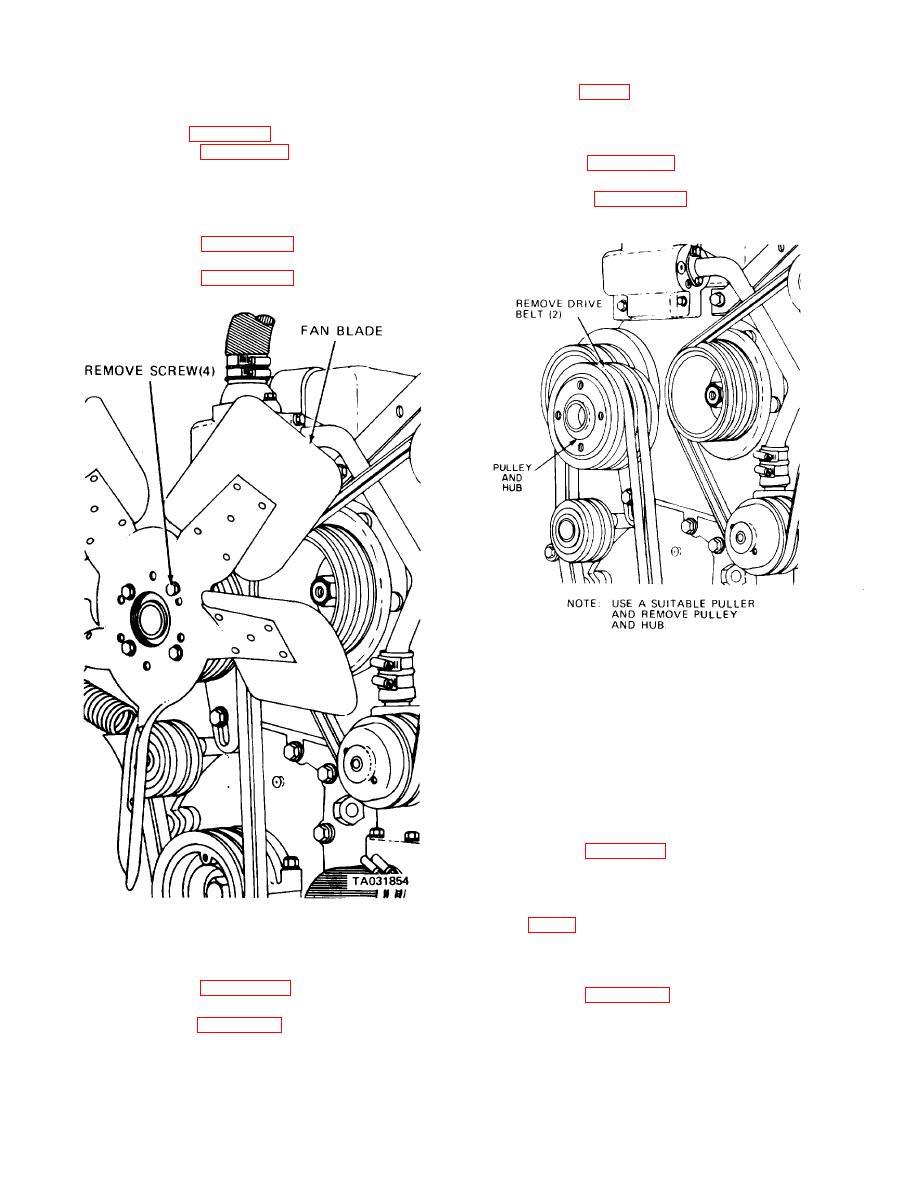
solvent (item 1, App F), and dry thoroughly.
4-29. Fan Blade
(2) Inspect the pulley and hub for cracks and
a. Removal.
breaks. Replace a defective pulley and hub.
(1) Refer to figure 4-14 and remove fan guard.
c. Installation.
(2) Refer to figure 4-17 and remove the fan
(1) Refer to figure 4-18 and install the pulley
blade.
and hub.
b. Inspection. Inspect the fan blade for nicks,
(2) Refer to figure 4-17 and install the fan
cracks, and breaks. Replace a defective fan blade.
blade.
c. Installation.
(1) Refer to figure 4-17 and install the fan
blade.
(2) Refer to figure 4-14 and install the fan
guard.
TA072397
Pulley Bracket
a. Removal.
(1) Move the radiator fan control lever down to
the ON position. In this position the spring is
shortened and will permit the spring loop to be
pulled from the bracket eye easily.
(2) Refer to figure 4-19 and remove the fan belt
tension control, spring, and bracket pulley.
b. Cleaning and Inspection.
(1) Clean all parts with drycleaning solvent
(item 1, App F) and dry thoroughly.
(2) Inspect for cracks, rust, and breaks. Replace
defective parts.
a. Removal.
c. Installation.
(1) Refer to figure 4-17 and remove the fan
(1) Refer to figure 4-19 and install the fan belt
blade.
tension control, and bracket pulley. Install the fan
(2) Refer to figure 4-18 and remove the pulley
guard.
and hub.
(2) Move the radiator fan control lever down to
b. Cleaning and Inspection.
the ON position to facilitate installation of the
(1) Clean the pulley and hub with drycleaning
spring. Install spring. Move fan control lever to the
OFF position.
|
|
Privacy Statement - Press Release - Copyright Information. - Contact Us |
