 |
|||
|
|
|||
|
Page Title:
CONNECTING RODS AND BEARINGS REPLACEMENT - continued |
|
||
| ||||||||||
|
|
 TM 10-3930-673-34
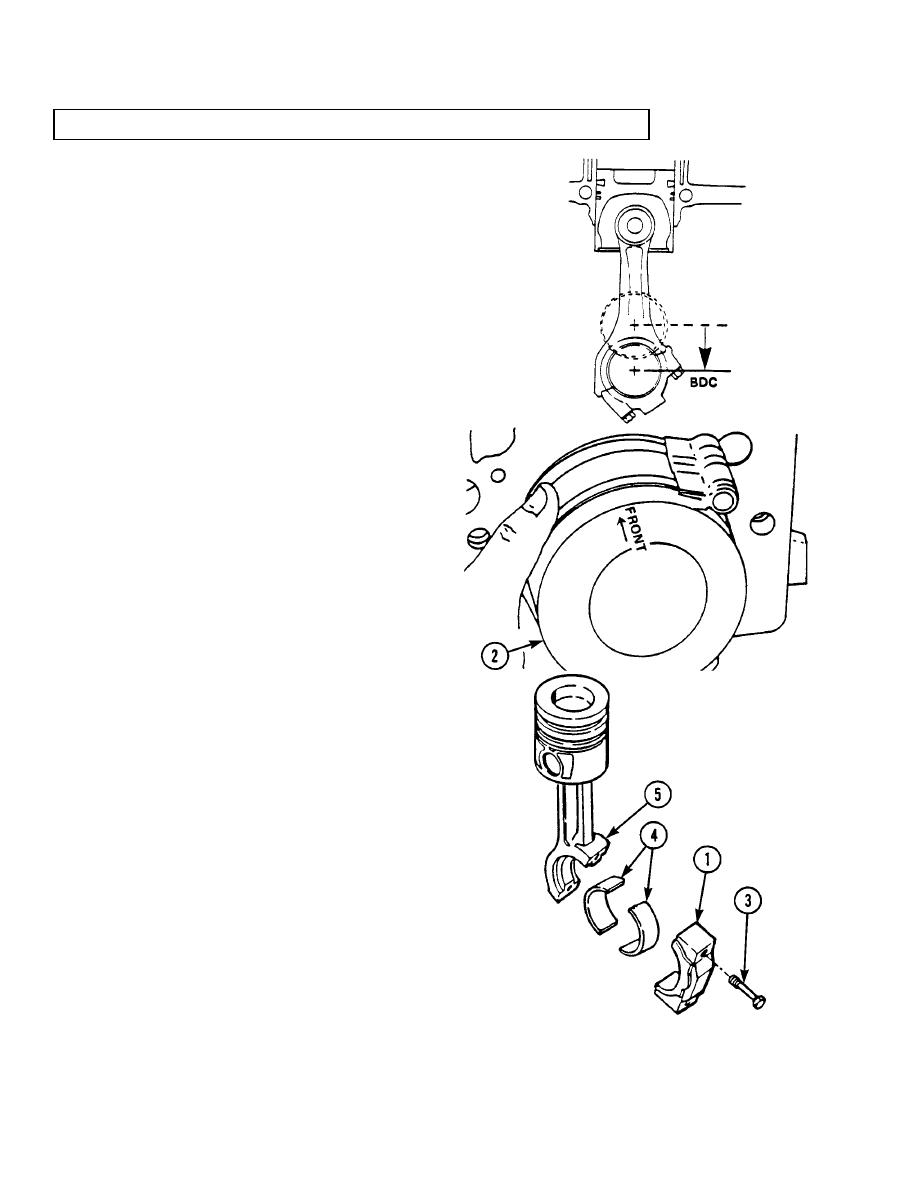
3-17. CONNECTING RODS AND BEARINGS REPLACEMENT (CONT)
(c)
Bar crankshaft (9) over so rod
journal for piston (2) and connecting
rod (5) assembly being installed is at
bottom dead center (BDC).
(d)
Install piston (2) and connecting
rod (5) assembly through top of
cylinder bore, using care not to
damage cylinder liner walls. Make
sure that side of piston containing
word, "FRONT," faces front (fan end)
of engine.
(e)
Continue to push piston (2) into
cylinder bore until top of piston is
approximately 2 in. (50.8 mm) below
top surface of cylinder block.
(f)
Repeat above procedure until all six
piston (2) and connecting rod (5)
assemblies are installed.
(g)
Obtain proper sized rod bearing set,
according to rod bearing clearance
measurement, in Inspection
Steps (4)(d) and (4)(e).
(h)
Install rod bearings (4) in
connecting rods (5) and bearing
caps (1).
(i)
Apply light coat of Lubriplate 105 to
rod bearing (4) bearing surfaces.
(j)
Grasp bottom of connecting rod (5)
and pull downward onto
crankshaft (9) rod journal.
(k)
Install bearing caps (1) with four-
digit numbers stamped on bearing
caps and on connecting rods (5), at
parting line, towards oil cooler side
of engine.
(l)
Apply engine lubricating oil to
threads and under heads of
screws (3). Install screws in bearing
cap (1) and connecting rod (5).
Tighten screws fingertight.
TR01638
3-116
|
|
Privacy Statement - Press Release - Copyright Information. - Contact Us |
