 |
|||
|
|
|||
|
|
|||
| ||||||||||
|
|
 TM 10-3930-660-24-2
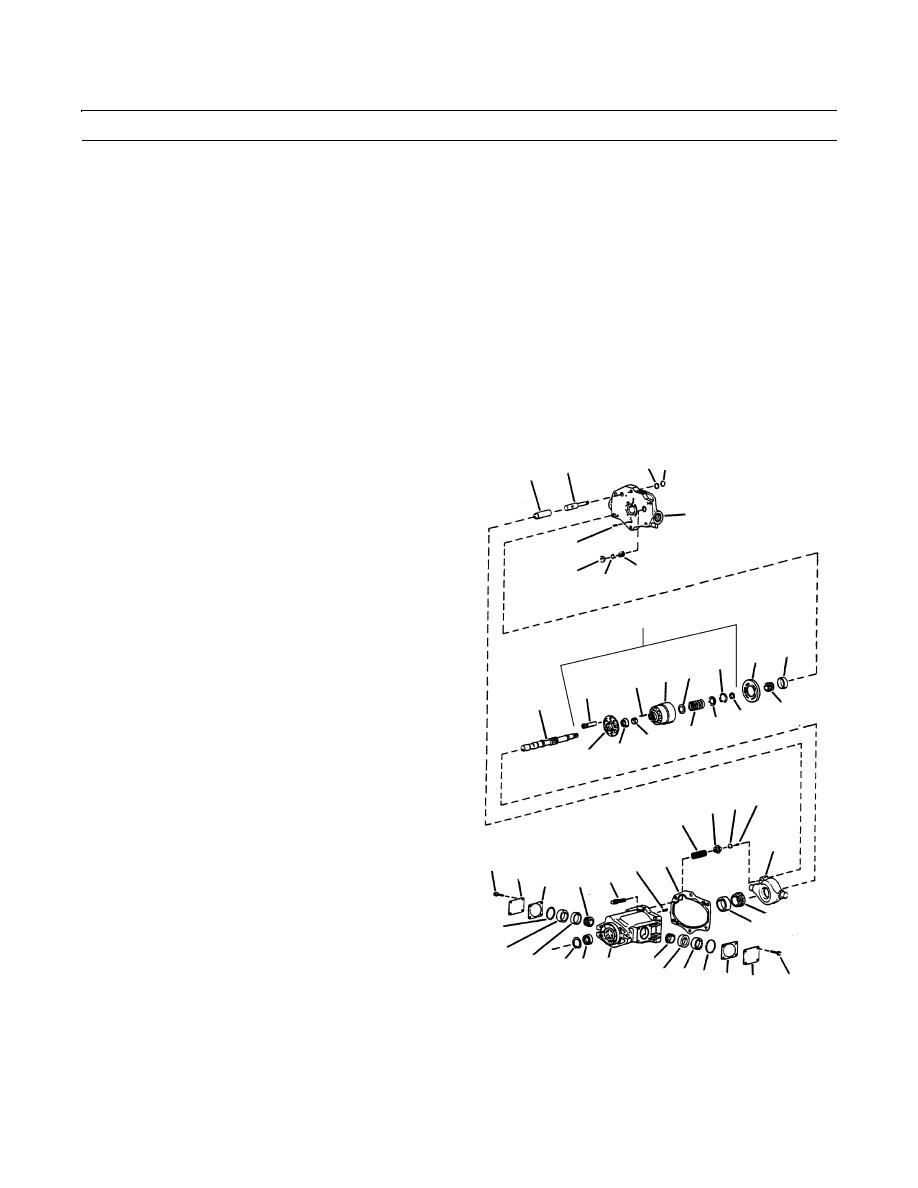
PISTON PUMP MAINTENANCE - CONTINUED
0256 00
ASSEMBLY - CONTINUED
NOTE
The side of the wafer plate with the locating pin groove must face the valve block.
46.
Assemble wafer plate (11) over bearing race (48) and plate groove over locating pin (12).
CAUTION
Wafer plate must be flat against valve block face. Check to make sure it does not rock back and forth. If
rocking motion occurs, make sure locating pin is bottomed out in the valve block. Wafer plate rocking will
induce high stress conditions and cause fractures in the wafer plate.
47.
Place valve block (3) on its side. Install piston rod (8) into valve block (3) and attach retaining ring (47).
48.
Install new O-ring (46) in the piston rod (8) O-ring
47 46
8
7
groove.
CAUTION
3
Be careful not to allow the piston to drop
12
from piston rod as this could damage the
piston.
44
42
43
49.
Install piston (7) over piston rod (8).
18
50.
Assemble valve block (3) to housing (6) with six
screws (9).
48
11
21
51.
Cross-torque screws (9) to bring valve block and
17 23
16
housing evenly together against gasket (10). Torque
23
15
screws (9) to 60-70 lb-ft (81-95 Nm).
13
22 14
20
25
24
19
34 36 37
35
26
49 10
28 29
9
27
31
38
39
32
33
30
31
40 41 6
30 33 32 27 29
28
409-1473
52.
Check shaft torque to verify correct bearing preload. If shaft torque is greater than 6 lb-ft (8 Nm), adjust shaft bearing
preload. See steps 22-27.
0256 00-12
|
|
Privacy Statement - Press Release - Copyright Information. - Contact Us |
