 |
|||
|
|
|||
|
|
|||
| ||||||||||
|
|
 TM 10-3930-660-24-1
CAB HEATER REPLACEMENT - CONTINUED
0168 00
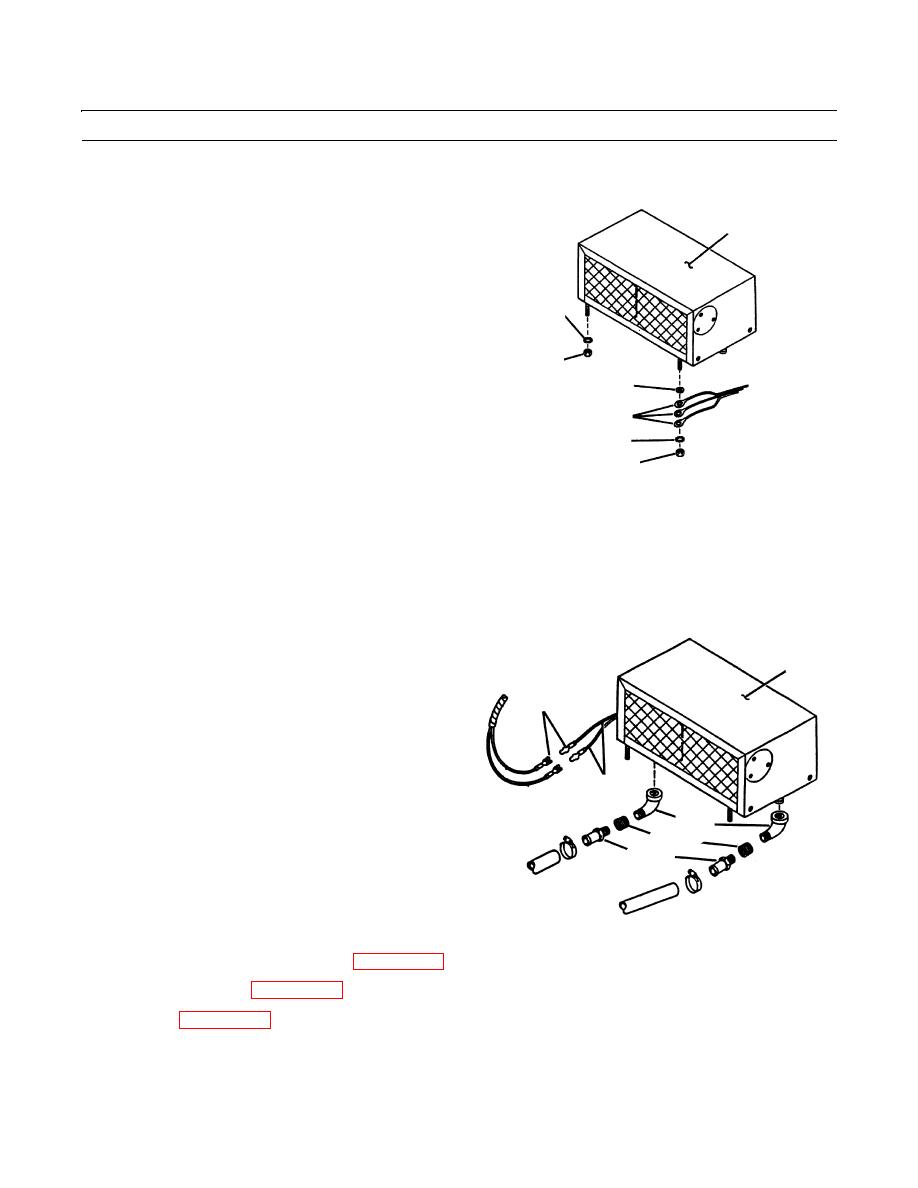
REMOVAL - CONTINUED
2.
Remove nut (5), starwasher (6), three ground leads (7)
4
and lockwasher (8) from left-front mounting stud of
heater (4). Discard starwasher and lockwasher.
3.
Remove nuts (9) and starwashers (6) at three remain-
ing mounting studs of heater (4). Discard starwashers.
6
4.
Disconnect two electrical leads (10) of heater (4) at
spade connectors (11) inside cab.
5.
Lift and remove heater (4) from cab floor.
9
8
7
6
5
409-624
INSTALLATION
NOTE
Apply loctite to male threads of connectors, elbows and heater.
1.
Position heater (4) so that mounting studs fit through
4
holes in cab floor.
2.
Connect two electrical leads (10) of heater (4) at spade
11
connectors (11) inside cab, as tagged.
3.
Position new lockwasher (8), three ground leads (7)
and new starwasher (6) on left-front mounting stud of
heater (4) under cab. Secure with nut (5).
10
4.
Install nuts (9) and new starwashers (6) on three
remaining mounting studs of heater (4).
3 3
5.
Install two connectors (1), connector bushings (2) and
2
2
elbows (3) to ports of heater (4).
1
1
409-625
6.
Fill engine cooling system with coolant (WP 0053 00).
7.
Connect battery cables (WP 0107 00).
8.
Install seat (WP 0160 00).
END OF WORK PACKAGE
0168 00-2
|
|
Privacy Statement - Press Release - Copyright Information. - Contact Us |
