 |
|||
|
|
|||
|
|
|||
| ||||||||||
|
|
 TM 10-3930-660-24-1
WINDSHIELD WASHER ASSEMBLY MAINTENANCE - CONTINUED
0165 00
INSTALLATION - CONTINUED
NOTE
8
Apply loctite to screws as installed.
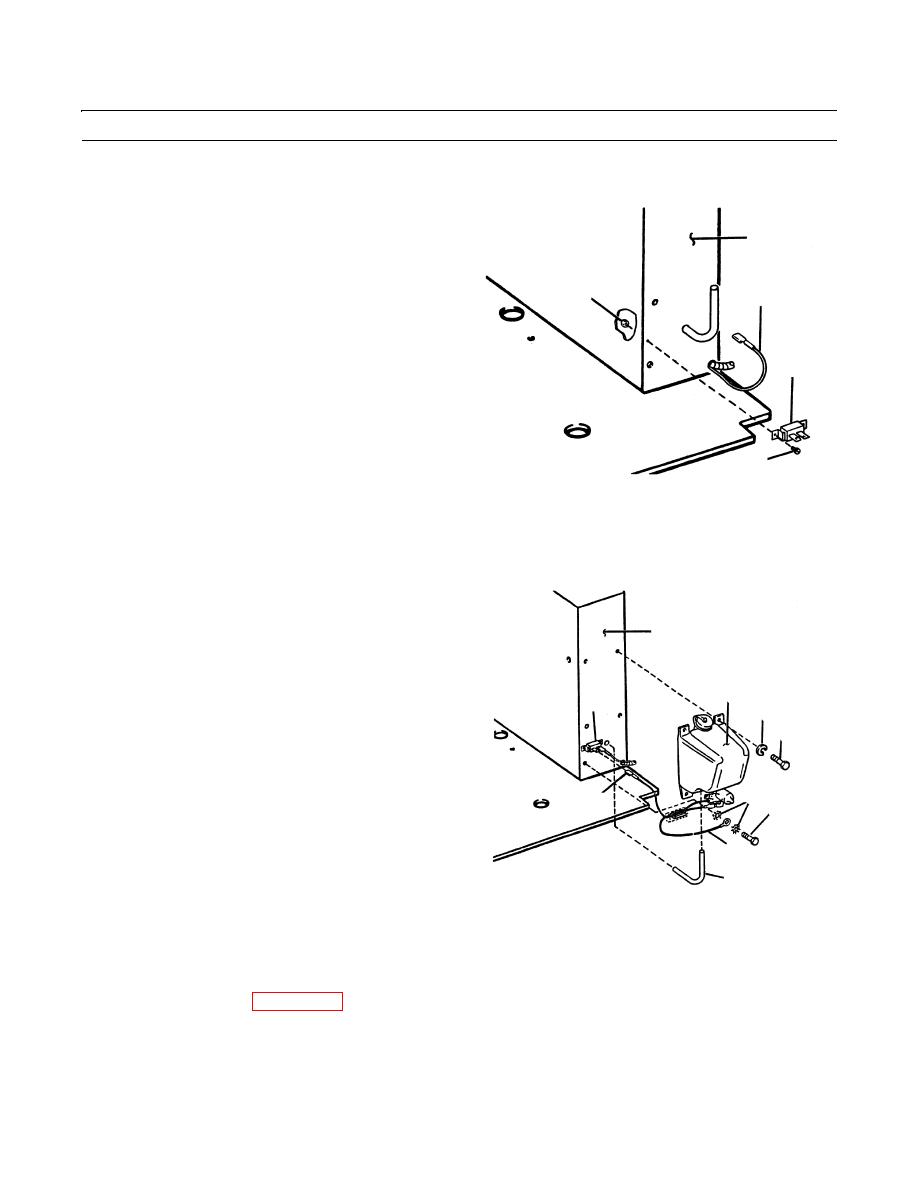
6.
Position resistor assembly (4) on side console (8) and
secure with two new locknuts (13) and two screws
13
12
(14).
7.
Connect female spade connector of electrical lead (12)
to male spade connector on resistor assembly (4) as
tagged.
4
14
409-611
NOTE
Apply loctite to threads of screws.
8.
Position reservoir assembly (2) on side console (8)
and secure with four new lockwashers (11) and four
screws (10).
8
9.
Push hose (9) on fitting at bottom of reservoir assem-
bly (2).
2
4
11
NOTE
10
Apply loctite to threads of capscrew.
10.
Secure electrical lead (7) to side console (8) with two
6
new starwashers (6) and capscrew (5).
3
5
11.
Connect female spade connector of electrical lead (3)
to male spade connector on resistor assembly (4) as
7
tagged.
9
409-610
12.
Fill reservoir assembly (2) with washer fluid as
described in Service.
NOTE
Install electric joystick if removed (WP 0235 00).
13.
Connect battery cables (WP 0107 00).
14.
Check for proper operation (TM 10-3930-660-10).
END OF WORK PACKAGE
0165 00-4
|
|
Privacy Statement - Press Release - Copyright Information. - Contact Us |
