 |
|||
|
|
|||
|
|
|||
| ||||||||||
|
|
 TM 10-3930-660-24-1
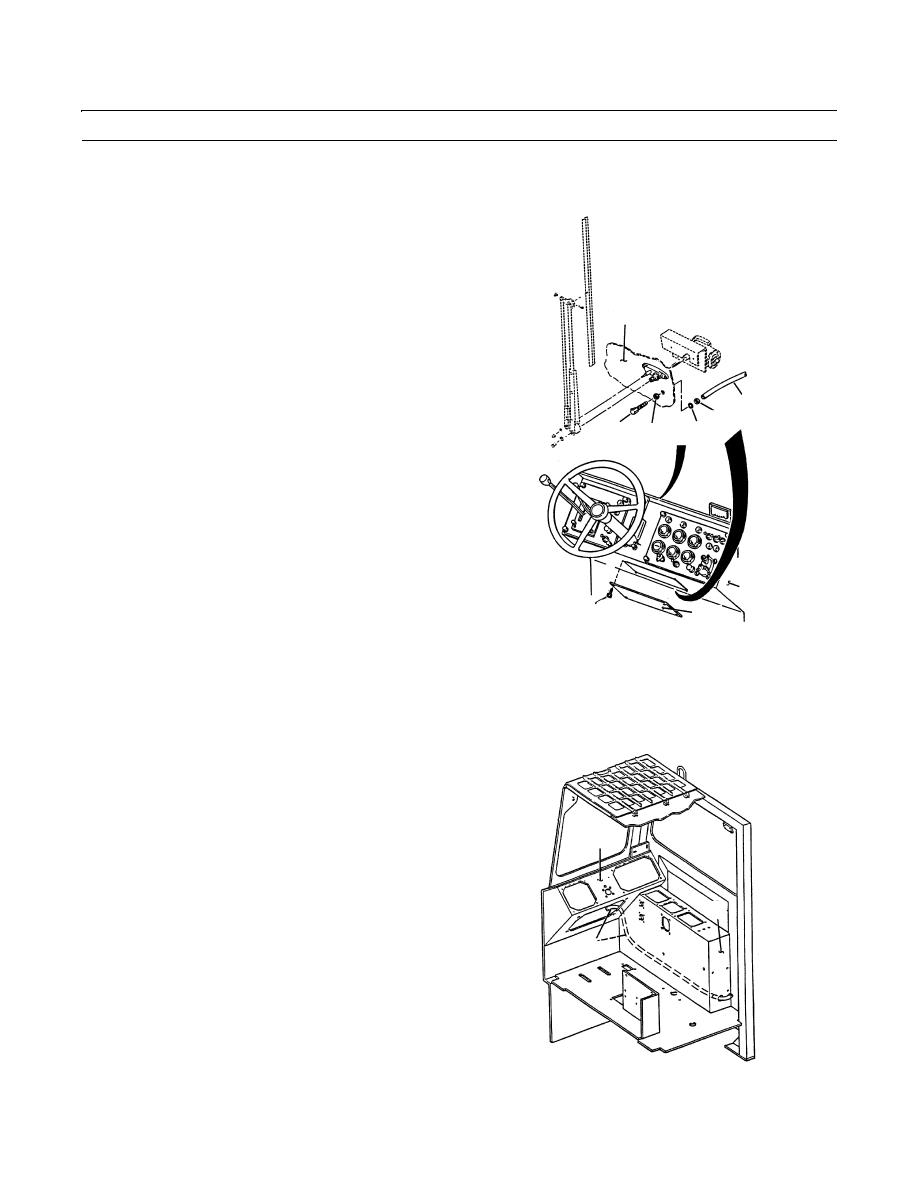
WINDSHIELD WASHER ASSEMBLY MAINTENANCE - CONTINUED
0165 00
REMOVAL - CONTINUED
NOTE
The washer nozzle is located on the cab
below the base of the front windshield
wiper.
7.
Remove four capscrews (15) and dashboard access
22
panel (16) from front console (17).
8.
From inside front console (17), pull and remove hose
(9) from washer nozzle (18). Remove nut (19) and
starwasher (20) from washer nozzle (18). Discard star-
9
washer.
19
9.
From outside machine, remove washer nozzle (18)
18
20
21
and rubber washer (21) from cab (22). Discard rubber
washer.
17
15
16
409-613
10.
Pull hose (9) out from hole at rear of side console (8).
INSTALLATION
1.
Push hose (9) into hole at rear of side console (8).
NOTE
For easier installation of hose, electric joy-
17
stick may be removed, if necessary (WP
0233 00).
2.
Continue to push hose (9) through side console (8)
8
until end of hose appears inside front console (17).
3.
From outside vehicle, position washer nozzle (18) and
9
new rubber washer (21) on cab (22).
4.
From inside dashboard, secure washer nozzle (18)
with new starwasher (20) and nut (19). Push hose (9)
onto washer nozzle.
5.
Secure dashboard access panel (16) to front console
409-614
(17) with four capscrews (15).
0165 00-3
|
|
Privacy Statement - Press Release - Copyright Information. - Contact Us |
