 |
|||
|
|
|||
|
|
|||
| ||||||||||
|
|
 TM 10-3930-660-24-1
DRIVE BELT AND TENSIONER REPLACEMENT - CONTINUED
0061 00
REMOVAL - CONTINUED
5.
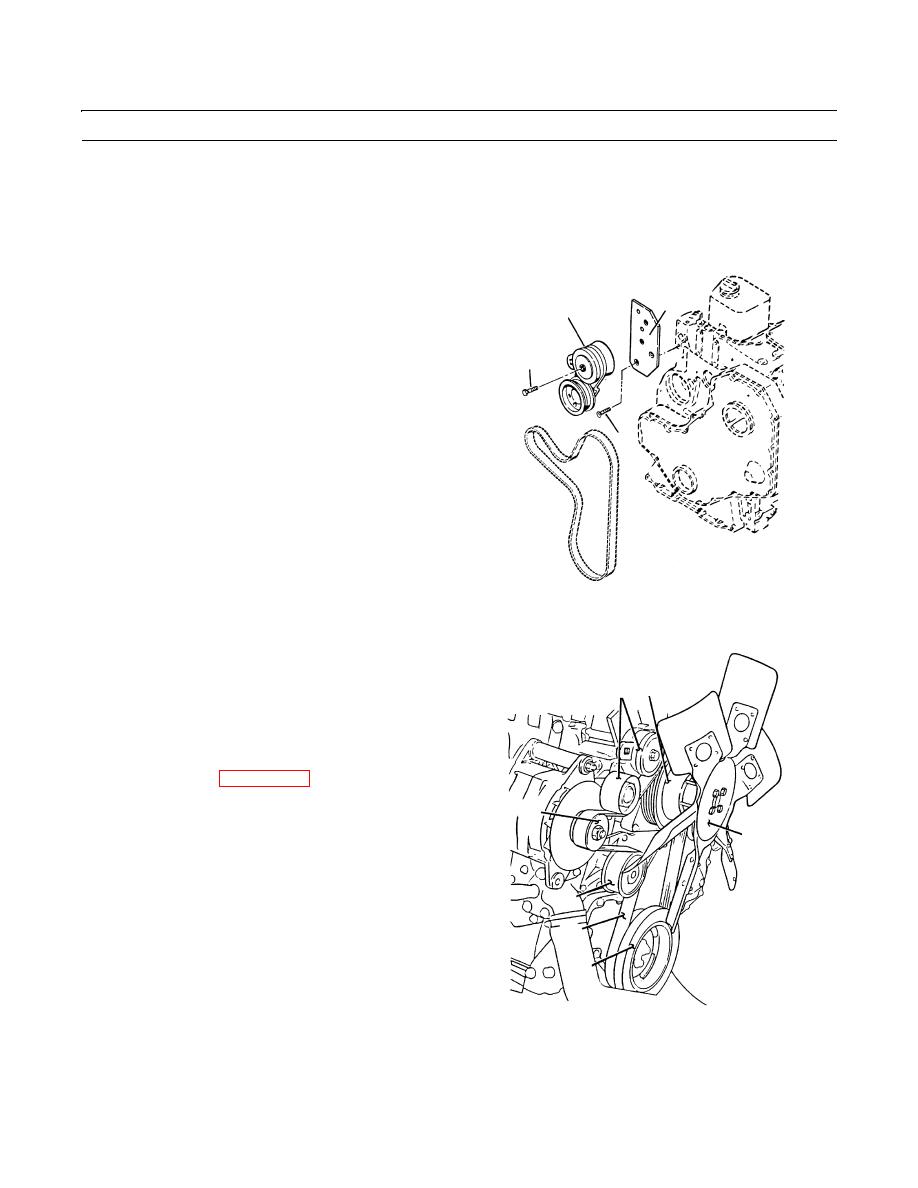
Remove capscrew (8) and tensioner (2) from bracket (9).
6.
If necessary, remove two capscrews (10) and bracket (9) from engine.
INSTALLATION
1.
If removed, install tensioner (2).
9
2.
If removed, secure bracket (9) to engine with two cap-
2
screws (10). Torque capscrews to 6 lb-ft (8 Nm).
3.
Align mounting hose on tensioner (2) with lower
8
mounting hole on bracket (9).
4.
Secure tensioner (2) to bracket (9) with capscrew (8).
Torque capscrew to 32 lb-ft (43 Nm).
5.
Install drive belt (1).
10
409-248
6.
Position belt (1) around blades of fan (7).
7.
Place belt (1) on crankshaft pulley (5), fan pulley (4)
2 4
and water pump pulley (6).
8.
Lift tensioner (2) and place belt (1) on alternator pul-
ley (3) and under tensioner. Lower tensioner assembly
(2).
9.
Install fan guards (WP 0060 00).
10.
Start engine and check for proper operation (TM 10-
3
3930-660-10).
7
6
1
5
409-247
END OF WORK PACKAGE
0061 00-2
|
|
Privacy Statement - Press Release - Copyright Information. - Contact Us |
