 |
|||
|
|
|||
|
Page Title:
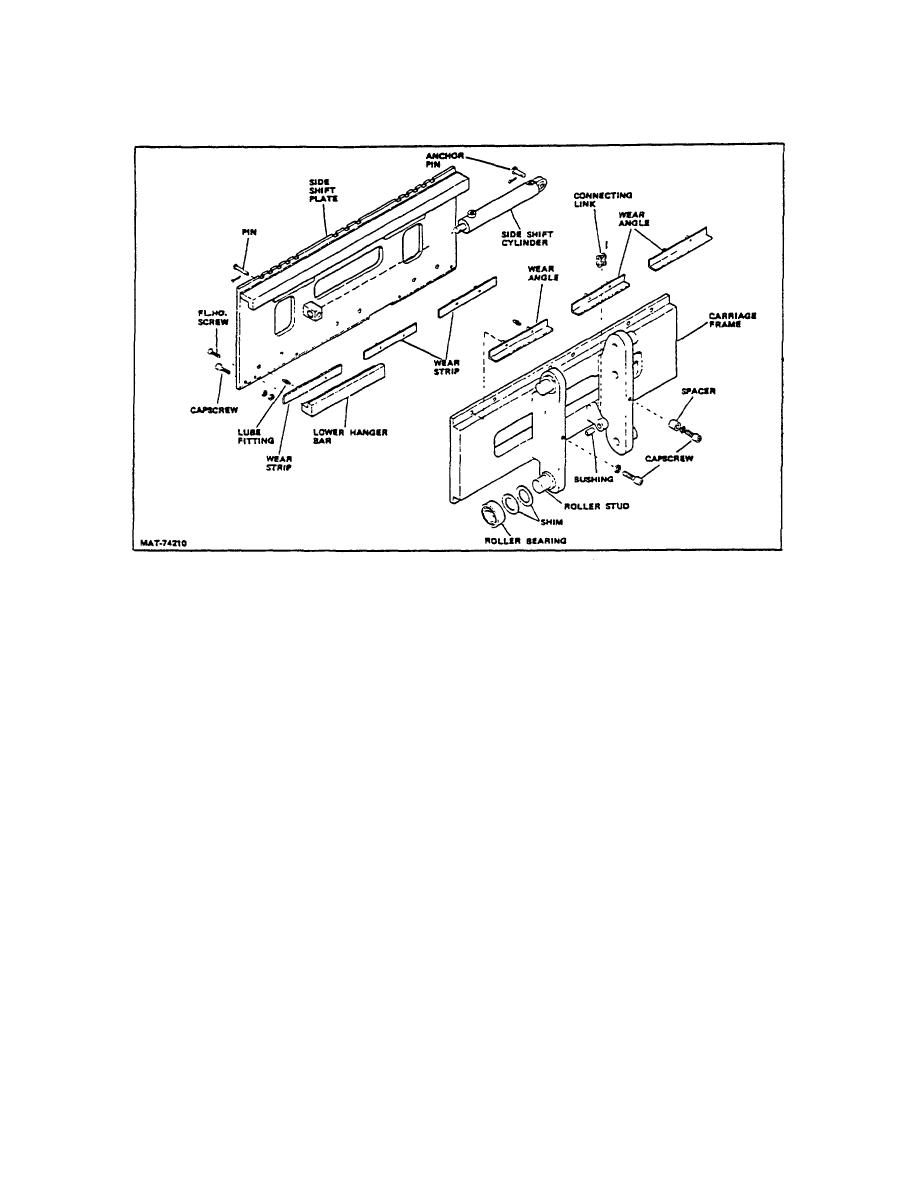
Figure 7. Side Shifter Components (Typical) |
|
||
| ||||||||||
|
|
 TM 10-3930-644-14&P
TOPIC 5 SIDE SHIFTERS
Figure 7. Side Shifter Components (Typical)
A. REMOVAL/INSTALLATION
6. Pry off wear strips at bottom of side shift and top
of carriage plates. Wear strips and wear angles
First disconnect hydraulic hoses at junction block on
should be replaced when worn to a thickness of
carriage frame, then refer to TOPIC I and perform the
.063".
appropriate removal (or installation) procedures.
7. Check all wear strip and wear angle mating
surfaces for nicks, foreign material or any high
B. DISASSEMBLY
spots. Repair or replace as necessary.
C. REASSEMBLY
NOTE
For disassembly of the carriage
1. Reinstall wear strips and wear angles by
frame refer to the appropriate topic
snapping into holes provided. Lubricate all wear
depending on the type carriage used.
strips and angles with a light coat of a Grade 2
1. To disassemble side shifter, first disconnect and
lithium base grease, (characterized by the word
plug the hydraulic hoses from the side shift
"Moly").
cylinder, to prevent entry of foreign particles.
2. Using a suitable hoist, lift side shift plate to
2. Disconnect side shift cylinder from side shift
relative mounting position at right side of
plate by removing retaining pin and cotter pin.
carriage frame (when facing carriage).
3. Attach a suitable hoist to side shift plate and
3. Carefully slide side shift plate onto carriage
take up slack in chain.
frame.
4. Slide side shift plate off right side of carriage
4. Reconnect side shift cylinder plunger to side
frame (when facing the carriage), and move/to
shift plate by reinstalling retaining pin and cotter
desired location.
pin.
5. remove lower hanger bars.
3-201
|
|
Privacy Statement - Press Release - Copyright Information. - Contact Us |
