 |
|||
|
|
|||
|
Page Title:
TOPIC 14. FILLER BLOCKS AND OIL GUARD |
|
||
| ||||||||||
|
|
 TM 10-3930-644-14&P
TOPIC 14. FILLER BLOCKS AND OIL GUARD
A. DESCRIPTION
The rear and front main bearings are sealed to the
cylinder block and the oil pan by a rear oil guard, rear
filler block, and a front filler block; these three
components are semicircular die castings equipped with
jute seals and neoprene seals (Figure 6-1). The oil
guard fits in the cylinder block, Just to the rear of the
rear main bearing. The rear filler block is assembled to
the cylinder block with capscrews, directly under the oil
guard.
Jute seals are mounted on the inner semicircular
grooves of the rear oil guard and filler block, where
contact is made with the crankshaft.
The outer
semicircular groove of the rear filler block also has
mounted a neoprene seal where contact is made
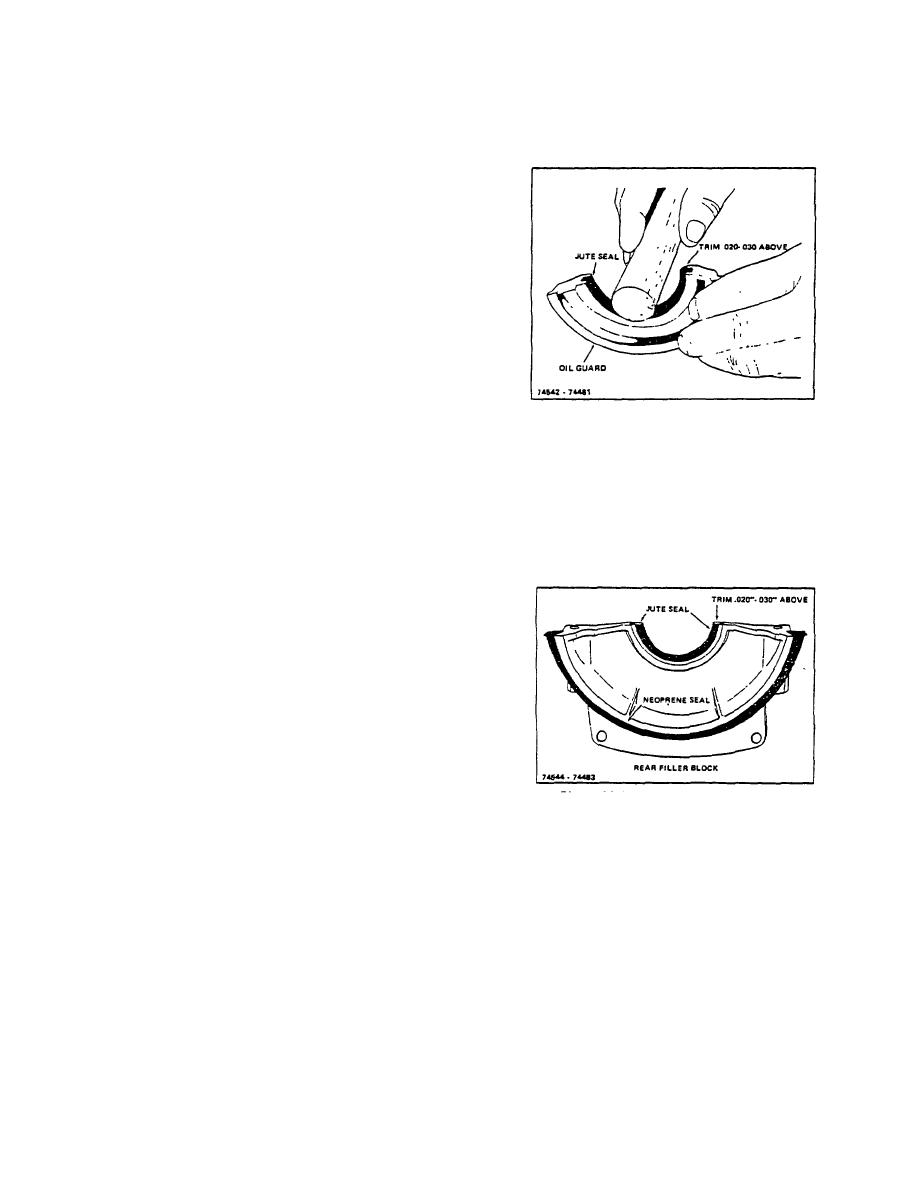
Figure 14-1. Installing Jute Seal in Oil Guard
between the filler block and the oil pan.
4. Press packing seal into the grooves of both the
The front filler block is assembled to the front of the
filler block and the oil guard. Then, using a
cylinder block with capscrews. A neoprene seal is
piston pin, a smooth hammer handle, or some
mounted on the outer semicircular groove of the front
other instrument with a rounded surface, iron
filler block to seal the connection with the oil pan.
this packing into the groove so that it is seated
firmly and expanded so that is seizes the sides.
B. REMOVAL
1. Refer
to
TOPIC
6.
CRANKSHAFT
COMPONENTS for access to Filler Blocks and
oil Guard.
2. With the engine resting on its side, remove the
rear and front filler blocks.
3. Remove the crankshaft.
4. Remove the oil guard.
C. SERVICING
Figure 14-2. Installing Jute Seal in Rear Filler Block
1. Remove the jute seals and neoprene seals from
the oil guard and the filler blocks; thoroughly
NOTE
clean inner and outer seal grooves to remove all
After installation, the jute packing will
dried cement and grease.
protrude from the grooves at either
end in varying amounts.
With a
2. Install jute seals on the oil guard and the rear
sharp knife, or razor blade, cut this
filler block. Refer to Figures 14-1 and 14-2.
off to project .020"-.030" above,
making the cut parallel to the surface
3. Jute packing for crankshaft seal as it is received
of the casting. Then slip it into place,
is approximately one-third larger in diameter
either around the crankshaft, if the
than the width of the groove. To fit the grooves
engine is still assembled, or directly
in the filler block, the packing must be crushed in
into the groove if the crankshaft is
a vise or flattened with a hammer on a flat
out.
surface so the Jute packing is narrow' enough to
fit into the grooves.
3-46
|
|
Privacy Statement - Press Release - Copyright Information. - Contact Us |