 |
|||
|
|
|||
|
|
|||
| ||||||||||
|
|
 TM 10-3930-644-14&P
NOTE
Refer to following paragraph F for
LIFT CYLINDER BLEED SERVICE.
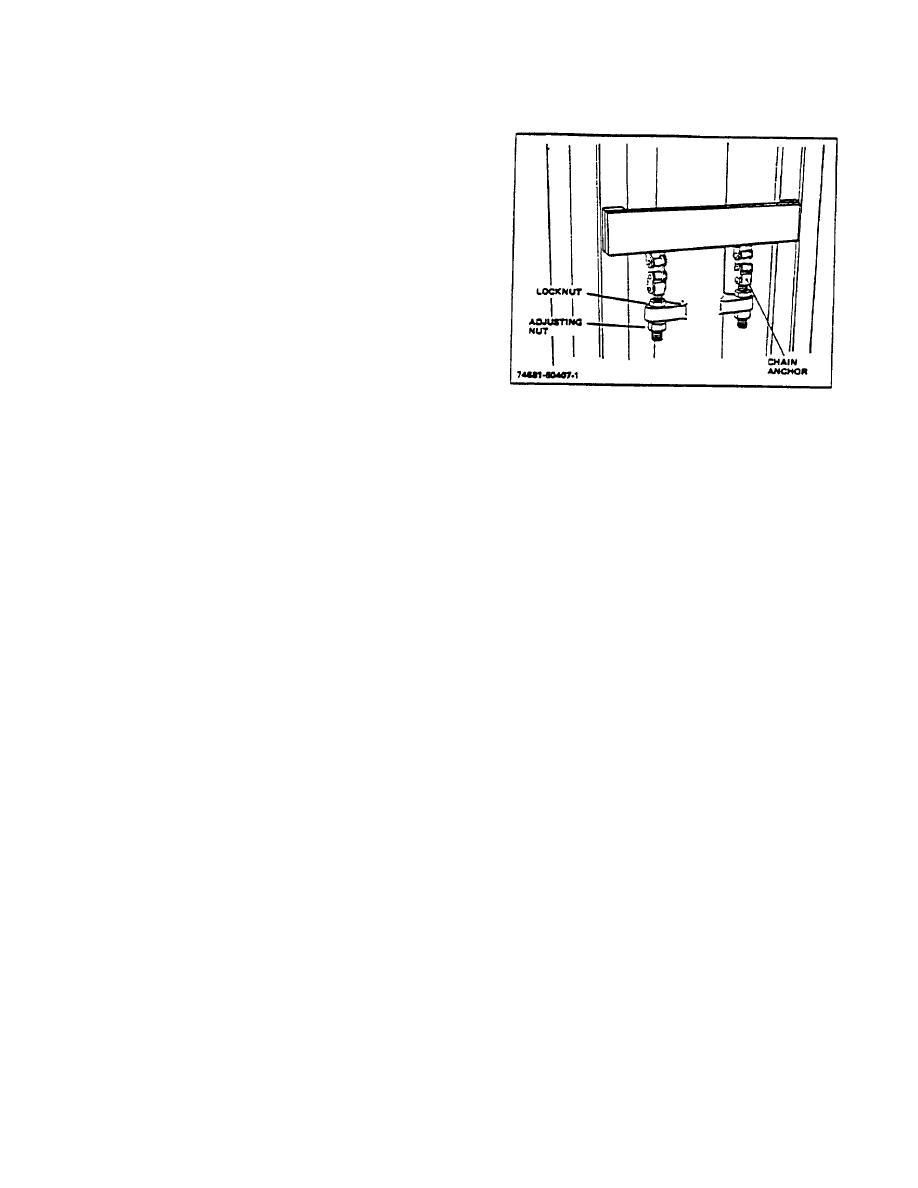
E. LIFT CHAIN ADJUSTMENT
When it becomes apparent that the fork carriage is not
level, that the lift chains are loose, or that the forks (or
attachments) are higher than .25" to .50" above the floor
when the lift cylinder is fully lowered, then the lift chains
require adjustment.
NOTE
ALL CLUSTER CYLINDERS are
adjusted
with
the
PRIMARY
Cylinders FULLY extended.
To adjust the chain length, refer to Figure 3-1 for a
Figure 3-1. Chain Adjustment (On Cylinder)
general view of chain anchor and use the following
outline:
F. LIFT CYLINDER BLEED SERVICE
1. Position the mast assembly so it is vertical.
1. Raise mast until forks are approximately 3 feet
Ensure that the inner mast section and lift
off of the ground.
cylinder are in the fully lowered position.
2. Open cylinder bleed screw(s).
2. Loosen the chain anchor locknuts (Fig 3-1).
Leave open until a stream
of
PURE
3. Chain tension is adjusted by increasing or
HYDRAULIC OIL comes out.
decreasing the chain lengths with the adjusting
nuts. Alternately tighten or loosen the chain on
NOTE
one side and then on the opposite side, until the
Be sure the oil being emitted is free
chains are snug, with no slack and carriage
of any air bubbles that may be seen
forks clear the floor within .25" to .50".
only under close inspection. Leave
bleed screws open until pure oil
4. Make certain that the lift chain tension is equal
comes out.
on each chain and that the fork carriage is level.
3. Close bleed screw(s) tight.
5. After the adjustment is completed, tighten the
locknuts securely and make certain anchors
4. Check hydraulic oil level; fill if required with pre-
were not turned.
filtered specified oil.
5. Raise and lower mast to check for leaks, if any,
and repair as necessary.
2-100
|
|
Privacy Statement - Press Release - Copyright Information. - Contact Us |
