 |
|||
|
|
|||
|
Page Title:
TOPIC 3 ALTERNATOR AND REGULATOR |
|
||
| ||||||||||
|
|
 TM 10-3930-644-14&P
TOPIC 3 ALTERNATOR AND REGULATOR
A. DESCRIPTION
Although the alternator and its built-in regulator are
designed and constructed to give trouble-free service for
long periods of time, following a regular inspection
procedure will allow maximum life to be obtained from
the units.
The inspection frequency will be determined by the type
of operating conditions. High speed operation, high
temperatures, and heavy duty conditions all increase
wear on the alternator slip rings and bearings. The
terminals should be inspected at regular intervals for
corrosion or loose connections.
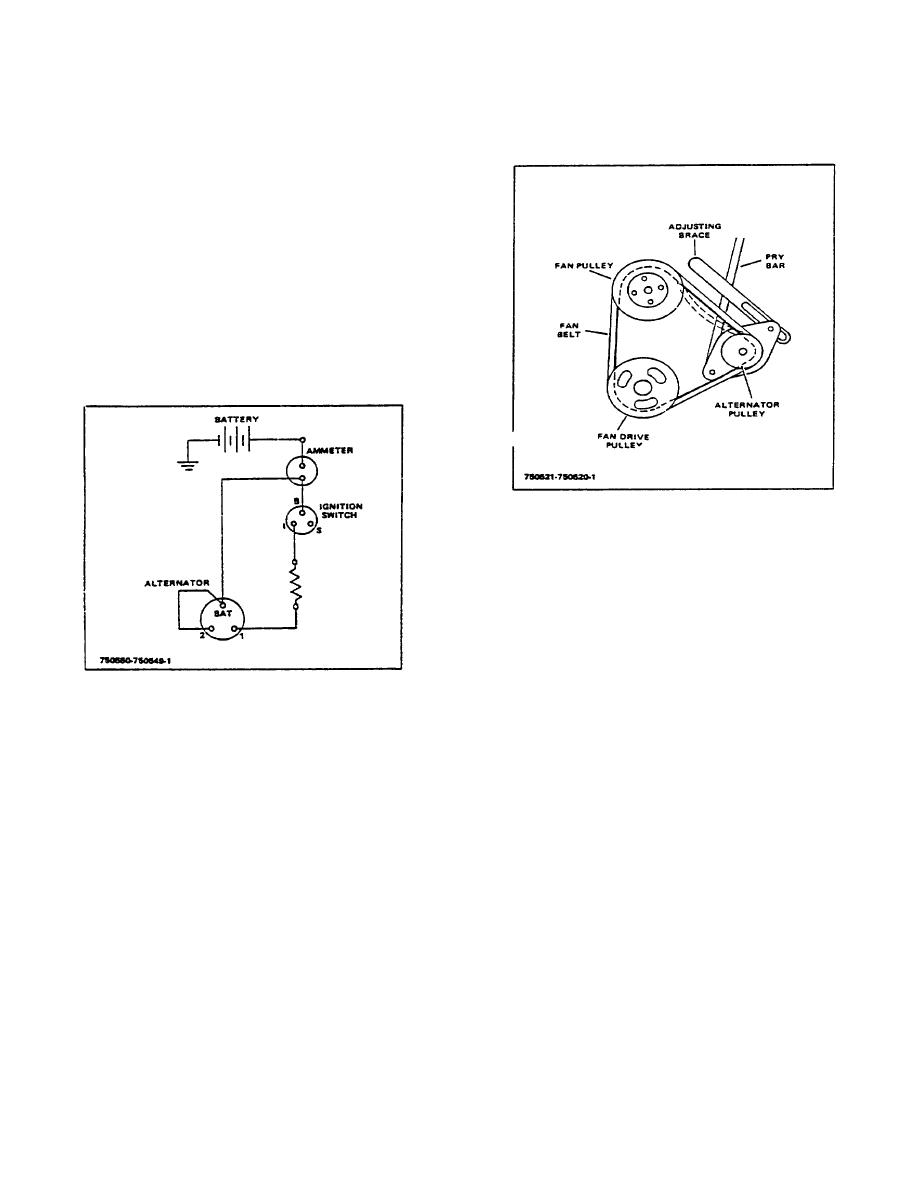
Figure 3-2. Fan Belt Tension
NOTE
For proper disassembly, inspection,
repair and reassembly procedures,
refer to REPAIR MANUAL.
C. REMOVAL
1. Disconnect the battery from the electrical circuit
prior to alternator removal/installation.
Figure 3-1. Typical Wiring Diagram
2. Disconnect the "BAT" (battery) terminal and "#1"
B. ADJUSTMENT
and "#2" post connectors at the alternator.
Be sure to check the mounting bolts for tightness and
3. Loosen adjusting brace and mounting bolt, then
the belt for alignment, corrosion, tension and wear. Belt
push alternator towards engine until fan belt is
tension should be adjusted to allow approximately 3/8"
disengaged from alternator pulley.
inward deflection of the belt between the alternator
pulley and the fan pulley with a force of about 10
4. Carefully remove the alternator from the engine
pounds. (See Figure 3-2).
as the pivot mounting bolt and adjusting brace
capscrew are removed.
When tightening belt tension, always apply pressure
against the stator laminations, never against the end
NOTE
frames.
Refer to REPAIR MANUAL for
DISASSEMBLY,
INSPECTION,
A noisy alternator can be caused by worn or dirty
REPAIR AND REASSEMBLY.
bearings, loose mounting bolts, a loose drive pulley, a
defective diode or a defective stator
M-146-1
2-25
|
|
Privacy Statement - Press Release - Copyright Information. - Contact Us |