 |
|||
|
|
|||
|
Page Title:
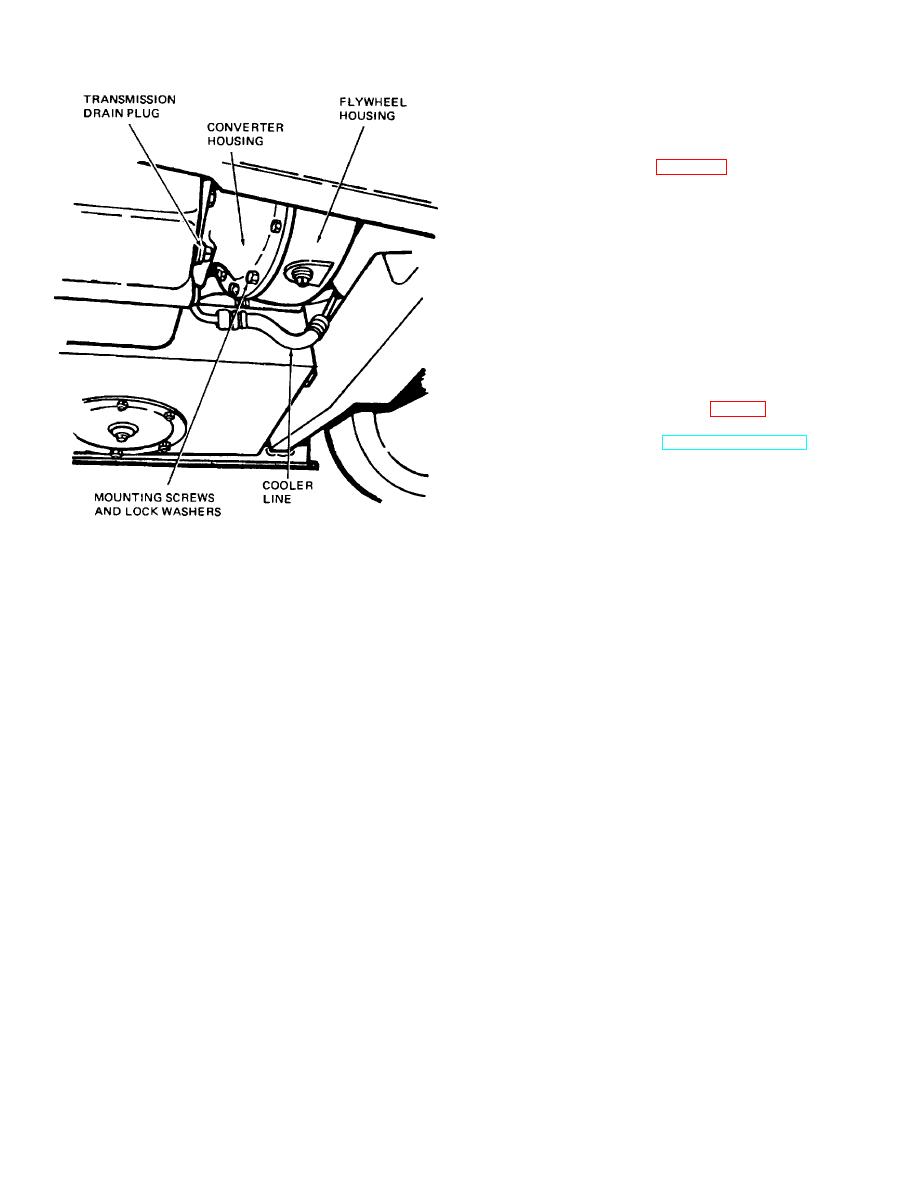
Figure 2-1. Transmission, installed view. |
|
||
| ||||||||||
|
|
 TM 10-3930-621-34
(10) Remove six screws and flat washers attaching
converter to flywheel and remove converter from
flywheel.
(11) Discard converter shim if it is damaged.
b. Installation.
(1) Check clearances (para 6-11) and install shim of
equal thickness on converter.
(2) Secure converter to flywheel with six screws and
flat washers.
(3) Attach converter reinforcing plate to drive plate
with six bolts.
(4) Secure reinforcing and drive plate assembly to
flywheel with six screws and flat washers.
(5) Using hoist, carefully insert transmission forward
shaft of assembled unit, into converter.
Caution: Use extreme care in alining splines of
forward shaft and converter, so as not to damage
spline edges.
(6) Secure converter housing to flywheel housing
with 12 screws and lock washers (fig. 2-1).
(7) Install propeller shaft cross assembly on output
flange in accordance with TM 10-3930-621- 12.
(8) Install cooler lines and control linkages (TM 10-
3930-621-12).
(9) Install drain plug.
(10) Remove transmission oil level gage and fill
transmission with internal combustion engine lubricating
oil OE until a full reading can be obtained on the gage.
Figure 2-1. Transmission, installed view.
Caution: Do not overfill transmission.
(11) Install corner post, battery and battery case,
(7) Carefully slide transmission forward shaft from
seat deck assembly, and floor plates (TM 10- 3930-621-
torque converter and remove unit from truck,
12).
(8) Remove six bolts and lock washers attaching
(12) Operate transmission for a few minutes and
converter drive and reinforcing plates to flywheel and
recheck oil level and connections.
remove plates from flywheel.
(9) Remove six bolts attaching drive plate to
reinforcing plate and remove reinforcing plate from drive
plate.
2-5
|
|
Privacy Statement - Press Release - Copyright Information. - Contact Us |
