 |
|||
|
|
|||
|
Page Title:
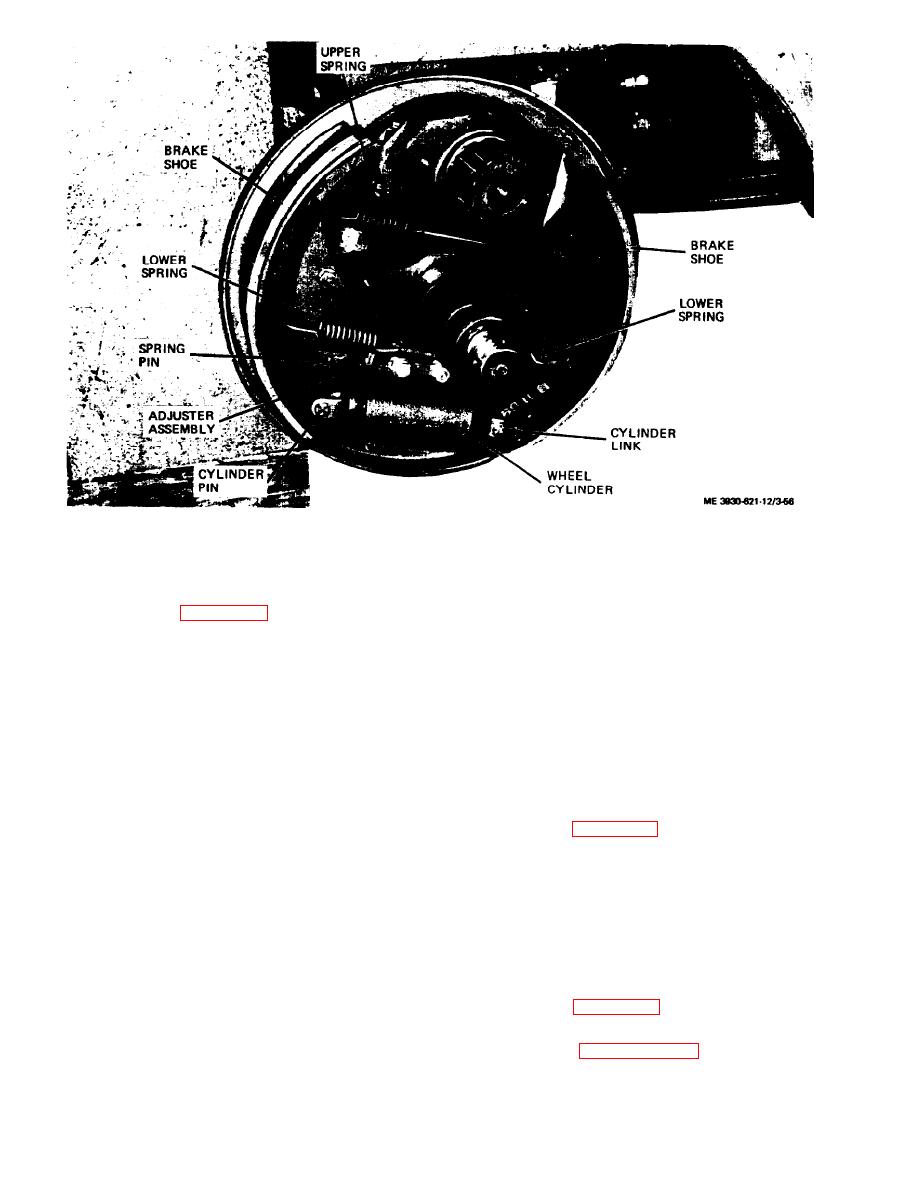
Figure 3-56. Service brake shoes,installed view |
|
||
| ||||||||||
|
|
 Figure 3-56. Service brake shoes,
installed view
(3) Refer to figure 3-56 and remove the brake
(5) Inspect brake shoes for wear, cracks, and
shoes as follows:
other damage.
(a) Disconnect three springs from the brake
(6) Inspect return springs for broken, nicked,
shoes.
or fatigued coils.
(b) Disconnect brake shoes from wheel cylinder
d. Installation.
and lift brake shoes and attached adjuster assembly
from backing plate.
Caution: Brake shoes are free floating and
(c) Using a suitable brass drift, drive the
self-adjusting. Check for obstractions during in-
spring pins from adjuster assembly and remove ad-
stallation that could interfere with floating action.
juster assembly.
Note. Do not disassemble adjuster assembly. Assembly is pre-
set at factory for correct operation.
(1) Refer to figure 3-56 and install brake shoes
as follows:
(d) Remove pins securing cylinder links to
(a) Install wheel cylinder links on bottom of
brake shoes and remove links.
brake shoes and secure links with pins.
c. Cleaning and Inspection.
(b) Install adjuster assembly on brake shoes
(1) Inspect linings on shoes for wear, dirt, grease,
and secure to brake shoes with spring pins.
and brake fluid.
(c) Install brake shoes on backing plate, with
(2) Clean linings thoroughly to remove foreign
links installed in ends of wheel cylinder. Hold shoes
matter.
in position and install three return springs.
(3) Inspect brake drums in wheels for cracks,
(2) Refer to figure 3-57 and install dust shield
deep scratches, and other defects.
and secure with four screws and lock washers.
(4) If linings are worn to less than 1/8 inch or
if linings are saturated with fluid or grease, re-
(3) Refer to paragraph 3-67 and install drive
place shoes.
wheels.
3-48
|
|
Privacy Statement - Press Release - Copyright Information. - Contact Us |