 |
|||
|
|
|||
|
Page Title:
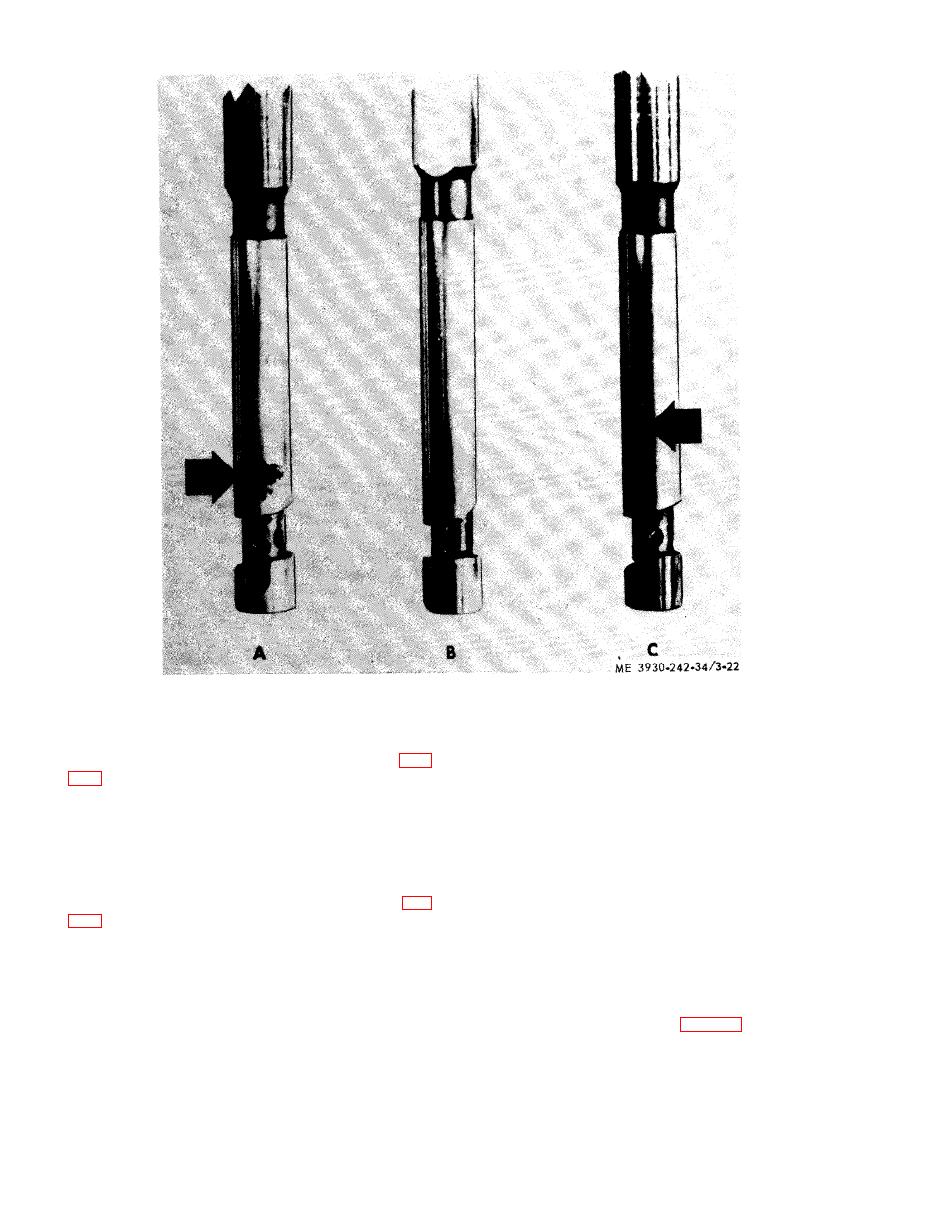
Figure 3-22. Defective fuel injector plungers. |
|
||
| ||||||||||
|
|
 TM 10-3930-242-34
approximatley 1.659 inches. Replace spring
(4) Clean the spray tip orifices with pin vise
when load of less than 48 pounds will compress
and the proper size spray tip cleaning wire (fig.
it to 1.028 inch.
( 8 ) Check the seal ring area in the injector
Use 0.0055 diameter wire to clean the holes. Be-
b o d y and surface which contacts the injector
fore using wire, hone the end of wire until it is
b u s h i n g for damage. If necessary, lap this sur-
smooth and free of burs. Allow wire to extend 1/8
face.
inch from the tool.
(9) Inspect the injector plunger for scoring,
( 5 ) Clean and brush all passages in the in-
e r o s i o n , chipping, or wear. Check the locating
j e c t o r body. Carefully insert reamer into injec-
p i n and the bushing. Slip the plunger into the
t o r nut and ream injector spray tip seat (fig
b u s h i n g and check for free movement. Plungers
a n d bushings are mated parts and must be re-
T u r n the reamer in a clockwise direction to re-
p l a c e d as an assembly.
m o v e carbon deposits.
( 1 0 ) Inspect the spray tip seating surface of
( 6 ) Inspect the teeth on control rack and
the injector nut for nicks, or burs.
c o n t r o l rack gear for wear or damage. Inspect
(11) Inspect the sealing surface of the injec-
b o t h ends of spill deflector for sharp edges or
tor parts as indicated by arrows (fig. 3-29). In-
b u r s . Remove burs with a medium stone.
s p e c t all surfaces with a magnifying glass for
( 7 ) Inspect follower spring for defects and
e v e n the slightest imperfections will prevent
p r o p e r tension. The spring has a free length of
|
|
Privacy Statement - Press Release - Copyright Information. - Contact Us |