 |
|||
|
|
|||
|
|
|||
| ||||||||||
|
|
 TM 10-3930-644-14&P
4. Remove drain plug at bottom of differential
9. Mark the bearing caps and differential housing
housing assembly and drain oil.
(Figure 14) to aid min proper alignment during
5. Remove the parking brake cable at the brake
reassembly; then remove the lockwire securing
actuating lever and disconnect the hydraulic
capscrews, cotter pins and the retaining bearing
lines or leakage return line if they might hinder
caps.
differential and carrier assembly removal.
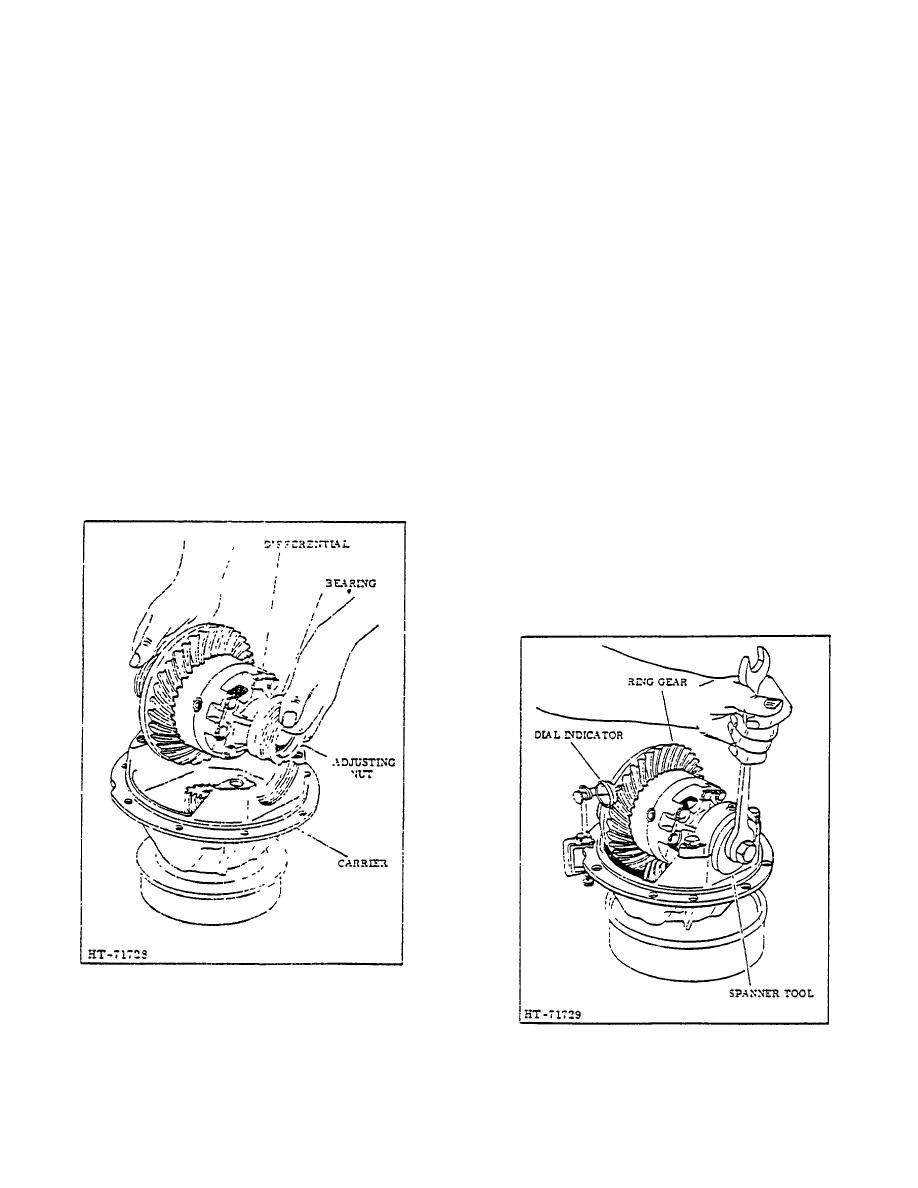
10. Refer to Figure 15 and remove the differential
6. Remove the securing capscrews which mount
case assembly along with the adjusting nuts,
the carrier and differential assembly to the axle
bearings and bearing cups.
housing.
NOTE
WARNING
Refer
to
DIFFERENTIAL
and
Be sure to properly support the
CARRIER DISASSEMBLY Section,
carrier assembly as the capscrews
REPAIR
MANUAL
for
proper
are removed.
INSPECTION
and
REPAIR-
REPLACEMENT Procedures.
7. Carefully withdraw the carrier and differential
assembly from the axle housing and place on a
C. INSTALLATION
suitable workbench.
1. Refer to Figure 15 and install the differential
case assembly along with adjusting nuts,
NOTE
bearings and bearing cups in the same relative
It may be necessary to lightly tap the
positions as these components were prior to
carrier housing in order to free it
removal.
from seal.
2. After ensuring that the ring gear has meshed
8. Remove and discard gasket between carrier
with the pinion gear, replace the bearing caps,
housing and axle housing.
but do not tighten.
CAUTION
Make sure the bearing caps are
reinstalled as marked at time of
disassembly.
3. Coat the ring gear with Prussian Blue or white
lead to obtain the tooth pattern.
Figure 15. Removing Differential from Carrier
Figure 16. Adjusting Backlash
2-70
|
|
Privacy Statement - Press Release - Copyright Information. - Contact Us |
