 |
|||
|
|
|||
|
|
|||
| ||||||||||
|
|
 (3) The bubble in the level of the protractor
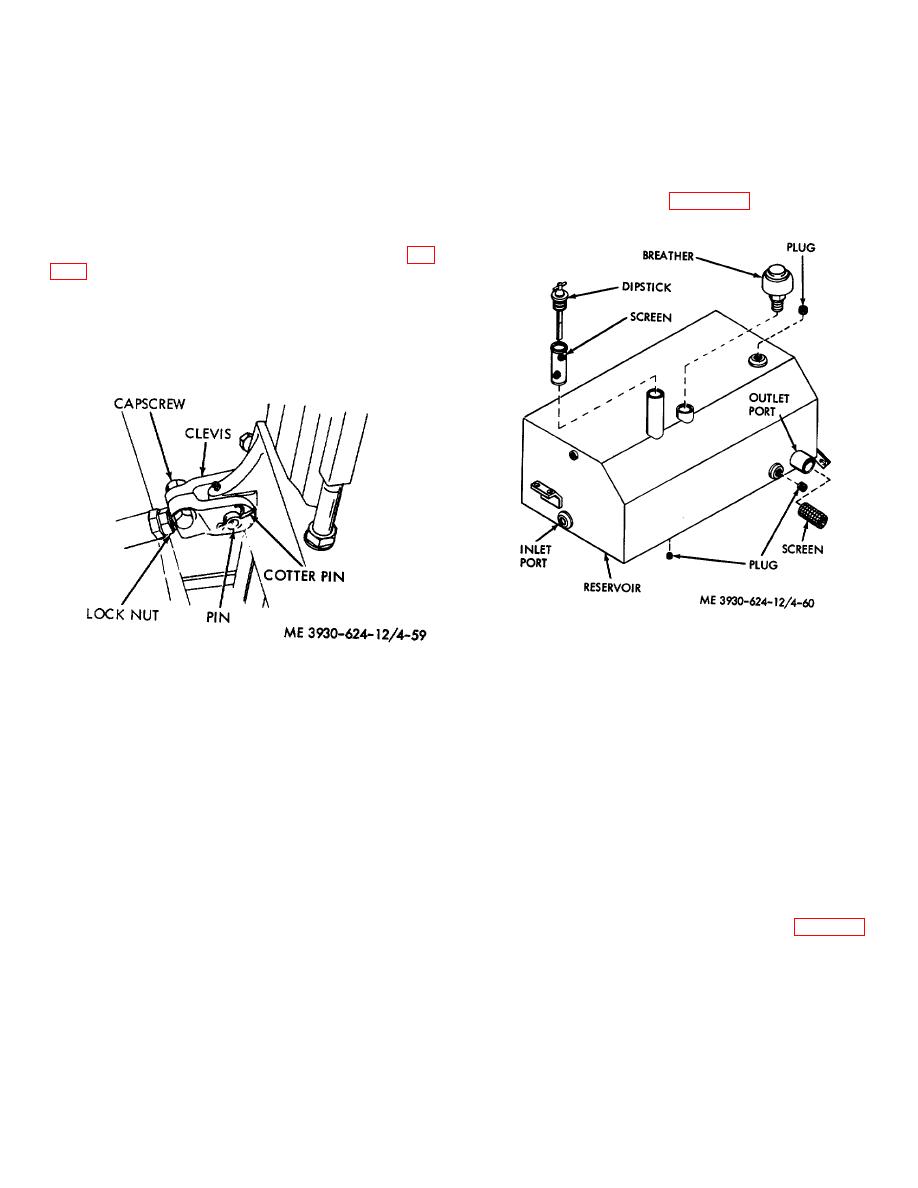
4-63. Oil Reservoir
should center if the degree of backward tilt is correct.
a. General. The hydraulic oil reservoir is located
at the right side of the truck frame below the corner
Note. Check both the right and the left side
post. The purpose of the hydraulic reservoir is to hold
of the mast assembly and at the same time make
sufficient oil for the entire hydraulic system. The
reservoir is composed primarily of the dipstick and filler
sure both cylinders have bottomed.
screen, breather assembly, suction hose and filter
screen, and drain plug.
(4) If adjustment is necessary, tilt the mast to
the forward position and loosen the capscrew on the tilt
cylinder clevis. Loosen the hex nut and place a wrench
on the adjusting hex on the tilt cylinder rod and, turn in
or out of the clevis to obtain the proper adjustment (fig.
(5) After each adjustment, check the degree
of tilt. When the proper degree of tilt is obtained tighten
the capscrews at the yoke.
(6) The forward tilt angle is automatically
adjusted when the backward tilt is set.
Figure 4-60. Hydraulic oil reservoir.
(1) Disconnect the suction and return lines at
the reservoir.
Figure 4-59. Tilt cylinder yoke.
(2) Remove the breather. Clean the outside
and inside of the reservoir with a cleaning solvent.
4-62. Lines and Fittings
(3) Dry with compressed air.
a. Inspection.
(4) Install the breather and suction and return
(1) Inspect all fittings for damaged or stripped
lines.
threads.
(5) Service the reservoir every 1000 hours.
(2) Inspect clamps for cracks, stripped
(6) Clean the filter screen at the suction hose
threads, perforated bands, or other damage.
with a cleaning solvent every 1000 hours.
(3) Inspect flexible lines for soft spots, cracks,
breaks, punctures, fraying, or other signs of damage or
4-64. Oil Filter
wear.
a. Removal.
(4) Inspect metal tubing for cracks, breaks,
(1) Remove the right-hand cowl.
wear or corrosion leaks, bends which could greatly
(2) Remove the nut and washer (fig. 4-61)
reduce effective oil flow, and other damage.
from the hydraulic oil filter head.
b. Replacement.
(1) Remove any clamps which may hold the
lines to the body or engine.
(2) Replace any lines or fittings as necessary.
4-48
|
|
Privacy Statement - Press Release - Copyright Information. - Contact Us |
