 |
|||
|
|
|||
|
Page Title:
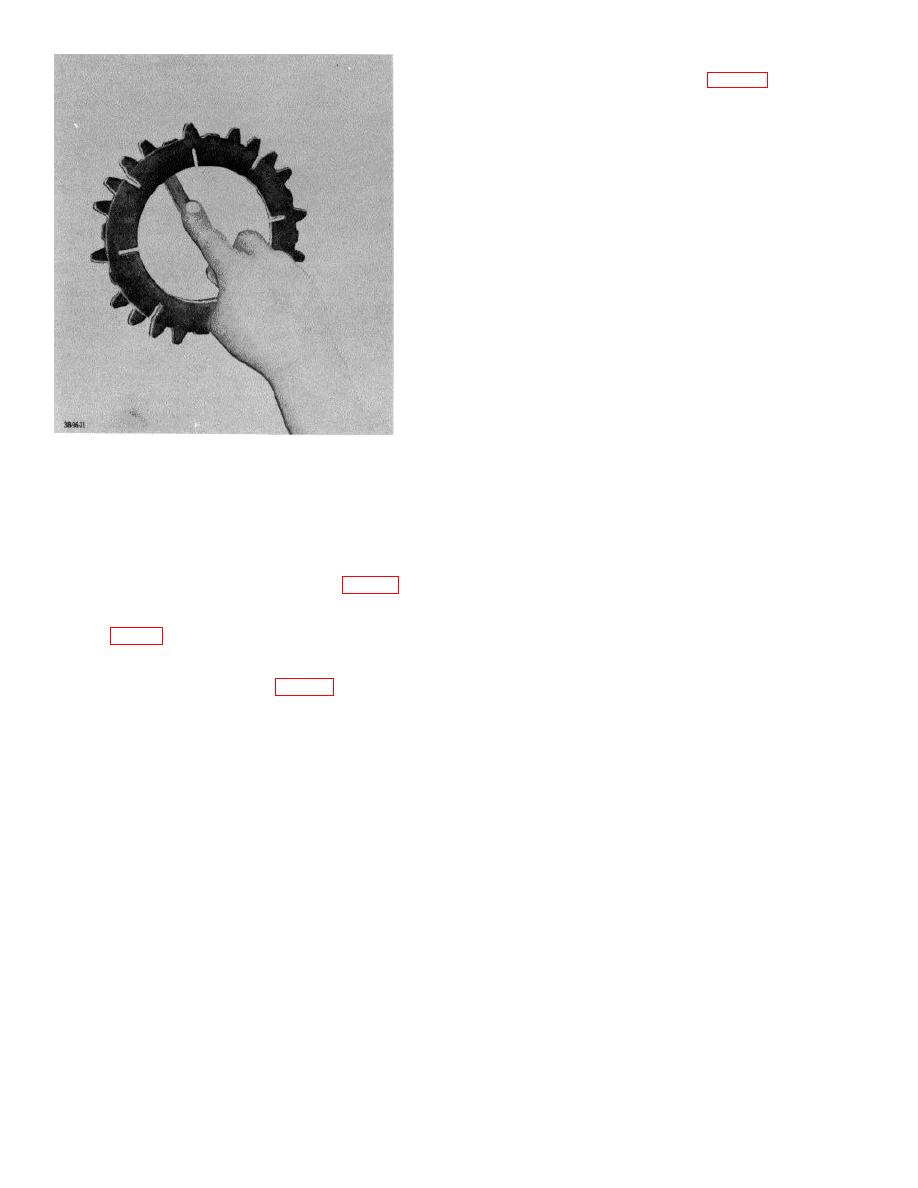
Figure 43. Checking for " ishing"of separator plate. |
|
||
| ||||||||||
|
|
 b. Disassembly.
(1) Remove plugs (1 and 35, fig. 74).
(2) Remove packing (2 and 34) from plugs.
(3) Remove springs (3 and 88) from control valve.
(4) Remove balls (4 and 32) from control valve.
(5) Remove plugs (6, 8, and 9) from control valve.
(6) Remove spring (11) from control valve.
(7) Remove packing (5, 7, and 10) from plugs (6, 8,
and 9).
(8) Withdraw inching spool (26), high and-low spool
(28), and forward-and reverse spool (29) from
control valve.
(9) Remove oil seals (2, 27, and 80) from control
valve.
(10) Remove retainers (15, 16, and 17) and gaskets
(14, 18, and 19) from control valve.
(11) Remove spring (18) and plunger (12) from
control valve.
(12) Remove spring (21) and plunger (23) from
control valve.
(13) Remove spring (20) and plunger (22) from
control valve.
c. Cleaning and Inspection.
Figure 43. Checking for " ishing"of separator plate.
d
(1) Clean all parts with SD and dry them with a
clean cloth or compressed air.
44. Transmission Control Valve
(2) Inspect spools for nicks, burs, and wear.
a. Removal.
(3) Inspect spool ports for deposits of foreign
(1) Disconnect transmission control valve linkage
matter, nicks, and burs.
(TM 10-39822220).
(4) Inspect the springs for lost tension and breaks.
(2) Disconnect safety switch wires Unscrew and
d. Repair. Replace defective parts with serviceable
remove the safety switch.
ones.
(3) Remove screws and flat washers (fig. 72) that
e. Assembly. Using new seals and packing, reverse
secure control valve to transmission case and
procedures in b above.
remove control valve and control valve gasket
f. Installation. Reverse procedures in a above.
(4) Remove mounting screws and fiat washers that
secure porting plate to case and remove plate
and porting plate gasket (fig. 73).
AGO 7010A
57
|
|
Privacy Statement - Press Release - Copyright Information. - Contact Us |
