 |
|||
|
|
|||
|
|
|||
| ||||||||||
|
|
 TM 10-3930-673-20-2
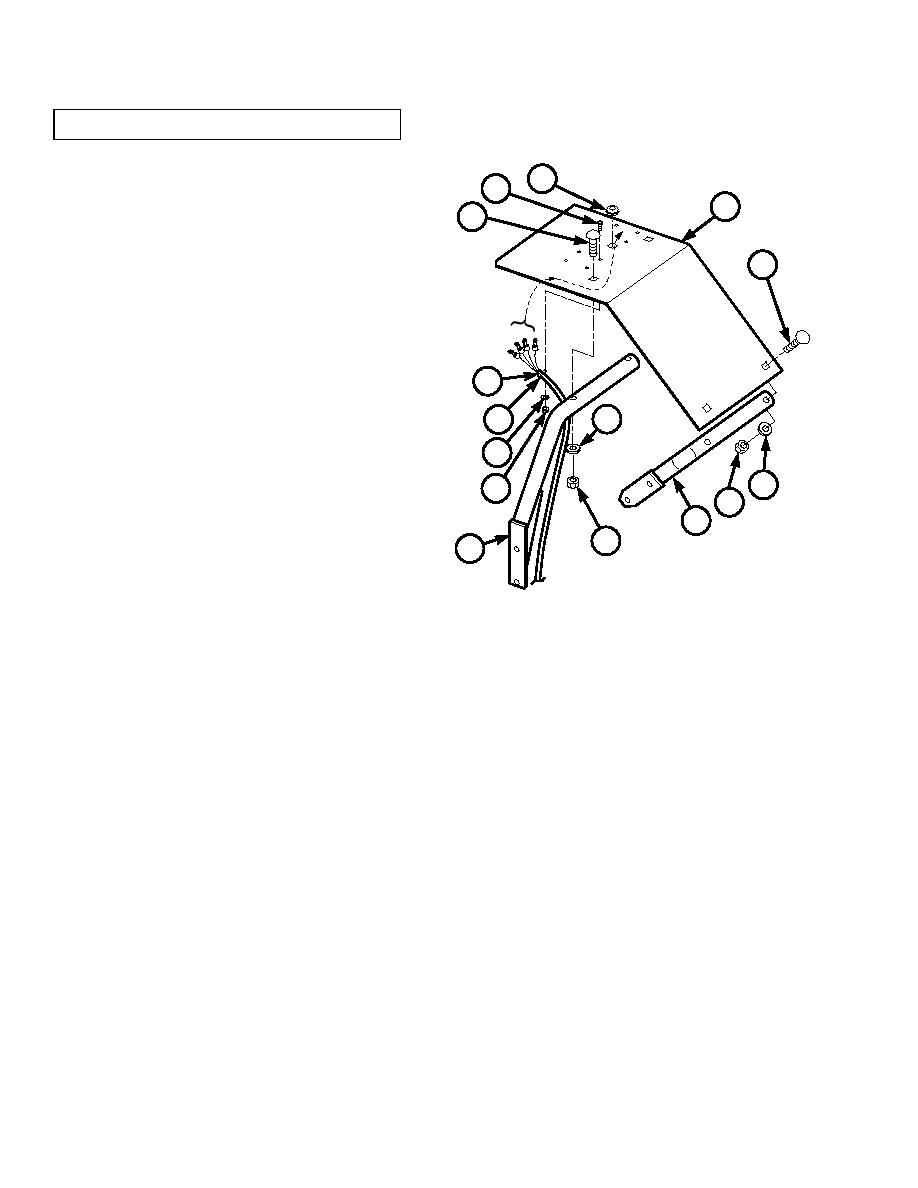
16-7. FENDER REPLACEMENT (CONT)
(2)
Remove wiring harness (6) and mounting
11
hardware (parts 7 through 10) from fender
9
(2).
2
16
NOTE
16
Rear fender has two clamps.
(a)
Remove locknut (7), washer (8), carriage
bolt (9), clamp (10), and wiring harness
(6) from underside of fender (2). Discard
locknut.
6
(b)
Remove harness (6) from grommet (11).
Remove grommet.
15
10
(3)
Remove fender (2) from two braces (12 and
8
13).
15
7
14
(a)
Remove four locknuts (14), washers 15),
13
and carriage bolts (16) from fender (2)
14
and two braces (12 and 13). Discard
12
locknuts.
(b)
Remove fender (2) from braces (12 and
13).
TR00400
b. Installation.
(1)
Install fender (2) on two braces (12 and 13).
(a)
Position fender (2) on braces (12 and 13).
(b)
Apply sealing compound to threads of four carriage bolts (16).
(c)
Install four carriage bolts (16), washers (15), and locknuts (14). Tighten locknuts 30-35 lb-ft (40.7-47.5
Nm).
(2)
Install wiring harness (6) and mounting hardware (parts 7 through 10) on fender (2).
(a)
Install grommet (11) and position harness (6) through grommet (11).
(b)
Position clamp (10) on wiring harness (6) and install with carriage bolt (9), washer (8), and locknut (7).
16-16
|
|
Privacy Statement - Press Release - Copyright Information. - Contact Us |
