 |
|||
|
|
|||
|
|
|||
| ||||||||||
|
|
 TM 10-3930-673-20-2
(2)
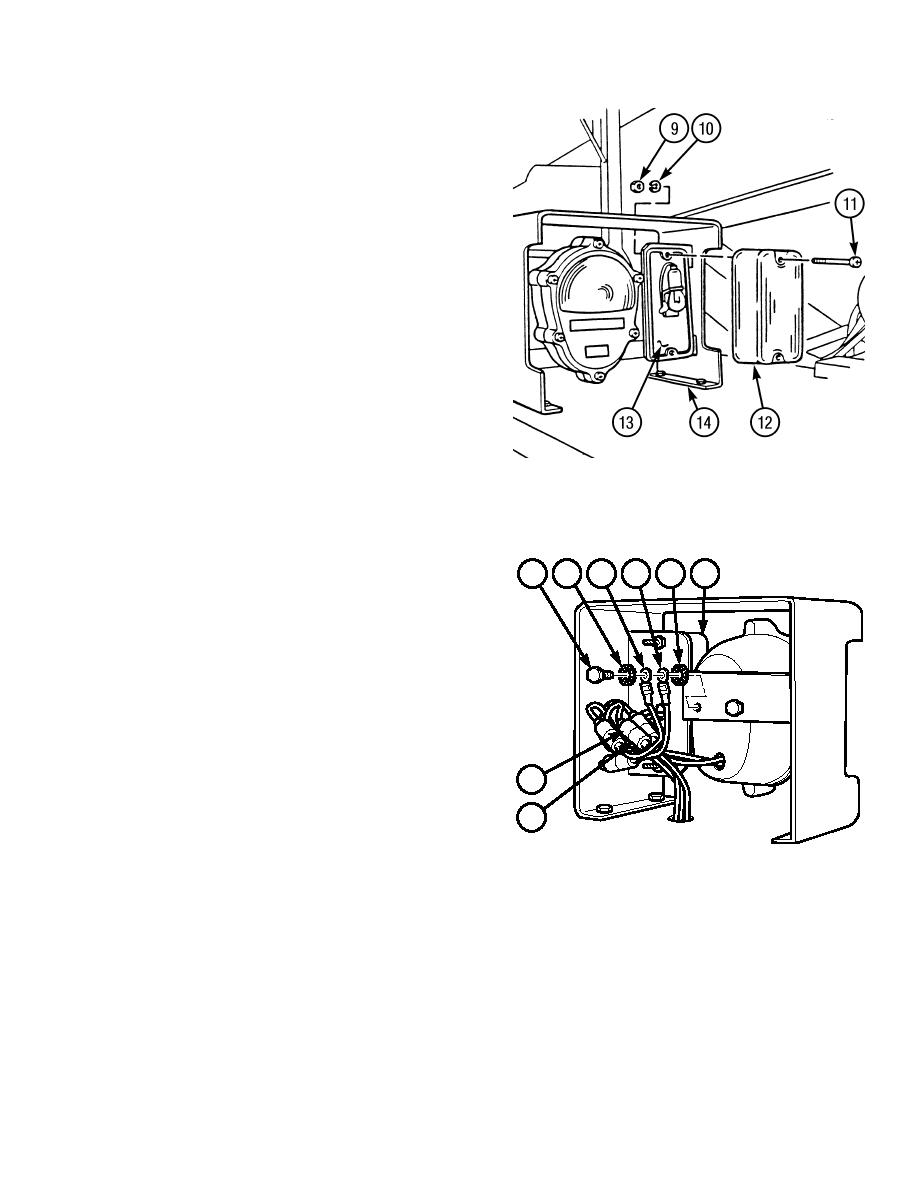
Remove mounting hardware (parts 9
through 11), lens (12), and socket plate (13)
from light bracket (14).
(a)
Remove two nuts (9), lockwashers (10),
screws (11), and lens (12) from socket
plate (13). Discard lockwashers.
(b)
Remove socket plate (13) from light
bracket (14).
b. Installation.
(1)
Install socket plate (13) and lens (12) on light
bracket (14) with mounting hardware (parts
9 through 11).
(a)
Position socket plate (13) on light bracket
(14).
TR00542
(b)
Position lens (12) on socket plate (13).
(c)
Install lens (12) and socket plate (13) on
light bracket (14) with two screws (11), lockwashers (10) and nuts (9).
NOTE
4
5
6
7
8
3
Install tie wraps as necessary.
(2)
Connect electrical wires (6 and 7) on rear
turn signal light (3).
(a)
Apply sealing compound on threads of
screw (4).
(b)
Install starwasher (8), vehicle wiring
harness wire (7), wire (6) of rear turn
2
signal light (3), and starwasher (5) with
screw (4).
1
(c)
Connect vehicle wiring harness connector
(1) to connector (2) of rear turn signal
TR00541
light (3).
8-97
|
|
Privacy Statement - Press Release - Copyright Information. - Contact Us |
