 |
|||
|
|
|||
|
|
|||
| ||||||||||
|
|
 TM 10-3930-673-20-2
8-6. INSTRUMENT PANEL GAGES REPLACEMENT (CONT)
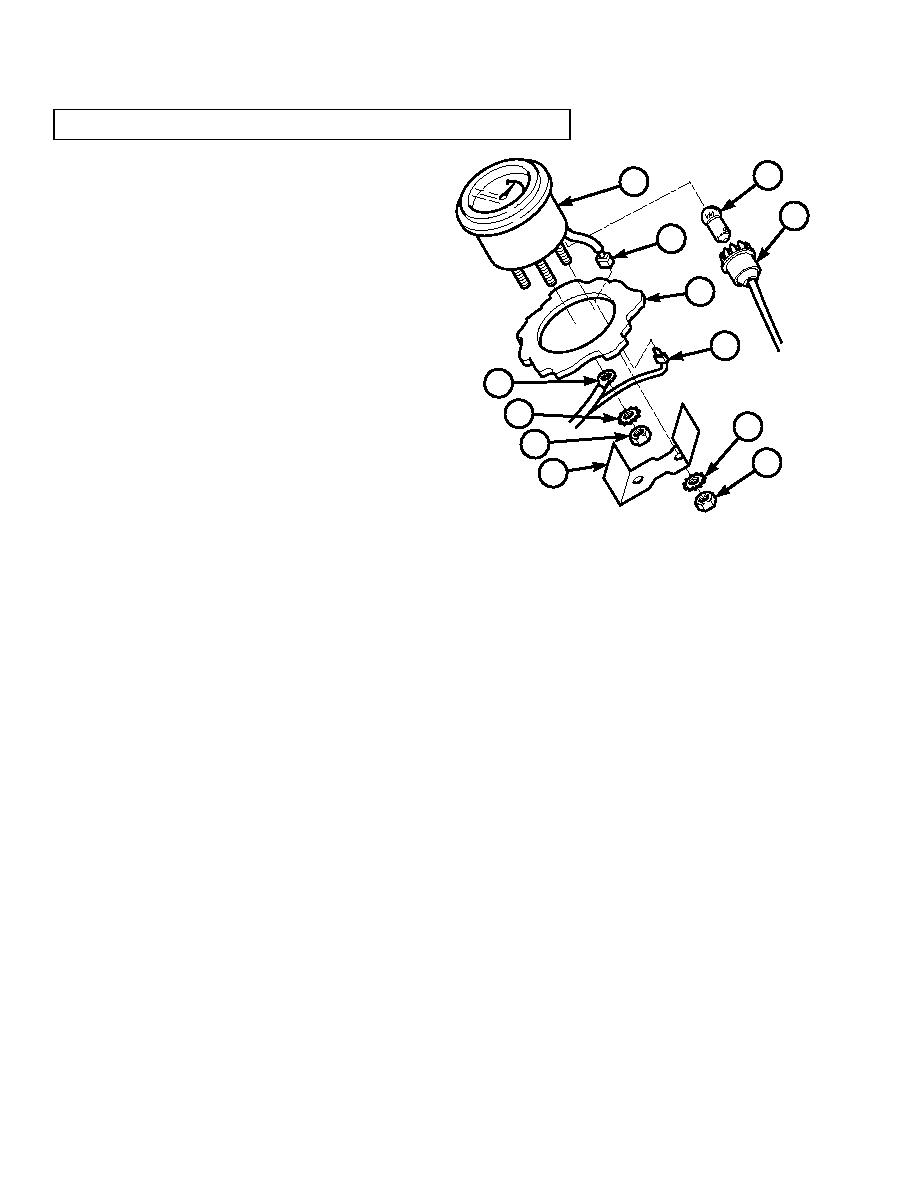
(2)
Tag, mark, and remove electrical wires
14
4
(parts 5 through 9) from gage (4).
13
(a)
Tag, mark, and disconnect gage light
electrical wire (5) from vehicle wiring
5
harness (6).
1
NOTE
Number of electrical wires will be
different for different gages.
6
(b)
Remove nuts (7) and starwashers (8) from
9
gage (4) terminals. Tag, mark, and
8
remove electrical wires (9). Discard
11
starwashers.
7
10
(3)
Remove gage (4) from instrument panel (1).
12
(a)
Remove two nuts (10), starwashers (11),
and clamp (12) from instrument panel (1).
TR00309
Discard starwashers.
(b)
Remove gage lamp holder (13) and lamp (14) from gage (4).
(c)
Remove gage (4) from right hand instrument panel (1).
b. Installation.
(1)
Install gage (4) in right hand instrument panel (1).
(a)
Install lamp (14) in gage lamp holder (13) and lamp holder in gage (4).
(b)
Position gage (4) in right hand instrument panel (1).
(c)
Install clamp (12) on instrument panel (1) with two starwashers (11) and nuts (10).
(2)
Connect electrical wires (parts 5 through 9) on gage (4).
NOTE
Number of electrical wires will be different for different gages.
(a)
Install electrical wires (9) on gage (4) terminals with starwashers (8) and nuts (7).
(b)
Connect gage light electrical wire (5) to vehicle wiring harness (6).
8-18
|
|
Privacy Statement - Press Release - Copyright Information. - Contact Us |
