 |
|||
|
|
|||
|
|
|||
| ||||||||||
|
|
 TM 10-3930-660-24-2
MLRS ATTACHMENT CONTROL VALVE MAINTENANCE - CONTINUED
0304 00
DISASSEMBLY - CONTINUED
15.
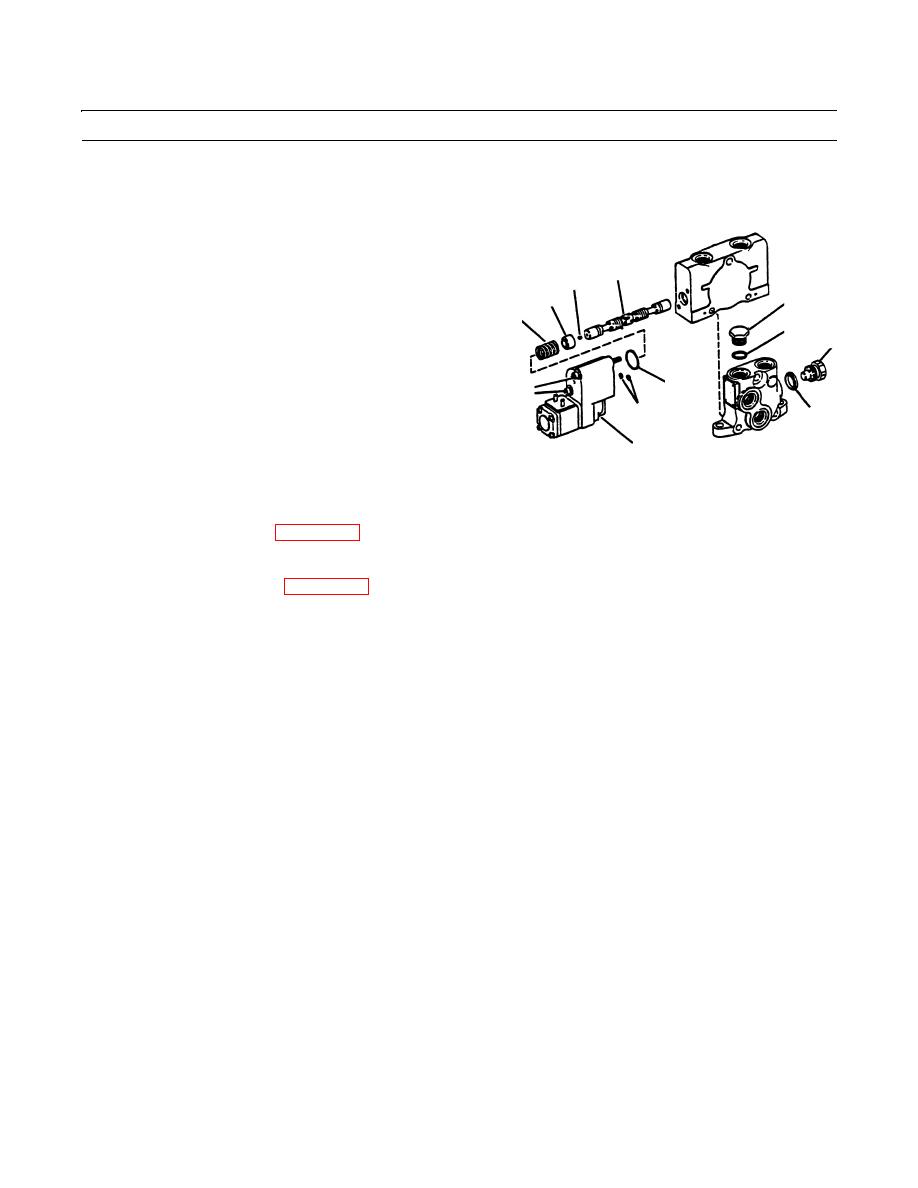
Remove two bolts (47), flatwashers (48) and lockwashers (49) from each electric hydraulic proportioning (EHP) assem-
bly (50). Remove eight EHP assemblies. Discard lockwashers.
16.
Remove and discard two small O-rings (51) and one
large O-ring (52) from each EHP assembly (50).
58 55,56,57
17.
Remove spring (53) and spring seat (54) from each
54
59
housing section.
53
60
18.
Remove spools (55 and 56) and two spools (57) from
61
housing sections.
19.
Remove plug (58) from each spool.
52
47,48,49
51
20.
Remove plug (59) and O-ring (60), if necessary. Dis-
62
card O-ring.
50
409-1382
21.
Remove plug (61) and O-ring (62), if necessary. Dis-
card O-ring.
CLEANING
See Cleaning instructions (WP 0316 00).
INSPECTION
See Inspection instructions (WP 0317 00).
ASSEMBLY
NOTE
Wipe all sealing surfaces on valve clean and dry. Apply film of clean hydraulic oil to all seals as they are
installed.
1.
If removal of O-ring (62) and plug (61) was necessary, install plug (61) with new O-ring (62).
2.
If removal of O-ring (60) and plug (59) was necessary, install plug (59) with new O-ring (60).
3.
Install plug (58) into each spool (55 thru 57).
4.
Install spools (55 and 56) and two spools (57).
5.
Install spring seat (54) and spring (53) in each housing section.
6.
Install two new small O-rings (51) and one new large O-ring (52) to each EHP assembly (50).
7.
Install eight electric hydraulic proportioning (EHP) assemblies (50) with new lockwashers (49), flatwashers (48) and
two bolts (47).
0304 00-3
|
|
Privacy Statement - Press Release - Copyright Information. - Contact Us |