 |
|||
|
|
|||
|
|
|||
| ||||||||||
|
|
 TM 10-3930-660-24-2
TRANSMISSION ASSEMBLY REPAIR - CONTINUED
0289 00
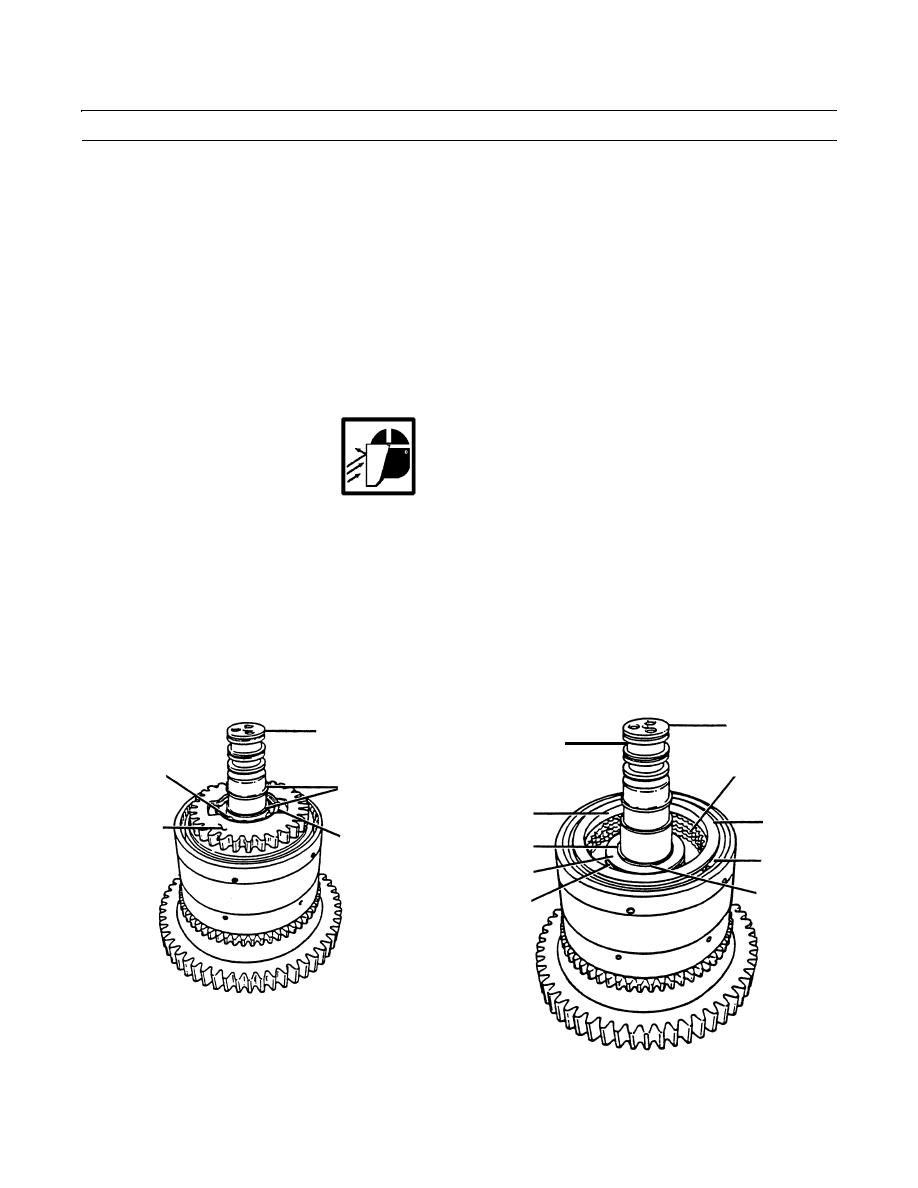
DISASSEMBLY - CONTINUED
42.
Remove two snap rings (51).
43.
Use a gear puller to remove weld gear (52) and bearing (53) as an assembly from shaft assembly (49).
44.
Using an assistant to spread snap ring (54), use a driver to remove bearing (53) from weld gear (52).
45.
Remove snap ring (55) and clutch plate retainer (56) from shaft assembly (49).
46.
Remove four clutch plates (57) and four separator plates (58).
NOTE
The third stage clutch pack contains four clutch plates and four separator plates.
WARNING
Springs are under tension. Always wear face shield when working on compressed springs. Carefully handle
spring in compressed form. Failure to follow this precaution could cause personal injury.
47.
Place shaft assembly (49) in a press. Install a clutch spring compressor tool.
48.
Press down on spring compressor tool and retainer (59) just enough to relieve pressure on retainer ring (60). Remove
retainer ring (60). Slowly remove clutch spring compressor tool.
49.
Remove retainer (59), four springs (61) and thrust washer (62).
50.
Insert air nozzle at pressure ports (63) located between three seal ring grooves on shaft assembly (49). Use compressed
air to remove piston (64).
49
49
63
57,58
53
51
64
56
52
54
59
55
61
60
62
409-1168
409-4117
0289 00-9
|
|
Privacy Statement - Press Release - Copyright Information. - Contact Us |
