 |
|||
|
|
|||
|
|
|||
| ||||||||||
|
|
 TM 10-3930-660-24-2
CRANKSHAFT FRONT SEAL REPLACEMENT - CONTINUED
0273 00
INSTALLATION - CONTINUED
CAUTION
The front seal and seal pilot used in step 3 are packaged as a single item. Do not separate these two compo-
nents before seal installation. Failure to use the pilot could result in a damaged front seal.
Drive the alignment/installation tool at the 12, 3, 6 and 9 o'clock positions only. Driving the tool at other
positions could damage the seal carrier.
2.
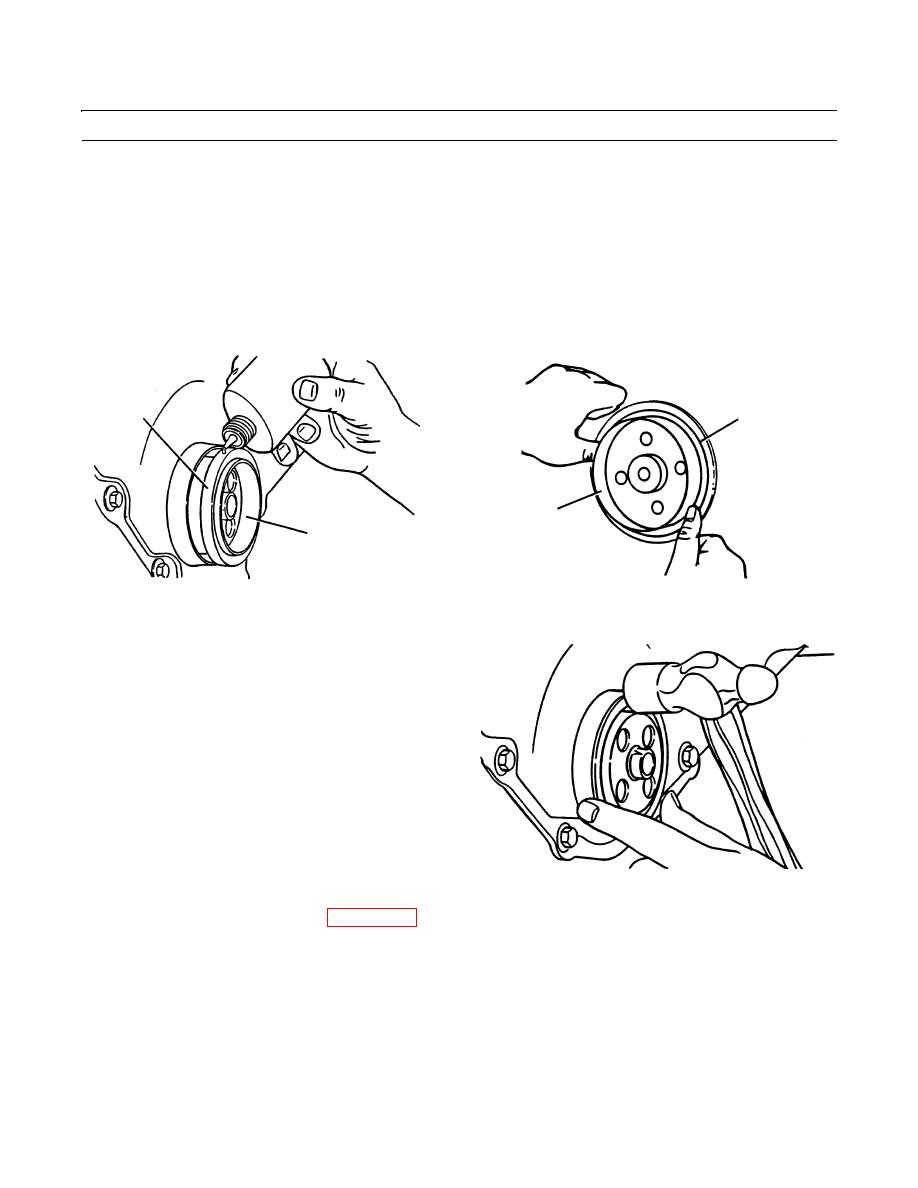
Apply a bead of loctite around outside surface of front seal (1).
3.
Push on new front seal (1) until front seal is inside gear cover, then remove seal pilot (2).
1
1
2
2
409-953
409-954
4.
Position the alignment/installation tool over the crank-
shaft and against the seal carrier with the flange of the
tool away from the front seal.
5.
Use a hammer to tap front seal into front cover until
flange of tool is against front cover.
409-955
6.
Install crankshaft vibration damper (WP 0275 00).
7.
Run engine and check for leaks (TM 10-3930-660-10).
END OF WORK PACKAGE
0273 00-3/(-4 Blank)
|
|
Privacy Statement - Press Release - Copyright Information. - Contact Us |