 |
|||
|
|
|||
|
|
|||
| ||||||||||
|
|
 TM 10-3930-660-24-2
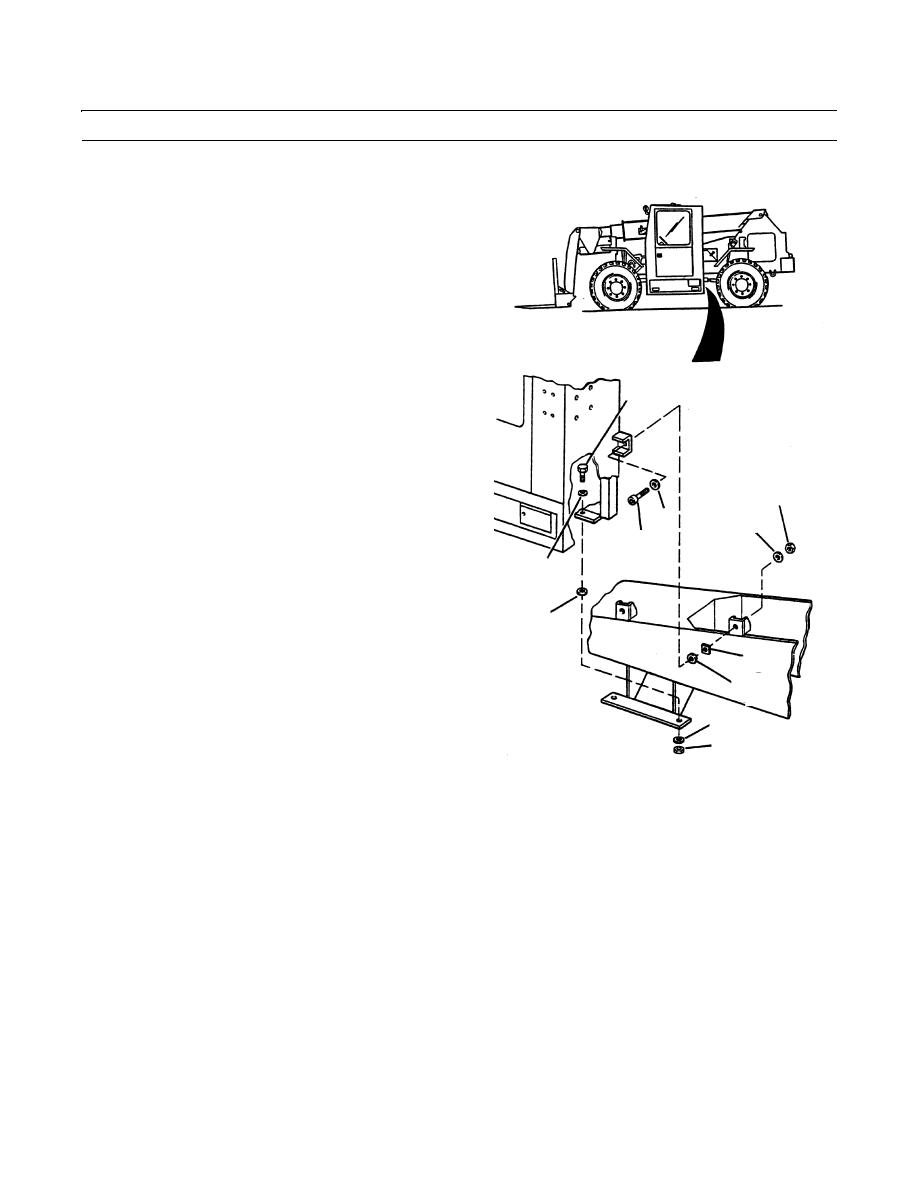
CAB ASSEMBLY WITH ROPS/FOPS MAINTENANCE - CONTINUED
0253 00
INSTALLATION - CONTINUED
1.
Use a hoist and sling to position cab on vehicle.
NOTE
Apply loctite to threads of capscrews as
installed.
Use washers to shim cab so side of cab to
boom hoist cylinder anchor clearance, with
vehicle level and boom centered, is 2.75 in.
(70 mm) minimum. Shim both upper cab
mounts equally. Use as few washers as possi-
ble. Do not overshim.
20
2.
Align cab and frame mounting holes and install two
capscrews (21), two capscrews (20), eight flatwashers
(17), two washers (shims) (19), four rubber washers
(18) and four nuts (16).
3.
Torque cab mounting hardware to 640 lb-ft (868 Nm)
of torque.
16
4.
Remove hoist and sling.
5.
Connect hydraulic lines. Use tags placed on lines at
17
17
disassembly to ensure correct connection. Refer to
21
Removal, steps 13-19.
17
6.
Connect heater hoses at temperature control valve and
heater (WP 0170 00).
18
7.
Connect parking brake cable (WP 0128 00).
19
18
17
16
409-1358
8.
Connect transmission cable at the transmission (WP 0115 00).
9.
Connect accelerator cable at engine (WP 0048 00).
0253 00-9
|
|
Privacy Statement - Press Release - Copyright Information. - Contact Us |
