 |
|||
|
|
|||
|
|
|||
| ||||||||||
|
|
 TM 10-3930-660-24-2
REAR DIFFERENTIAL CARRIER ASSEMBLY REPLACEMENT - CONTINUED
0247 00
INSTALLATION - CONTINUED
1.
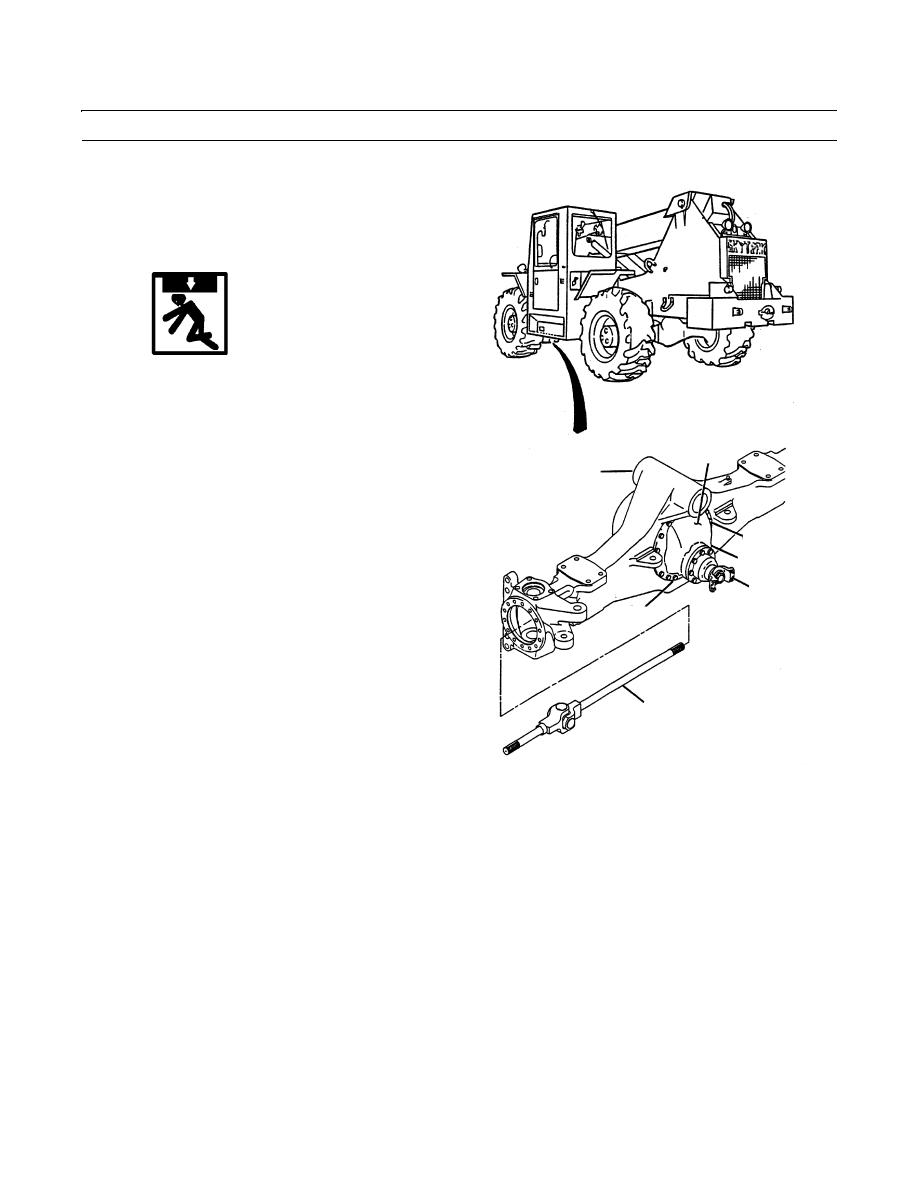
Apply a 1/8 in. (32 mm) bead of silicone RTV-732
clear sealing compound to differential mounting sur-
face of axle housing (3). Be sure to apply sealing com-
pound around each tapped hole of mounting surface.
WARNING
Use caution when handling heavy parts.
Provide adequate support and use assis-
tance during procedure. Ensure that any
lifting device used is in good condition
and of suitable load capacity. Keep clear of
2
heavy parts supported only by lifting
3
device. Failure to follow this warning may
cause injury or death.
2.
Install differential carrier (2) into axle housing (3).
4,5
CAUTION
6,8
First four installed capscrews must be
9
evenly spaced to prevent uneven pressure
7,8
on differential carrier when torquing. Fail-
ure to do so could cause component dam-
age.
3.
Install four capscrews (4) and flatwashers (5) into cor-
ner locations around differential carrier (2) and axle
1
housing (3). Hand tighten.
4.
Carefully push differential carrier (2) into position.
409-1311
Tighten four capscrews (4) two or three turns each in a
pattern opposite each other.
NOTE
Torque capscrews in pairs on opposing
sides of differential carrier.
5.
Torque capscrews (4) to 50 to 75 lb-ft (68 to 102 Nm).
Torque in pairs across from each other.
0247 00-3
|
|
Privacy Statement - Press Release - Copyright Information. - Contact Us |
