 |
|||
|
|
|||
|
|
|||
| ||||||||||
|
|
 TM 10-3930-660-24-2
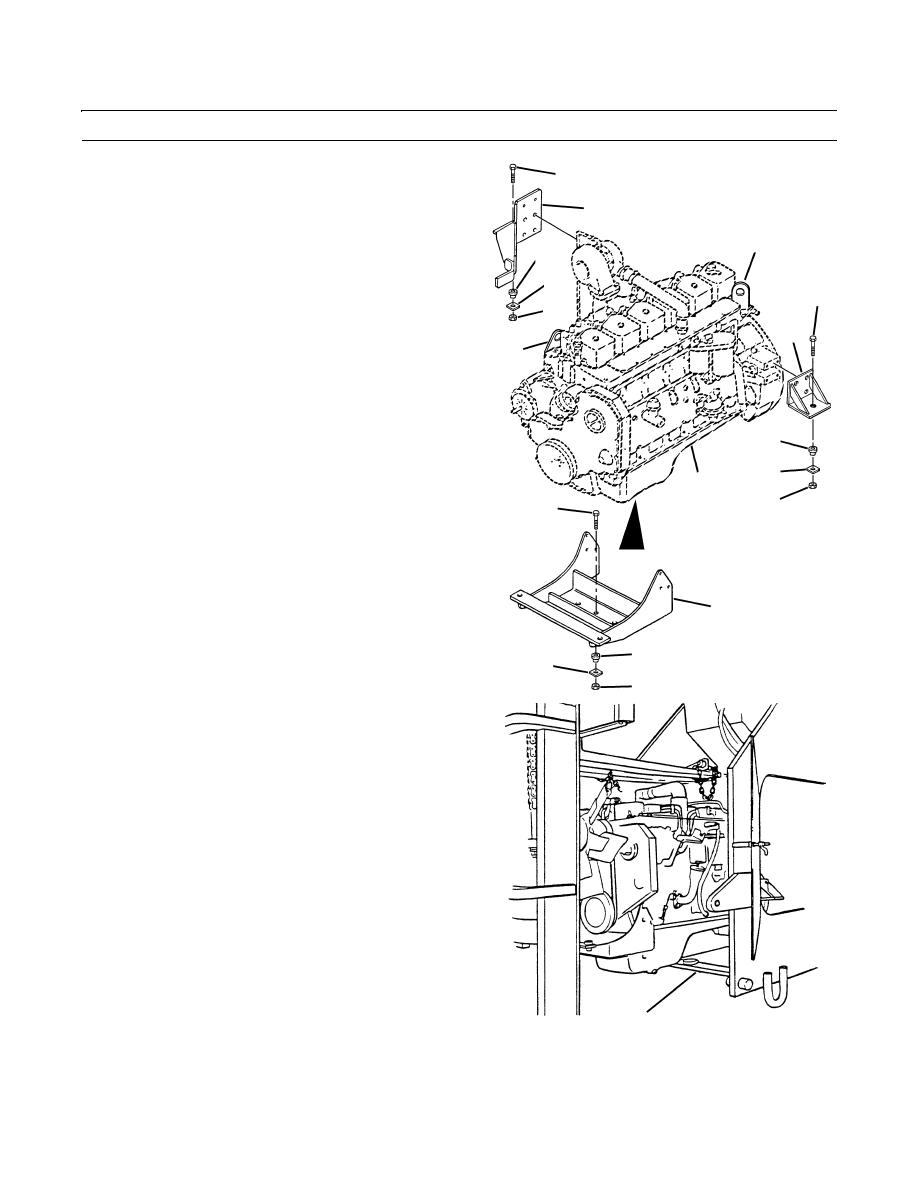
ENGINE ASSEMBLY REPLACEMENT (165 HP) - CONTINUED
0210 00
REMOVAL - CONTINUED
125
40.
Remove locknut (119), rebound washer (120) and
126
screw (121) from right front engine mount (122). Dis-
card locknut.
133
135
41.
Remove locknut (123), rebound washer (124), and
screw (125) from left front engine mount (126). Dis-
124
card locknut.
121
123
42.
Remove locknut (127), rebound washer (128), and
122
screw (129) from rear engine mount (130). Discard
locknut.
132
Use caution when handling heavy parts. Provide
adequate support and use assistance during pro-
cedure. Ensure that any lifting device used is in
good condition and of suitable load capacity.
135
Keep clear of heavy parts supported only by lift-
ing device. Failure to follow this warning may
120
cause injury or death.
131
119
129
NOTE
Engine assembly weighs 1,075 lb (488 kg).
43.
Attach lifting chains to engine lifting brackets (132
and 133).
130
44.
Attach lifting chains to lifting device.
45.
With assistance, raise engine (131) high enough to
136
clear rear frame support bar (134).
128
46.
Slowly remove engine (131) through back of engine
127
409-1807
compartment.
47.
Place engine (131) in engine stand.
48.
Remove front rubber mounts (135) and rear rubber
TR0134
mount (136) from right and left front engine mounts
(122 and 126) and rear engine mount (130).
134
409-1808
0210 00-14
|
|
Privacy Statement - Press Release - Copyright Information. - Contact Us |
