 |
|||
|
|
|||
|
|
|||
| ||||||||||
|
|
 TM 10-3930-660-24-1
HEATER HOSES, LINES AND FITTINGS REPLACEMENT - CONTINUED
0170 00
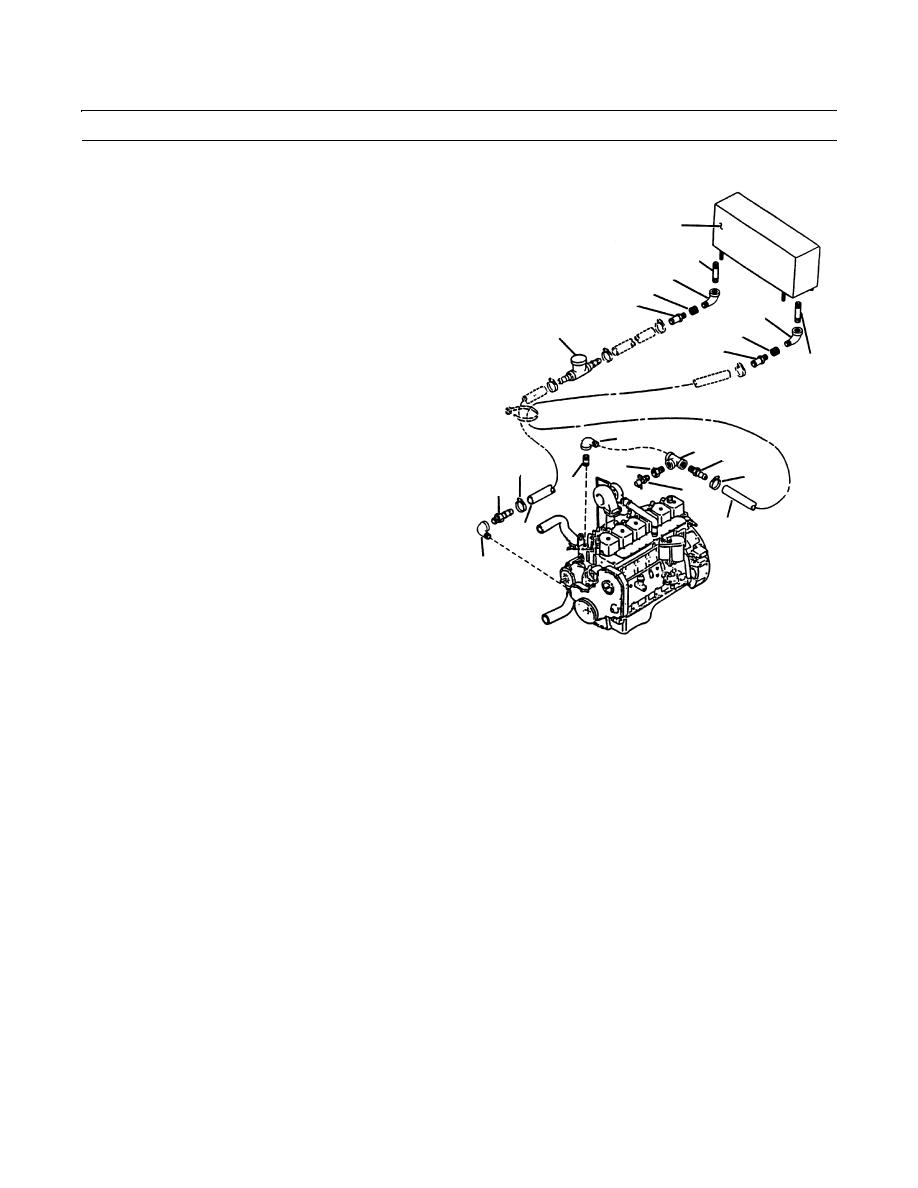
REMOVAL - CONTINUED
5.
Remove clamp (11) and hose (10) at adapter (12). Dis-
card clamp.
18
6.
Remove clamp (13) and hose (5) at adapter (14). Dis-
17
card clamp.
16
7.
Remove connector (3), bushing (15), elbow (16) and
15
nipple (17) at heater (18).
3
20
8.
Remove connector (6), bushing (19), elbow (20) and
19
8
nipple (21) at heater (18).
6
21
9.
Remove cable from heater control valve (8) and
remove heater control valve (8).
10.
Remove adapter (14), tee (22), bushing (23), drain
cock (24), elbow (25) and nipple (26) at engine.
25
22
11.
Remove adapter (12) and elbow (27) at engine.
14
11
23
13
12
26
24
5
10
27
409-632
INSTALLATION
NOTE
Apply loctite to male threads on fittings as installed.
Install new tie down straps around heater hoses as noted during removal.
1.
Install elbow (27) and adapter (12) at engine.
2.
Install nipple (26), elbow (25), drain cock (24), bushing (23), tee (22) and adapter (14) at engine.
3.
Position heater control valve (8) under vehicle and connect cable to valve (8).
4.
Install nipple (21), elbow (20), bushing (19) and connector (6) at heater (18).
5.
Install nipple (17), elbow (16), bushing (15) and connector (3).
6.
Position hose (5) on adapter (14) and install new clamp (13).
7.
Position hose (10) on adapter (12) and install new clamp (11).
0170 00-2
|
|
Privacy Statement - Press Release - Copyright Information. - Contact Us |
