| |
TM 10-3930-653-14&P
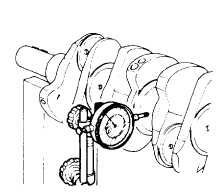
(3) MEASURING CRANKSHAFT
FOR BENDING
Support both end journals in a V-block or other
appropriate support, apply a dial gauge to the center of
the journal bearing surface, turn the crankshaft and
measure the bend of the crankshaft (I’ of the maximum
valve shown on the gauge is the amount of bend) If bent
beyond the prescribed service limit, straighten with a
press, or replace the crankshaft, as required.
Fig. 4-62. Measuring Crankshaft for Bending
Correct to within
Service (bend)
mm (in)
limit mm (in)
Crankshaft
0.02 (0.0008)
0.05 (0.0020)
bend
Note: When measuring bend, use a
dial gauge. Bend value is half of the
reading obtained when crankshaft is
turned one full revolution with a dial
gauge attached to its center journal.
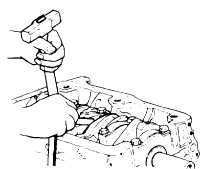
(4) MEASURING END PLAY
With the crankshaft installed in place and the bearing
caps tightened. check the end play with the bearing
caps tightened, check the end play at the center bearing.
If the clearance exceeds the limit. replace the center
bearing with a new one.
Fig. 4-63. Checking End Play
Standard
Limit
End play
0.05 to 0.18
0.2 (0.0079)
mm (in)
(0.0020 to 0.0071)
4-2-4-10.
BEARING
SHELLS
(1) NSPECTING BEARING
SURFACES
The upper and lower bearing are matched for the
front, rear and center bearings and should not be
interchanged (mixed). (The upper bearing shell for the
rear bearing, for example, should not be used with the
lower bearing shell for the front bearing). Make sure that
the bearings are not scarred or scratched (due to entry of
dirt or other abrasive matter) and that there is no sign of
metal fatigue, peeling, or binding. Replace both upper
and
lower
bearing
shells
as
a
set,
if
faulty.
4 - 37
|


