| |
TM 10-3930-653-14&P
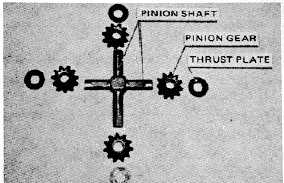
(6) Check pinion gear teeth for wear, damage or cracks, and if unsatisfactory, replace.
(7) Measure inner diameter of pinion gear and out diameter of pinion shaft. If excessively worn, replace.
(8) Check pinion gear thrust plates for wear or damage. If unsatisfactory, replace thrust plate.
Unit: mm (in)
Service
Checking Item
Standard Value
Limit
I.D. of pinion gear
22.01-22.05
--
(0.867-0.868)
O.D. of pinion shaft
21.99-22.00
(0.8658-0.866)
--
Pinion gear thrust plate
6.0 (0.236)
--
thickness
Pinion gear thrust plate
5.8, 6.2, 6.4
thickness (replacement part) 0.228, 0.244,
--
0.252)
Fig. 4-413. Checking Pinion Gear and Shaft
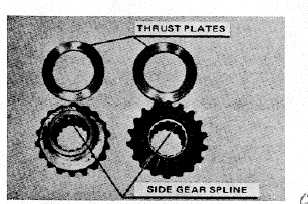
(9) Check side gear splines for wear or damage by fitting drive shaft to side gear and measuring the clearance between
drive shaft splines and side gear splines in rotational direction by means of a dial gauge. If excessive wear or damage
is found, replace side gears with new ones.
(10) Check side gear thrust plates for wear or damage. If any defect is found, replace the thrust plate.
Unit: mm (in)
Service
Checking Item
Standard Value
Limit
Clearanced between side
0.04-0.10
--
gear and drive shaft splines
(0.0016-0.004)
in rotational direction.
Side gear thrust plate
2.0 (0.08)
--
thickness
Side gear thrust plate
1.8, 2.2, 2.3
--
thickness (replacement part)
(0.071, 0.087
0.091)
Fig. 4 -414. Checking Side Gear Spline
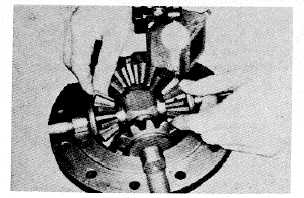
(11) Check side gears and pinion gears for backlash. If
measured value exceeds the standard specified
below, replace thrust plates.
Unit: mm (in)
Service
Checking Item
Standard Value
Limit
Backlash on side gears
0.15-0.25
--
and pinion gears
(0.006-0.01)
Fig. 4-415. Checking Backlash on Side Gears and
Pinion Gears
4 - 192
|
