 |
|||
|
|
|||
|
|
|||
| ||||||||||
|
|
 TM 10-3930-644-14&P
6. Remove bearing and packing from piston.
7. Thoroughly check cylinder bore for score marks
or nicks.
These cause damage to piston
packing cups.
D. TILT CYLINDER REPAIR
1. When packing/starts to wear, renew it otherwise
parts of the packing will contaminate the oil and
work into the pump or valve. thus causing
damage, or malfunction.
2. Do not disassemble the unit any more than is
required to replace the faulty packing.
Figure 3.4. Tilt Cylinder Assembly
3. Use only approved packing.
Never make
a. O Rings should be pushed over sharp
substitutions.
edges with care. They can be easily cut.
4. Before installing, inspect for nicks, cuts or flaws.
b. Usually no adjustment is required upon
Do not install if any of these faults are present.
installation; make certain that 0 Rings are
not twisted.
5. All metal surfaces on which packing slides
should be very smooth. If surfaces are scored
c. Check to see that the ring is of correct
or nicked, replace the parts or resurface them.
size to give a "squeeze" in the installed
position.
6. Soak packing in hydraulic oil before installing.
11. Do everything possible to keep all hydraulic
7. Sharp tools or instruments should not be used
parts as clean as possible. Keep dirt and fine
when installing packing.
metal particles from packing and plungers.
Such material can quickly damage packing and
8. When installing seal rings do not stretch them
score plungers.
more than absolutely necessary.
E. TILT CYLINDER REASSEMBLY
9. Fit packing evenly and snugly without using
Reverse disassembly procedure when installing new
undue force.
parts.
10. When packing must be installed over threads or
1. Install new packing and bearing on piston.
sharp edges, use shim stock to protect packing.
2. Install spacers on plunger rod. Be sure that
outer spacer has an 0 Ring in groove.
3. Install piston and plunger assembly in cylinder
tube.
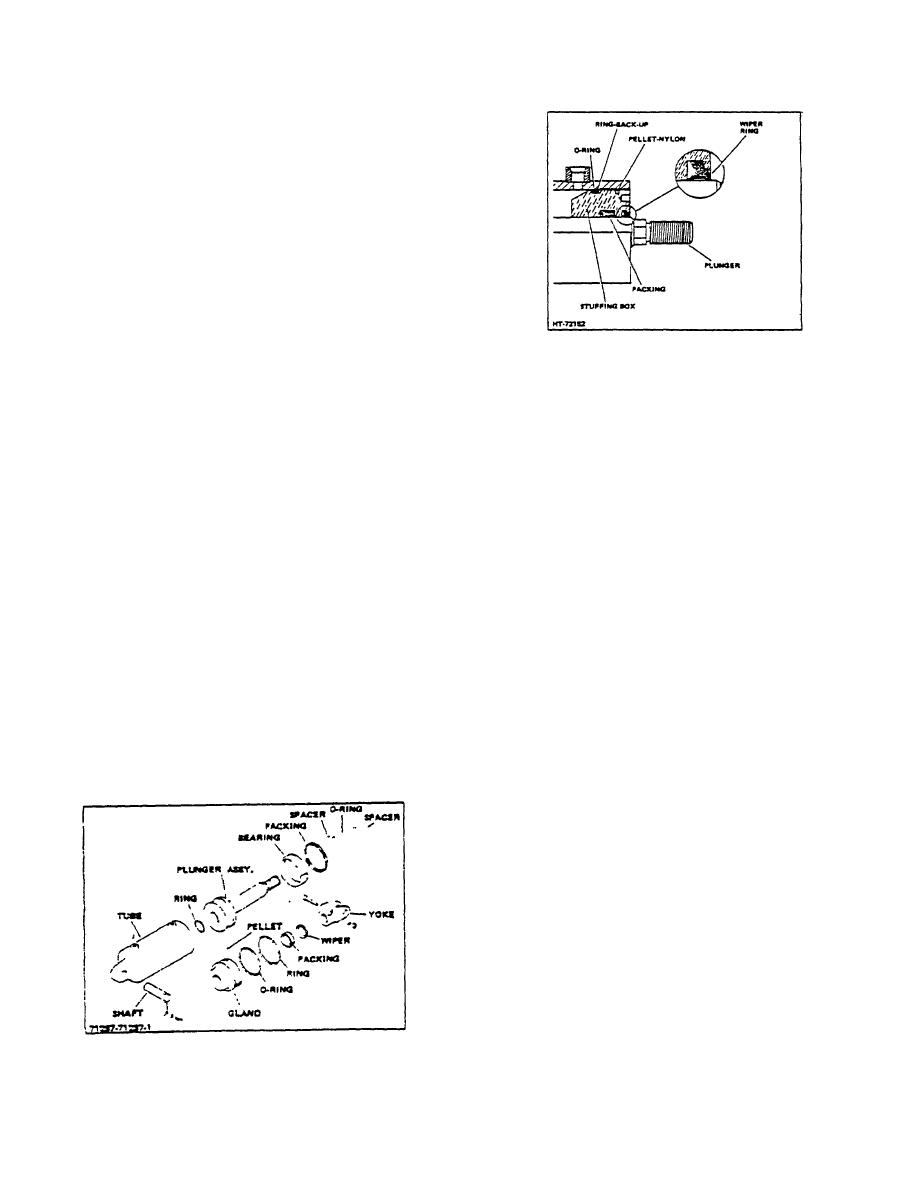
4. Install new nylon pellets, 0 Ring, backup ring,
packing and wiper on packing gland.
5. Install packing gland on plunger assembly and
cylinder tube. Gland must be flush with cuter
edge of cylinder tube.
6. Install yoke on plunger rod same number of
turns as when removed. Tighten capscrew on
yoke.
Figure 3 -3. Tilt; Cylinder Components
3-186
|
|
Privacy Statement - Press Release - Copyright Information. - Contact Us |
