 |
|||
|
|
|||
|
Page Title:
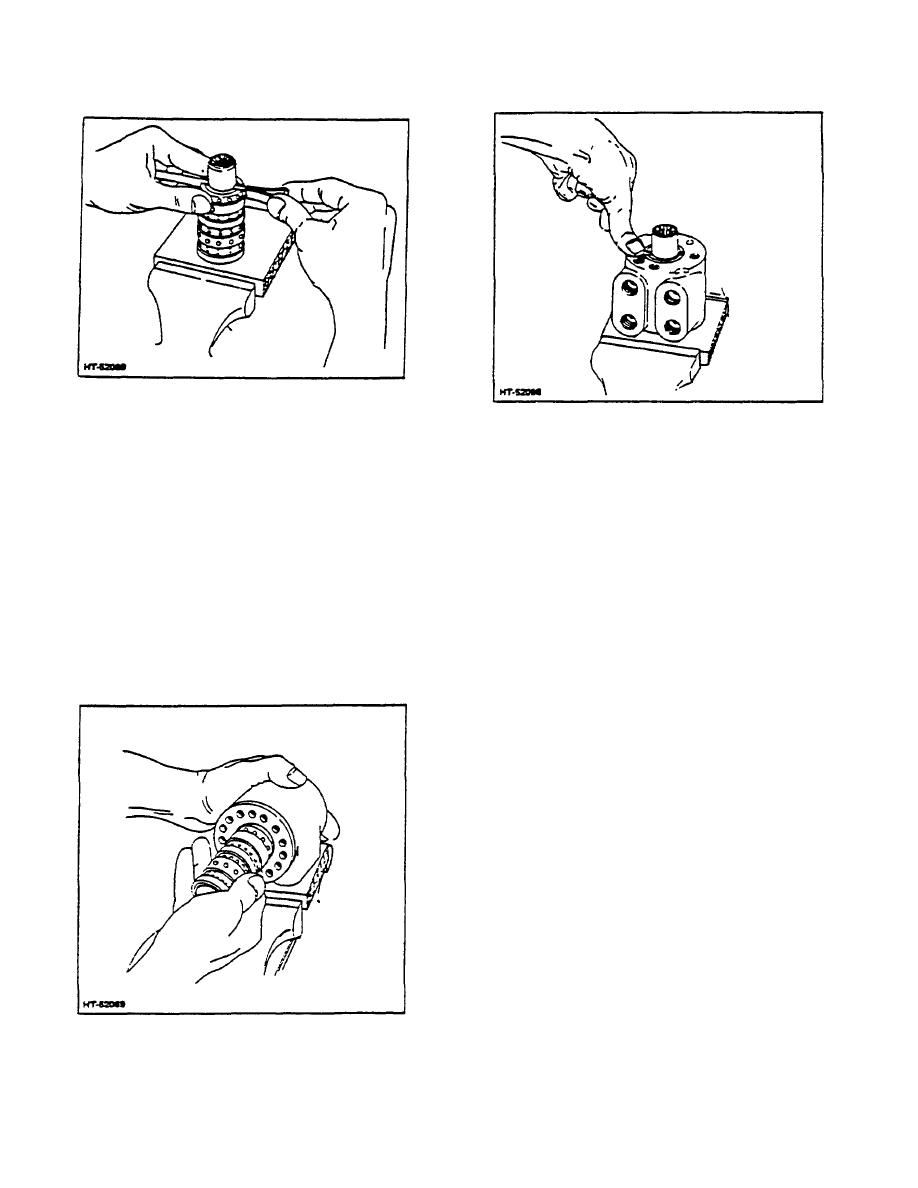
Figure 22. Installing Centering Spring Set |
|
||
| ||||||||||
|
|
 TM 10-3930-644-14&P
Figure 22. Installing Centering Spring Set
Figure 24. Rocking Check Plug
diameter at both ends.
During Installation
9. Place the housing on a solid surface with the
this point, because the cross pin may drop into
port face down. Install the spool assembly with
the discharge groove of the housing. With spool
the splined end of the spool entering the 14-hole
assembly in this flush position, check for free
end of the housing first (Fig. 23). Push parts
rotation within the housing by turning with light
gently into place with a slight rotating motion.
finger force at the splined end. Hold the parts in
this position and place the 14-hole end of the
CAUTION
assembly on the wooden block in the vise throat
Exercise extreme care so the parts
and clamp lightly across the port face with the
do not cock out of position while
vise.
entering.
11. Install a new O-ring on the check plug, and
10. The spool assembly should be installed within
install the plug in the housing, (Fig. 24). Exert a
the housing bore until it is flush with the 14-hole
steady pressure on the plug, rocking it slightly so
end of the housing. Do not install the spool
the O-ring feeds in smoothly without cutting.
assembly beyond
12. Insert the cap locator bushing, large O.D.
chamfer up, partially into the housing. Rotate
the bushing with the fingers to seat It flatly and
smoothly against the spool assembly.
13. Install new mounting plate and shaft seals.
Push each seal carefully into the seal groove
with the fingers. The seal groove is slightly
smaller than the seal to provide adequate
sealing.
NOTE
The thin oil seal at exterior of
mounting plate is used only to seal
out dirt and generally does not need
replacement.
However, if it is
replaced, it must be pressed into the
counterbore so that the lip is directed
away from the unit.
14. Place the mounting plate subassembly over the
spool shaft and slice it down smoothly in place
over the-cap locator bushing so that seals will
Figure 23. Installing Spool Assembly
not be disrupted in assembly (Fig. 25).
3-168
|
|
Privacy Statement - Press Release - Copyright Information. - Contact Us |
