 |
|||
|
|
|||
|
|
|||
| ||||||||||
|
|
 TM 10-3930-644-14&P
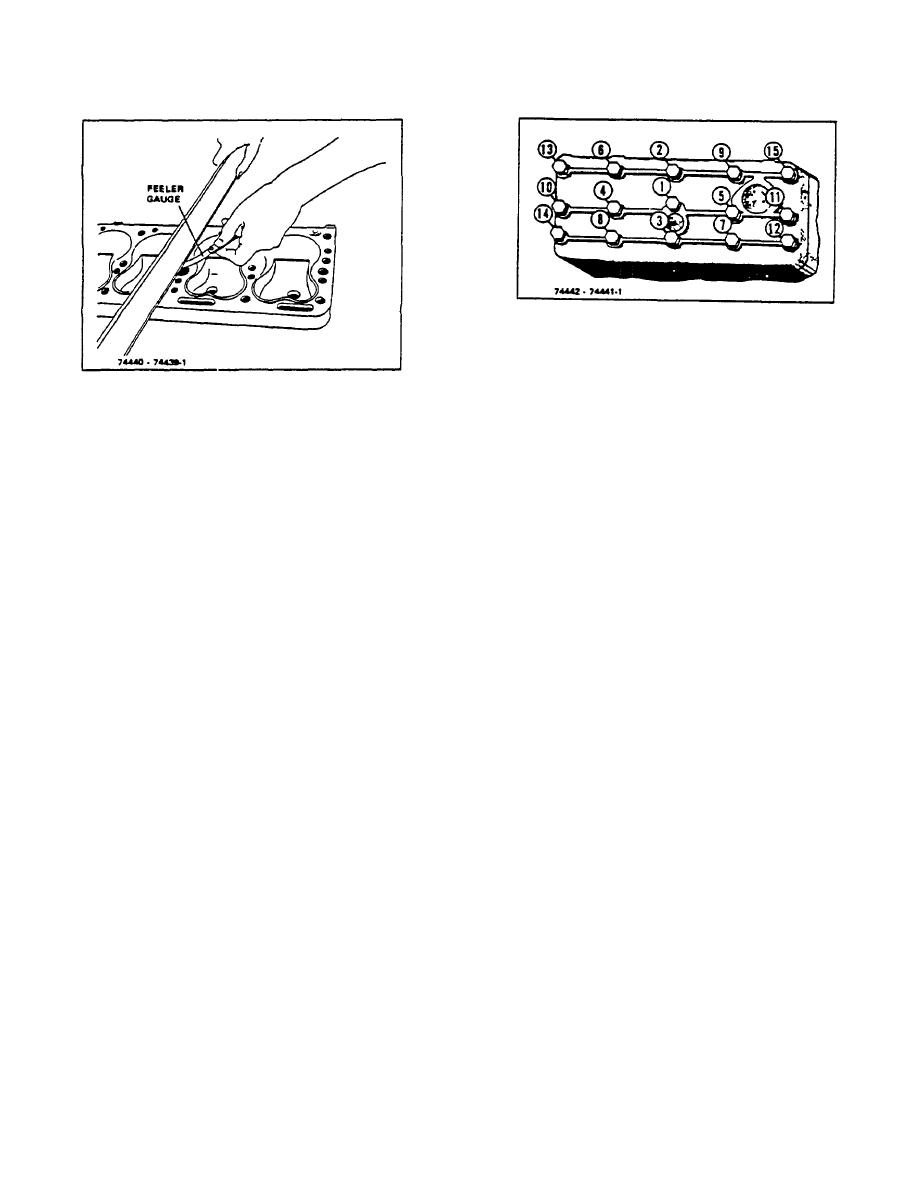
Figure 5-4. Cylinder Head Torquing Sequence
2. Refer to Figure 5-4 for correct cylinder head
capscrew torquing sequence.
Install two
4908605-1 capscrews at locations 6 and 12. All
Figure 5-3. Checking Cylinder Head Flatness Crosswise
other capscrews are identical.
D. INSTALLATION
3. Install distributor and secure it with clamp and
1. Install new head gasket and replace cylinder
capscrew.
head on cylinder block.
4. Remove covering from spark plug ports and,
after checking the insulation for cracks and
NOTE
verifying correct gap, reinstall spark plugs.
Capscrews should be tightened in
successive stages and in such order
5. Attach respective spark plug ignition wiring to
as will ensure even pressure over the
plug caps.
entire surface of the cylinder head
and gasket.
If all the outside
6. Connect temperature sender wire.
capscrews are pulled up first, instead
of the center ones, the head will be
7. Secure water by-pass tube to water pump. Do
cocked and the gasket will not fit
not over-tighten connector.
tight enough to prevent burning or
blowing out between cylinders. A
8. Re-install upper radiator hose, thermostat and
good torque wrench is recommended
attaching clamps.
for this purpose. It is good practice
to hold tension on each capscrew for
9. Refer to TOPIC 3 and install the manifold.
a few seconds before releasing the
wrench.
10. Add engine oil, allowing for extra halfquart if oil
filter was changed.
It is recommended that several
passes be made in tightening down
11. Close radiator and cylinder block water drain
the head so as to avoid any warpage.
cocks.
At the first pass apply approximately
one-half of the recommended torque,
12. Refill radiator.
and then increase the torque one-half
each succeeding pass until the
13. Refer to TOPIC 16.
ENGINE
RUN-IN
recommended torque is attained.
SCHEDULE for compression check.
Torque all capscrews to 70-75 lb. ft.
R-104-1
3-14
|
|
Privacy Statement - Press Release - Copyright Information. - Contact Us |