 |
|||
|
|
|||
|
Page Title:
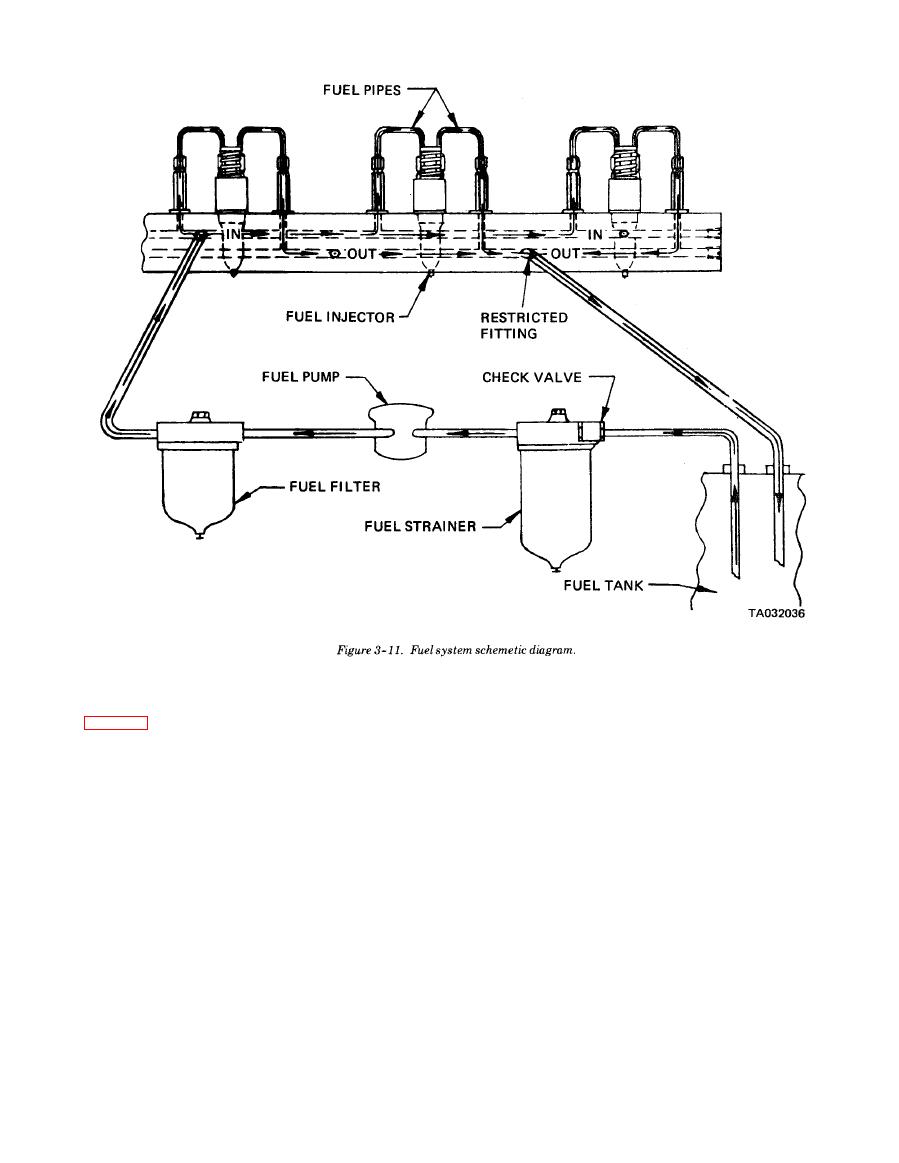
Figure 3-11.Fuel system schematic diagram |
|
||
| ||||||||||
|
|
 TM 10-3930-634-34
bottomed on the injector control tube. Turn the outer
justed, hold the stop lever in the full-fuel position and
adjusting screw down until it bottoms lightly on the
press down on the injector rack with a screwdriver
injector control tube. Then, alternately tighten both
the inner and outer adjusting screws until they are
slightly. The setting is sufficiently tight if the rack re-
tight.
turns to its original position. If the rack does not re-
(h) Recheck the rear injector rack to be sure that
turn to its original position, it is too loose. To correct
it has remained snug on the ball end of the injector
this condition, back off the outer adjusting screw
rack control lever while adjusting the adjacent injec-
slightly and tighten the inner adjusting screw. The set-
tor. If the rack of the rear injector has become loose,
ting is too tight if, when moving the stop lever from
back off slightly the inner adjusting screw on the adja-
the STOP to the full-fuel position, the injector rack be-
cent injector rack control lever. Tighten the outer ad-
comes tight before the governor stop lever reaches the
justing screw. When the settings are correct, the racks
end of its travel. This will result in a step-up in effort
of both injectors must be snug on the ball end of their
required to move the stop lever to the full-fuel position
respective rack control levers.
and a deflection in the fuel rod (fuel rod deflection can
(i) Position the remaining injector rack control
be seen at the bend). If the rack is found to be too tight,
levers as outlined in (g) and (h) above.
back off the inner adjusting screw slightly and tighten
(3) Maximum No Load Engine Speed Adjustment.
the outer adjusting screw.
(a) With engine at normal operating tempera-
(g) Manually hold the rear injector rack control
ture and throttle control (accelerator) in full-fuel posi-
lever in the full-fuel position. Turn down the inner ad-
tion, check engine RPM. Maximum no-load RPM shall
justing screw on the injector rack control lever of the
be 2800*15 RPM.
adjacent injector until the injector rack has moved into
(b) Stop engine and, if necessary, adjust no-load
the full-fuel position and the inner adjusting screw is
3-15
|
|
Privacy Statement - Press Release - Copyright Information. - Contact Us |