 |
|||
|
|
|||
|
Page Title:
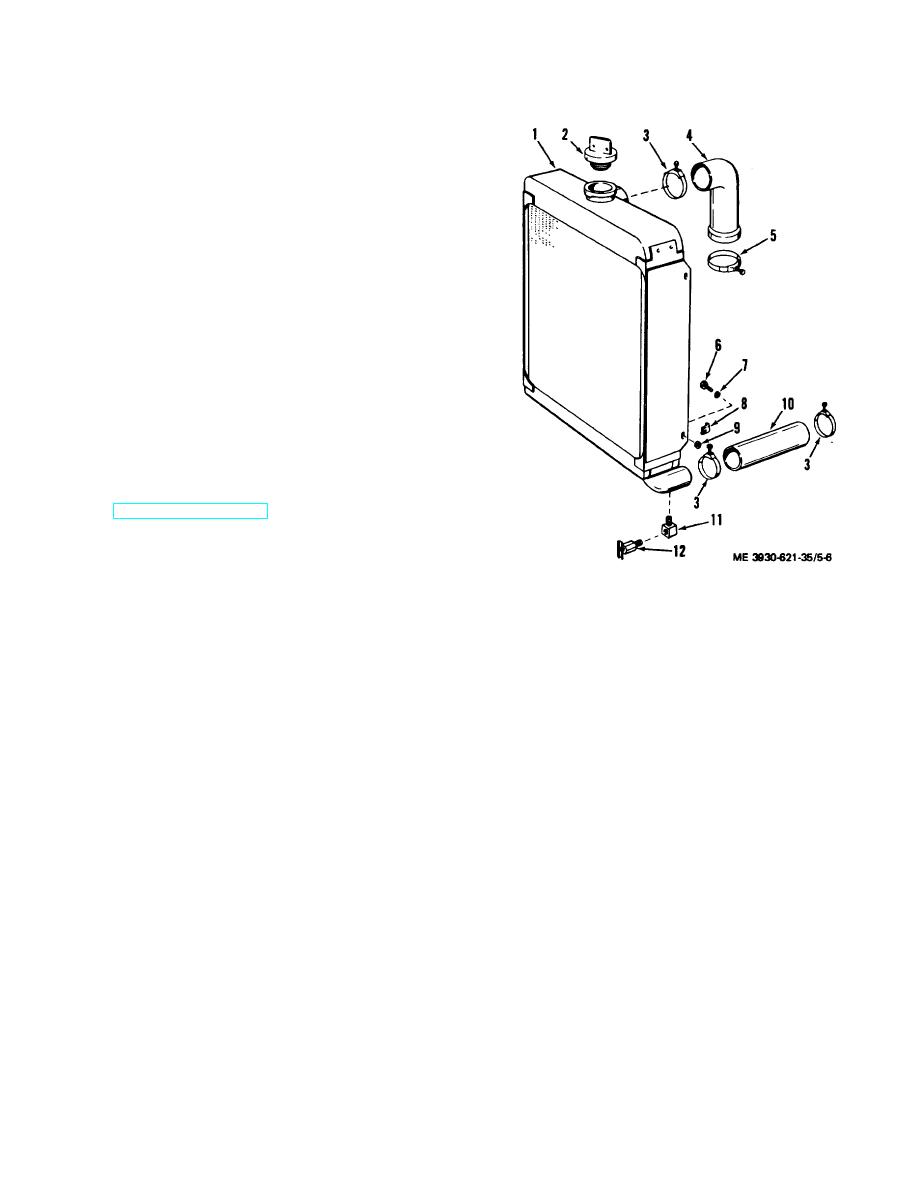
Figure 5-6. Radiator and connections exploded view |
|
||
| ||||||||||
|
|
 TM 10-3930-621-34
(1) Dry radiator core thoroughly. Water in the core
will prevent air from passing out a small leak.
(2) Completely immerse radiator in water.
(3) Apply no more than 10 psi of compressed air and
note any air leakage.
(4) Repair any leaks by soldering.
b. Test for clogging as follows:
(1) Check core tube inlet passages for obstructions.
(2) Fill radiator with water and seal upper water
passages.
(3) Inspect for a steady and full stream of water
flowing out of lower passage. If stream is small or
erratic, the core tubes are restricted or plugged.
(4) A plugged radiator must be boiled out.
c. Straighten any bent cooling fins, being careful not to
puncture tubes.
d. Test pressure caps for leaks and replace if faulty.
e. Check hoses for cracks or deterioration and
replace as authorized.
f. Check tank for damage. If damage cannot be
repaired by brazing, replace radiator and ac- cessories
as authorized.
5-19. Installation
Refer to TM 10-3930-621-12
for radiator installation
procedures.
1.
Radiator
7. Flat washer
2.
Pressure cap
8. Spacer
3.
Hose clamp
9. Nut
4.
Hose
10. Lower hose
5.
Hose clamp
11. Elbow
6.
Cap screw
12. Drain cock
Figure 5-6. Radiator and connections exploded view
5-8
|
|
Privacy Statement - Press Release - Copyright Information. - Contact Us |
